
Planning a trip outdoors and want to make sure your food stays safe and tastes good? It’s not always easy to keep things cold and fresh when you’re away from your kitchen. This guide is all about smart camp cooking, focusing on how to manage your cooler and keep food at the right temperatures. We’ll cover everything from packing your cooler to serving your meals, so you can enjoy healthy food without worry.
Key Takeaways
- Keep cold foods at 40°F or below and hot foods at 140°F or above to stop bacteria from growing. Use a thermometer to check.
- Pre-chill your cooler and food before packing. Use block ice or frozen water bottles, and pack items in the order you’ll use them.
- Limit how often you open the cooler and keep it in the shade. A separate cooler for drinks helps keep food cold longer.
- Prevent food poisoning by keeping raw meats separate from other foods and always using clean utensils and plates.
- For longer trips, consider a portable refrigerator for more reliable temperature control, especially in hot weather.
Mastering Cooler Management for Healthy Camp Cooking
Keeping your food cold and safe when you’re out in the wild is a big deal. It’s not just about avoiding a soggy sandwich; it’s about preventing foodborne illnesses when you’re far from any help. Think of your cooler as your portable kitchen’s refrigerator. Getting it right means you can enjoy a wider range of meals, not just the stuff that lasts forever in a can. A well-managed cooler opens up possibilities for fresh ingredients and more exciting dishes, making your camping trip that much better.
The Crucial Role of Cold Storage in Camp Cooking
When you’re camping, especially for more than a day or two, keeping perishable foods at the right temperature is non-negotiable. Bacteria that cause spoilage and illness multiply rapidly in what’s called the ‘temperature danger zone’ – roughly between 40°F and 140°F. If your food hangs out in this range for too long, it can become unsafe to eat. This means things like raw meats, dairy products, and even some pre-cooked meals need constant chilling. Proper cold storage isn’t just about convenience; it’s a primary safety measure that lets you bring along foods that aren’t shelf-stable, vastly expanding your menu beyond trail mix and canned beans.
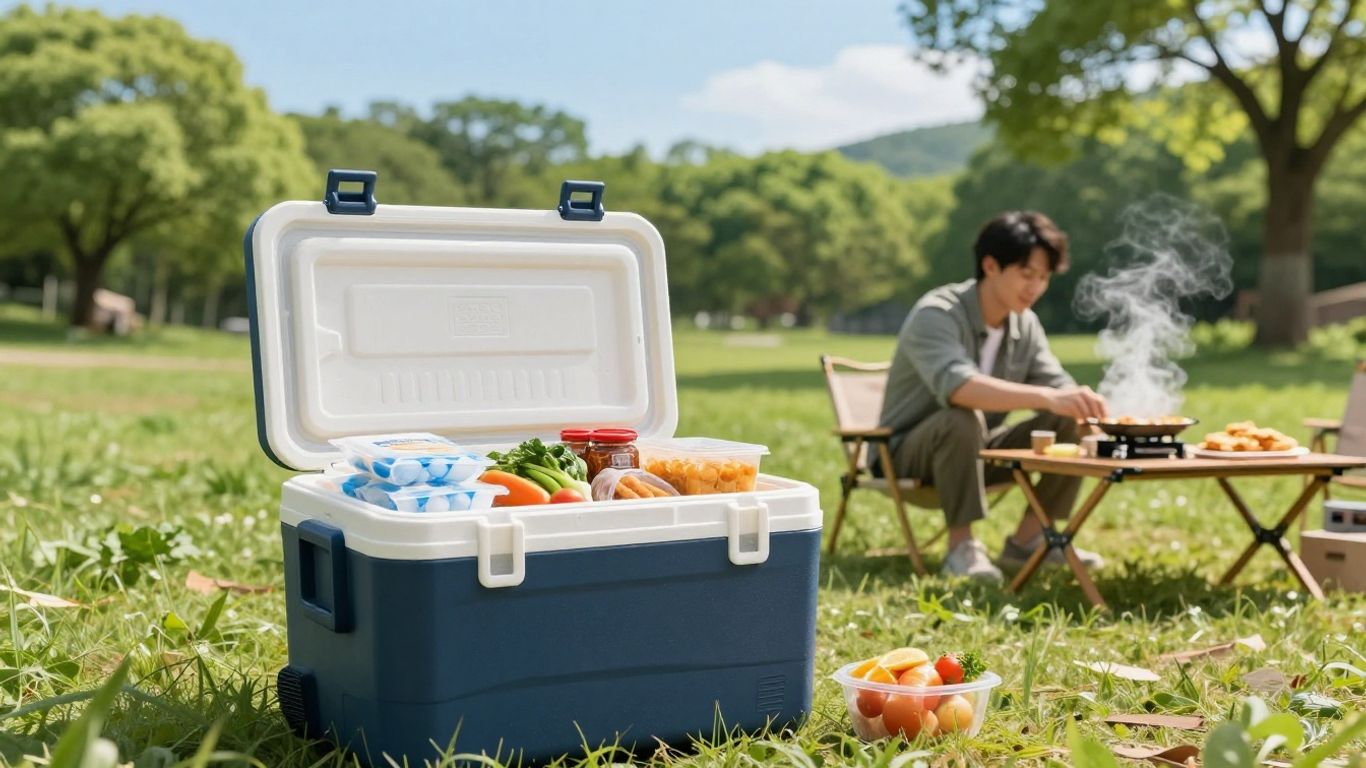
Choosing the Right Cooling Method for Your Adventure
Your choice of cooling depends a lot on how long you’ll be out and where you’re going. For short weekend trips, a good quality cooler packed with ice or frozen water bottles can work well. However, if you’re heading out for an extended period, especially in warmer weather, or if you’re bringing more sensitive ingredients, a portable refrigerator might be a better investment. These units offer consistent temperature control, unlike coolers where ice melts and temperatures fluctuate. Consider the power source needed for a portable fridge if you’re going off-grid.
Pre-Chill Your Cooler for Optimal Performance
This step is often overlooked but makes a significant difference. Before you even start packing your food, make sure your cooler is cold. You can do this by bringing it inside the night before and letting it cool down, or by filling it with sacrificial ice or frozen water bottles a few hours before you pack your actual food. A warm cooler will melt your ice much faster, compromising the temperature of your food from the start. Starting with a cold cooler is like giving your ice a head start.
- Pre-chill the cooler: Bring it inside or fill it with ice packs the night before.
- Use block ice: It melts slower than cubed ice.
- Freeze water bottles: They act as ice packs and provide drinking water as they thaw.
- Pack tightly: Minimize air pockets where warm air can enter.
Don’t underestimate the power of a cold start. A cooler that’s already at a low temperature will keep your food colder for longer, reducing the amount of ice you need and the frequency of ice replenishment.
Maintaining Safe Temperatures for Camp Cuisine
Keeping food at the right temperature when you’re out camping is more than just about avoiding a spoiled meal; it’s about preventing foodborne illnesses. Bacteria love to party in the ‘Danger Zone,’ which is a pretty narrow temperature range where they multiply fast. We need to keep our food out of this zone, whether it’s hot or cold.
Understanding the Temperature Danger Zone
The temperature danger zone is that sweet spot where bacteria grow most rapidly. For most harmful bacteria, this zone falls between 40°F and 140°F. Think of it as a warning sign: if your food hangs out here for too long, it’s an invitation for trouble. The longer food stays in this range, the more bacteria can multiply, making it unsafe to eat.
Keeping Cold Foods Below 40°F
Your cooler’s main job is to keep cold foods cold, and that means aiming for a temperature of 40°F or below. This significantly slows down bacterial growth. If you’re packing perishables, make sure they start out cold and stay that way.
- Pre-chill your cooler: Bring its temperature down before you even pack it.
- Use plenty of ice: Block ice or frozen water bottles last longer than cubes.
- Pack strategically: Keep raw meats at the bottom to avoid drips contaminating other foods.
- Limit openings: Every time you open the cooler, cold air escapes.
If cold food sits out for more than two hours (or one hour if it’s over 90°F), it’s time to toss it. No exceptions.
Ensuring Hot Foods Remain Above 140°F
When you’re cooking at the campsite, keeping hot foods hot is just as important. The target here is to keep cooked food at or above 140°F. This is where insulated containers really shine.
- Cook thoroughly: Make sure food reaches safe internal temperatures.
- Insulate well: Wrap hot dishes in foil and place them in insulated carriers.
- Monitor time: Like cold food, hot food shouldn’t sit out for more than two hours (or one hour in hot weather).
Keeping food at safe temperatures is a simple but vital step in outdoor cooking. It protects your health and allows you to enjoy your meals without worry.
Here’s a quick look at safe temperatures:
| Food Type | Minimum Internal Temperature |
|---|---|
| Meats (Steak, Chops, Roasts) | 145°F |
| Ground Meats | 160°F |
| Poultry (Chicken, Turkey) | 165°F |
| Leftovers and Casseroles | 165°F |
Strategic Packing for Extended Freshness
Getting your cooler packed right is a game-changer for keeping food fresh on longer trips. It’s not just about tossing things in; a little planning goes a long way to prevent spoilage and keep your meals tasting great.
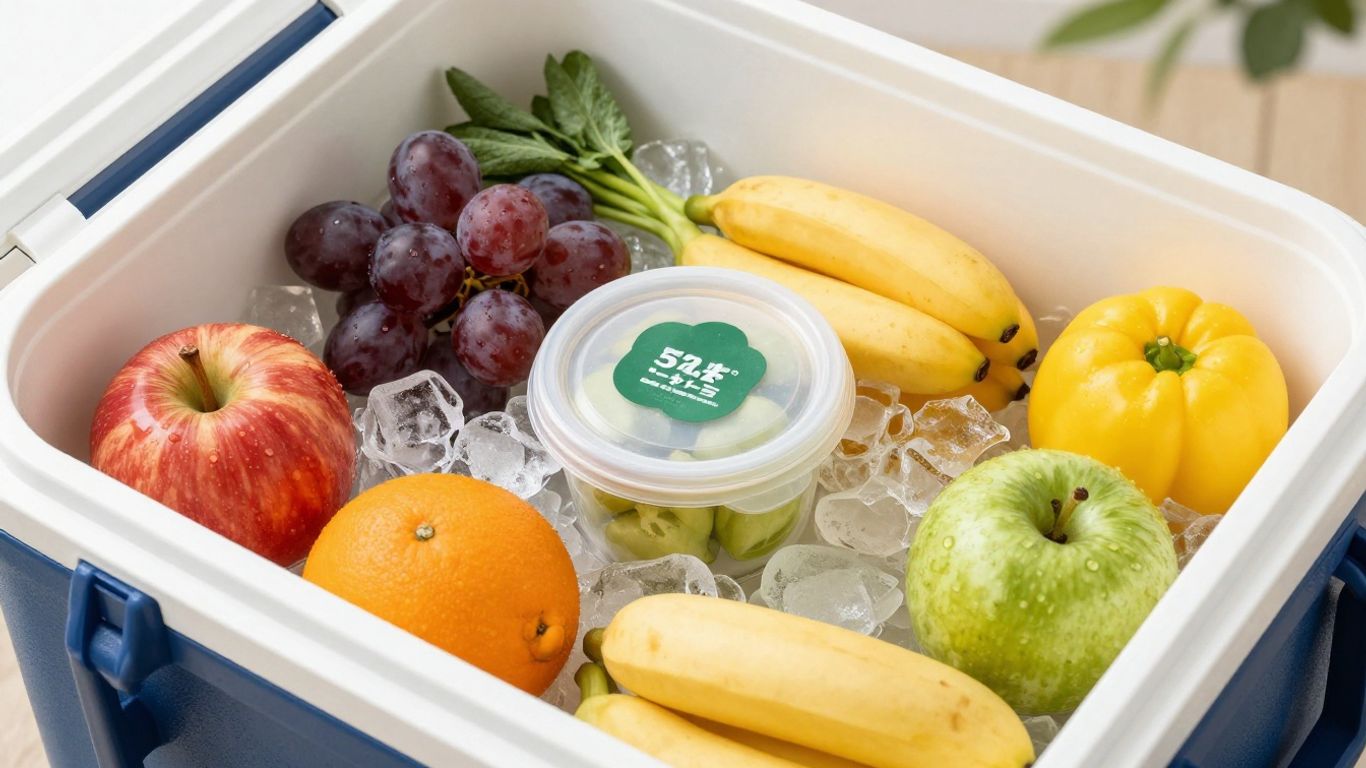
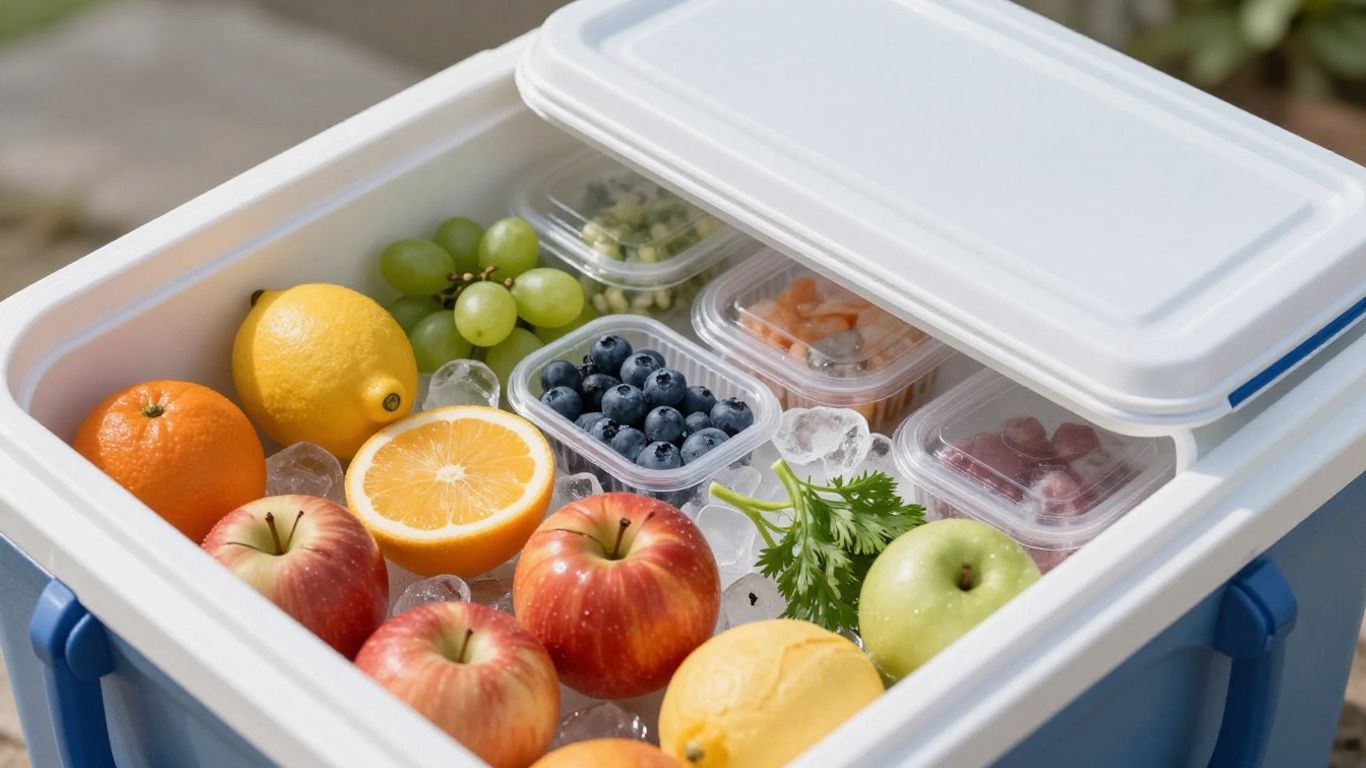
Organizing Your Cooler for Efficiency
Think of your cooler like a well-organized pantry. When you pack it smartly, you can find what you need without letting all the cold air escape. Start by placing items you’ll use last at the bottom. This way, the things you need first are on top, and you won’t have to dig around too much. Raw meats, poultry, and fish should always go on the very bottom. This is super important because their juices can drip and contaminate other foods. If you can, pack these items frozen – they’ll help keep the rest of your cooler cold even longer.
The Power of Block Ice and Frozen Water Bottles
Forget those small ice cubes that melt in a flash. For longer trips, block ice is your best friend. It melts much slower, providing consistent cold for days. You can buy large blocks or make your own by freezing water in clean milk jugs or large plastic containers. Another neat trick is to freeze water bottles. Not only do they act as ice packs, but once they thaw, you’ve got cold water for drinking or even washing up. A mix of block ice and frozen bottles often works best.
Packing Perishables in Order of Use
This is a simple but effective strategy. Lay out your meals for each day of your trip. Then, pack your cooler so that the food for your last day is at the very bottom, and the food for your first day is right on top. This minimizes the time the cooler is open and reduces how much you disturb the colder items. Remember that raw meat rule for the bottom, though! If you’re packing items that need to stay super cold, like dairy or pre-cooked meals, consider putting them in watertight containers or sealed bags. This adds an extra layer of protection against melting ice and potential leaks.
Minimizing Temperature Fluctuations
Keeping your cooler’s contents consistently cold is a bit of an art form, and it really comes down to limiting how much warm air gets in and how much cold air escapes. Every time you open that lid, you’re letting precious cold air out and inviting warmer air in, which makes your ice work overtime. Think of it like opening your house door on a winter day – you don’t want to leave it ajar for too long!
The Impact of Frequent Cooler Openings
Honestly, this is probably the biggest culprit when it comes to a lukewarm cooler. If you’re constantly digging around for a snack or a drink, the temperature inside is going to climb. It’s a simple physics thing, really. The more you disturb the cold air, the faster it dissipates. So, try to be deliberate when you open the cooler. Know what you need before you lift the lid, grab it quickly, and close it right back up. It might seem like a small thing, but it makes a big difference over the course of a trip.
Strategic Cooler Placement for Shade
Where you put your cooler is surprisingly important. Leaving it out in direct sunlight is like putting it in an oven. Even on a cloudy day, the sun’s rays can heat up the cooler’s surface significantly. Always aim for shade. This could be under a thick tree canopy, on the shaded side of your tent, or even behind a large rock. If you’re at a campsite with no natural shade, consider bringing a tarp or an old blanket to drape over the cooler. This extra layer acts as insulation, helping to keep the sun’s heat at bay and your food safely chilled.
Utilizing Insulation and Protective Covers
Beyond just placing your cooler in the shade, you can add extra layers of protection. Think of it as giving your cooler a cozy blanket. A thick blanket, a tarp, or even a specialized insulated cover can significantly slow down heat transfer from the outside environment. Some people even swear by burying the bottom half of their cooler in the sand (if you’re at a beach or sandy area) and then shading the top. The sand acts as a natural insulator. The goal is to create as much of a barrier as possible between the warm outside air and your cold contents.
Separating Drinks and Food for Cooler Efficiency
You know, sometimes the simplest tricks make the biggest difference when you’re out camping. One of those is keeping your drinks and your food in separate coolers. It might seem like a small thing, but it really helps keep everything at the right temperature for longer.
Why a Dedicated Beverage Cooler Matters
Think about it: when you want a drink, you’re probably going to open that cooler more often, right? And each time that lid lifts, all the cold air escapes, and warmer air rushes in. This constant opening and closing means your food cooler has to work overtime to stay cold. Plus, condensation from cold drinks can make your food soggy. By having a separate cooler just for beverages, you drastically cut down on how often the food cooler needs to be opened. This keeps your perishables much safer and fresher.
Keeping Cold Drinks Accessible Without Compromising Food
So, how does this work in practice? Designate one cooler for drinks – sodas, water bottles, juice boxes, whatever you’re sipping on. This cooler can be opened more freely. The other cooler is strictly for your food. This way, when someone needs a snack or a meal component, they can grab it without disturbing the carefully chilled environment of your food.
- Food Cooler: Keep this one closed as much as possible. Pack it with items you’ll use for meals.
- Drink Cooler: This one can be accessed more frequently. It’s perfect for water, sports drinks, and other beverages.
Pre-Chilling Beverages for Longer Cold Retention
Here’s a pro tip: don’t just throw room-temperature drinks into your beverage cooler. Partially freezing your drinks beforehand is a game-changer. Water bottles, cans, and juice boxes can be frozen until they’re slushy. They’ll stay colder much longer, and they’ll even help keep the rest of the drinks in that cooler frosty. You can even use these partially frozen drinks as extra ice packs for your food cooler if needed, and then enjoy them as they thaw.
Ensuring Food Safety During Preparation and Serving
When you’re out camping, keeping food safe from yucky germs is just as important as at home. It’s all about being smart with how you handle things before, during, and after cooking.
Preventing Cross-Contamination with Raw Foods
Cross-contamination is basically when germs from raw food, like uncooked chicken or meat, get onto other foods that won’t be cooked, or onto surfaces and utensils. This can happen easily if you’re not careful. Always keep raw meats, poultry, and seafood separate from anything ready-to-eat. This means using different cutting boards – one for raw stuff, another for veggies and fruits. If you only have one cutting board, wash it really well with hot, soapy water between uses. The same goes for plates and utensils. Never put cooked food back on the same plate that held raw meat unless it’s been thoroughly washed.
Safe Handling of Marinades and Juices
Marinades are great for flavor, but they often contain raw meat juices. If you marinate something, don’t just pour the leftover marinade over the cooked food later. That’s a direct route for bacteria to hitch a ride. If you want to use the marinade as a sauce, you need to boil it first to kill any germs. Otherwise, set some of the marinade aside before you add the raw meat to it, and use that portion for your sauce.
Using Clean Utensils and Serving Plates
This might seem obvious, but it’s worth repeating. Make sure everything you use to prepare, cook, and serve food is clean. This includes knives, spoons, tongs, and especially the plates you serve the final meal on. If you’re grilling, have a clean set of serving utensils ready to go, separate from the ones you used to handle the raw food. Think about bringing a separate container for dirty dishes so they don’t contaminate your clean cooking area.
Here’s a quick rundown of what to keep in mind:
- Wash Hands Often: Before, during, and after food prep, and always after using the restroom or touching anything questionable.
- Separate Raw and Cooked: Use different cutting boards, utensils, and plates.
- Boil Marinades: If you want to use marinade as a sauce, boil it first.
- Clean Surfaces: Wipe down your prep area regularly.
Keeping food safe outdoors is all about simple habits. A little bit of planning and attention can prevent a lot of potential problems, letting everyone enjoy the meal without worry.
Achieving Safe Internal Temperatures for Cooked Foods
Cooking food thoroughly is a big deal when you’re out camping. It’s not just about taste; it’s about making sure any nasty bacteria are zapped. Relying on how food looks or feels isn’t enough. You really need a thermometer to know for sure.
Essential Internal Temperatures for Meats and Poultry
Different types of meat and poultry need to reach specific temperatures to be safe. Think of it as a checklist for safety. Here’s a quick guide:
- Poultry (chicken, turkey, etc.): Cook to 165°F (74°C). This includes whole birds, pieces, and ground poultry.
- Ground Meats (beef, pork, lamb): Cook to 160°F (71°C). Ground meat has more surface area for bacteria, so it needs a higher temp.
- Whole Cuts of Meat (steaks, roasts, chops of beef, pork, lamb, veal): Cook to 145°F (63°C) with a 3-minute rest time. This allows the meat to continue cooking slightly after you remove it from the heat.
- Fish: Cook to 145°F (63°C) or until the flesh is opaque and separates easily with a fork.
The Importance of Cooking Leftovers Thoroughly
If you have any cooked food left over from a meal, it needs to be handled with care. When you reheat leftovers, they should reach an internal temperature of 165°F (74°C). This makes sure any bacteria that might have grown while the food was stored are killed off. Don’t just warm them up; make sure they’re piping hot all the way through.
Utilizing a Digital Thermometer for Accuracy
This is where your digital food thermometer really shines. It’s your best friend for camp cooking safety. Forget poking and prodding; a thermometer gives you a clear, objective reading. Make sure to:
- Calibrate your thermometer: Check if it reads accurately in ice water (should be 32°F/0°C) and boiling water (should be 212°F/100°C).
- Insert correctly: Place the thermometer probe into the thickest part of the food, avoiding bone, fat, or gristle.
- Check multiple spots: For larger items like roasts or whole poultry, check the temperature in a few different places to be sure it’s evenly cooked.
Keeping food at the right temperature, both hot and cold, is key to preventing foodborne illnesses. Don’t guess; use your thermometer to be certain.
Remember, color and texture can be misleading. A thermometer is the only reliable way to know your food is cooked safely and ready to enjoy around the campfire.
Advanced Cooling Techniques for Extended Trips
When your adventures stretch beyond a few days, relying solely on traditional coolers and ice can become a real challenge. That’s where more advanced cooling methods come into play, offering better temperature control and peace of mind for your food.
The Benefits of Portable Refrigerators
For longer trips, especially in warmer climates or when you’re truly off the grid, a portable refrigerator is a game-changer. Unlike coolers that rely on melting ice, these units maintain a consistent, set temperature. This means your food stays colder for longer, reducing spoilage and expanding your meal options significantly. You can bring along items that would be impossible to keep fresh in a standard cooler, like dairy products, delicate produce, and pre-marinated meats, without constant worry.
Powering Your Portable Fridge Off-Grid
This is where planning really matters. Most portable fridges run on electricity, so you’ll need a reliable power source. For extended trips, this often means pairing your fridge with a portable power station. These stations can be recharged via solar panels, your car’s alternator, or a generator. It’s about creating a self-sufficient power loop. Before you leave, calculate your fridge’s power draw and factor in how often you’ll need to recharge based on your trip’s duration and available charging methods. Some units have impressive battery life, lasting for days on a single charge, especially when paired with efficient solar charging.
Exploring Natural Cooling Methods in Dry Climates
Even with a portable fridge, knowing a few backup tricks is always smart. In dry climates, you can get creative with evaporative cooling. One simple method is to wrap a damp cloth or burlap sack around a sealed container holding your food. As the water evaporates from the cloth, it draws heat away from the container, providing a slight cooling effect. Another option, if you’re near a cold, fast-flowing stream, is to submerge a well-sealed, waterproof container in the water. Always double-check that your container is completely watertight and securely anchored. These methods won’t replace a fridge, but they can help keep items you plan to use soon a bit cooler for a little longer.
Protecting Vulnerable Campers
When you’re out enjoying the great outdoors, it’s easy to get caught up in the fun. But for some folks, food safety needs a little extra attention. We’re talking about young kids, older adults, pregnant women, and anyone whose immune system isn’t quite up to par. These groups can get sick more easily from foodborne illnesses, and the effects can be more serious.
Identifying Individuals at Higher Risk
It’s good to know who needs a bit more care. Generally, people with weakened immune systems are more susceptible. This can include those undergoing certain medical treatments, people with chronic illnesses like diabetes or kidney disease, and individuals with HIV/AIDS. Young children, under the age of five, haven’t fully developed their immune defenses, making them more vulnerable. Similarly, older adults, typically over 65, may have a less robust immune response.
Extra Precautions for Children and Seniors
For the little ones and our elders, think about packing foods that are less likely to cause issues. This means being extra careful with raw meats and poultry, making sure they’re sealed tight and kept separate from everything else. Also, consider foods that are easier to digest and less prone to spoilage. Simple, well-cooked meals are often the best bet. Always double-check that food is cooked thoroughly and served at safe temperatures.
Maintaining Vigilance with Weakened Immune Systems
If someone in your camping group has a compromised immune system, it’s wise to be extra diligent. This might mean sticking to simpler meals and avoiding anything that carries a higher risk. Think about pre-packaged, shelf-stable items or foods you can cook thoroughly and serve immediately. It’s better to be a bit more cautious than to risk a foodborne illness that could really put a damper on the trip for everyone.
- Keep coolers consistently cold: Aim for below 40°F (4°C) for all perishable items.
- Wash hands frequently: Use soap and clean water, or hand sanitizer if water isn’t available, before and after handling food.
- Cook foods to proper internal temperatures: Use a food thermometer to be sure.
When preparing food for vulnerable individuals, err on the side of caution. It’s always better to be safe than sorry, especially when you’re away from immediate medical help.
Smart Food Choices for Outdoor Adventures
When you’re heading out into the wild, thinking about what food to bring is half the battle. It’s not just about what tastes good, but also what will stay safe and fresh without a full kitchen. Making smart food choices can really simplify your camping experience.
Prioritizing Shelf-Stable Options
For longer trips or when you’re not sure about your cooling situation, leaning on foods that don’t need to be kept cold is a smart move. These items are your best friends for reliable sustenance. Think about things like:
- Canned goods: Beans, vegetables, fruits, and even pre-cooked meats.
- Dried foods: Pasta, rice, lentils, and dehydrated meals.
- Nut butters and honey: Great for energy and easy to spread.
- Hard cheeses: Many varieties hold up well for a while.
- Whole fruits and vegetables: Apples, oranges, carrots, and potatoes are good choices.
- Jerky and dried fruits: Packed with flavor and energy.
These foods are generally forgiving and can handle being packed around without spoiling. They also tend to be lighter, which is a bonus if you’re hiking in.
When to Opt for Fresh Produce
Even with shelf-stable options, fresh ingredients can make a big difference in morale and nutrition. The trick is to choose wisely and pack them carefully. If you’re going on a shorter trip, or if you have a really good cooler setup, bringing some fresh items is totally doable.
- Hardy Vegetables: Carrots, bell peppers, onions, and potatoes can last quite a while, especially if kept cool and dry. You can chop them up for meals or snacks.
- Firm Fruits: Apples, oranges, and pears are good choices. They have a natural protective layer and don’t bruise easily.
- Pre-washed Greens: If you’re using them on the first day or two, pre-washed salad mixes can be a nice treat.
Remember to wash all produce thoroughly before eating, even if you plan to peel it. For items like berries or leafy greens, it’s best to plan on eating them early in your trip.
Balancing Convenience and Health on the Trail
Ultimately, the best food choices for your outdoor adventure strike a balance. You want food that’s easy to prepare, safe to eat, and provides the energy you need, but you also want it to be enjoyable. Don’t be afraid to mix and match. Maybe you have a base of shelf-stable grains and beans, but you add some fresh herbs or a squeeze of lemon for extra flavor. Pre-portioning meals at home can also save a lot of time and hassle at the campsite, making it easier to stick to healthy eating habits even when you’re away from home.
Planning your meals ahead of time, considering your cooling capabilities, and choosing foods that are both nutritious and easy to transport will make your outdoor cooking experience much more enjoyable and safe. It’s about being prepared so you can focus on the adventure itself.
Planning a trip outdoors? Packing the right food is key to keeping your energy up and your spirits high. Think about easy-to-carry snacks that won’t spoil, like trail mix, fruit, and energy bars. These choices will fuel your fun without weighing you down. For more great ideas on what to eat on your next adventure, visit our website!
Keeping Your Adventures Delicious and Safe
So, there you have it. Keeping your food safe and cold while you’re out enjoying nature doesn’t have to be complicated. It’s really about a little bit of planning before you go and being mindful when you’re at the campsite. By following these simple steps, like pre-chilling your cooler, keeping things organized, and watching those temperatures, you can avoid any unpleasant surprises. This way, you can focus on the fun stuff – the campfire stories, the hikes, and of course, the tasty meals. Happy camping, and happy eating!
Frequently Asked Questions
Why is managing my cooler so important when camping?
Keeping your food cold is super important for camping. If food isn’t kept cold enough, tiny germs called bacteria can grow and make you sick. Plus, cold food just tastes better and stays fresh longer, so you can enjoy a wider variety of meals on your trip.
What’s the ‘Danger Zone’ for food temperatures?
The ‘Danger Zone’ is the temperature range where bacteria love to grow the fastest. For most foods, this is between 70°F and 125°F. You want to keep cold foods below 40°F and hot foods above 140°F to keep them safe.
How can I keep my cooler as cold as possible?
Start by chilling your cooler before you pack it. Use block ice or frozen water bottles, as they last longer than cubes. Pack your cooler tightly, keep it closed as much as you can, and always put it in the shade. Covering it with a blanket can also help.
Should I use one cooler for everything?
It’s actually a great idea to use a separate cooler for drinks. People tend to open the drink cooler much more often to grab a beverage. Keeping drinks separate means the food cooler stays closed more, which helps keep your food colder for longer.
How do I stop raw meat from making other food unsafe?
Always keep raw meat, poultry, and fish wrapped up tightly and at the bottom of your cooler. This way, if any juices leak, they won’t drip onto other foods that you’ll eat without cooking, like fruits or salads. Use separate cutting boards too!
How do I know if my cooked food is safe to eat?
The best way is to use a digital thermometer. For things like steaks and fish, aim for 145°F. Ground meats should reach 155°F, and poultry or anything stuffed needs to be cooked to 165°F. Leftovers should also be reheated to 165°F.
What if I’m going on a really long camping trip?
For longer trips, a portable refrigerator is a game-changer. It keeps a consistent cold temperature without relying on melting ice. Some can even run off your car battery or a portable power station, making off-grid food storage much easier.
Are there any special safety tips for kids or older adults?
Yes, children and older adults can get sick more easily from foodborne illnesses. Be extra careful with food temperatures and handling. Always make sure their food is cooked thoroughly and kept at the right temperature, and wash your hands often when preparing their meals.