
Learning knife skills fast isn’t just about speed; it’s about doing things right, safely. We’re talking about getting good with a blade, whether it’s for cooking or something else, without hurting yourself or others. It takes practice, sure, but there are smart ways to train that make you better, quicker. Think of it like learning any new skill – you start simple, build up, and focus on what really matters. This guide breaks down how to get there, step-by-step, making sure you’re building solid habits from the get-go.
Key Takeaways
- Start with the basics: Practice simple cuts on a homemade cardboard board to get a feel for resistance and build a solid grip. Don’t rush into complex moves; focus on getting the fundamentals down.
- Safety first, always: Stick to basic safety rules, keep your attention on the task, and handle knives with care. Speed comes later, after you’ve got the safety part down pat.
- Practice smart, not just hard: Short, regular training sessions are way more effective than long, infrequent ones. Focus on the specific cuts you find difficult to improve faster.
- Work on your stance and grip: How you hold the knife and position your body makes a big difference in both speed and safety. Find what works for you and stick with it.
- Build up gradually: Use drills and practice tools like rubber knives to get comfortable with faster movements and different scenarios. This helps build reflexes and confidence for real-world situations.
Mastering The Fundamentals Of Knife Skills Fast
Getting good with a knife isn’t just about having a sharp blade; it’s about how you use it. Think of it like learning to ride a bike. You don’t just hop on and win the Tour de France. There’s a process, a way to build up your ability safely and effectively. This section is all about setting you on that path, starting with the basics and building up from there.
Understanding The Progression From Simple To Complex
Just like any skill, knife work has a natural learning curve. You start with the easy stuff and gradually move towards more challenging techniques. Trying to do a fancy julienne on your first day with a chef’s knife is a recipe for frustration, and maybe a trip to the emergency room. Instead, we focus on building a solid foundation.
- Start with basic cuts: Think simple slices and dices. Get comfortable with how the knife moves through different ingredients.
- Introduce resistance: Practice on materials that mimic the feel of food, like cardboard. This helps you understand how much pressure is needed and how the blade interacts with a surface.
- Gradually increase complexity: Once you’re confident with basic cuts, you can move on to more intricate shapes and techniques.
The goal is to build muscle memory through repetition, not to rush through tasks.
The Importance Of Quality Practice Over Quantity
It’s easy to fall into the trap of thinking that just chopping a lot of vegetables will make you better. But if you’re doing it wrong, you’re just getting really good at doing it wrong. Quality practice means focusing on how you’re cutting, not just how much.
Proper technique, even at a slower pace, builds better habits than speed without control. It’s about making every movement count.
This means paying attention to your grip, your guide hand, and the angle of the blade. Even 15 minutes of focused practice a few times a week is far more beneficial than an hour of mindless chopping.
Developing Economy Of Motion For Efficiency
Ever watch a seasoned chef work? They move with a kind of fluid grace, making it look effortless. A big part of that is economy of motion. It means using the least amount of movement and energy to get the job done. This isn’t just about speed; it’s also about reducing fatigue and preventing injuries.
- Minimize unnecessary movements: Don’t lift the knife higher than you need to. Keep your cuts smooth and controlled.
- Use the weight of the knife: Let the blade do the work. You shouldn’t have to force it through most ingredients.
- Keep your guide hand close: A stable guide hand that’s close to the cutting surface allows for more precise and efficient cuts.
By focusing on these principles, you’ll find your cutting becomes faster, safer, and less tiring over time.
Building Your Cutting Skills With A Practice Board
Alright, let’s talk about getting your hands on a knife and actually, you know, cutting things. You can read about it all day, but until you’ve made some actual cuts, it’s just theory. That’s where a practice board comes in. It’s your personal cutting gym, a place to build muscle memory and get a feel for how a blade interacts with resistance.
Constructing A Cardboard Cut Board
Forget fancy setups for now. You can make a perfectly good practice board with stuff you probably have lying around. Grab some corrugated cardboard – the kind from shipping boxes works great. You want to cut it into squares or rectangles, maybe around 18 by 24 inches. The exact size isn’t super critical, but consistency helps. Then, you just stack these pieces up. Aim for a stack that’s at least 2.5 inches thick. Now, you need some glue. A basic white school glue, like Elmer’s, will do the trick. Just spread it between the layers – lines or splotches, it doesn’t have to be perfect. Once you’ve got your stack glued together, weigh it down with something heavy, like a couple of bricks, and let it dry completely. This whole process is pretty straightforward, and you can probably knock one out in an afternoon.
- Gather corrugated cardboard.
- Cut pieces to size (e.g., 18"x24").
- Stack pieces to at least 2.5" thickness.
- Apply white glue between layers.
- Weight down and allow to dry.
Simulating Flesh Resistance For Realistic Training
Cardboard isn’t flesh, obviously, but it’s a decent stand-in. When you cut into it, you get a sense of resistance. It’s not like slicing through air; the material pushes back. As you cut deeper, it gets a bit harder to get through, which mimics how actual meat would feel. This is important because it helps you develop a feel for the blade’s edge and how much pressure you need. It also gets you used to the impact of the blade hitting the board, which is a big part of learning to control your cuts. You’re not just hacking away; you’re learning to manage the force and the feedback you get from the material.
The goal here is to create a tactile experience that approximates the resistance of cutting through tissue. This helps build a more intuitive understanding of blade control and force application.
Developing Grip Strength And Impact Familiarity
Doing a lot of cutting on this board will naturally build up your grip strength. You’ll find yourself holding the knife more firmly, especially as you start to put more power into your swings. It also helps you get familiar with the impact. Every time the blade hits the cardboard, there’s a jolt. Getting used to that shock, and learning to absorb it without losing your grip or control, is a key part of training. You might even want to wrap some athletic tape around your hands where they make contact with the knife handle, especially if you plan on doing a lot of repetitions. It can save your skin from getting raw. Over time, you’ll start to feel more confident and comfortable with the physical feedback of cutting.
Enhancing Grip And Guide Hand Techniques
Getting a solid hold on your knife and keeping your guide hand steady are super important for both safety and making clean cuts. It’s not just about holding on tight; it’s about how you hold it and how you use that other hand to keep everything in line.
Exploring Various Knife Grip Options
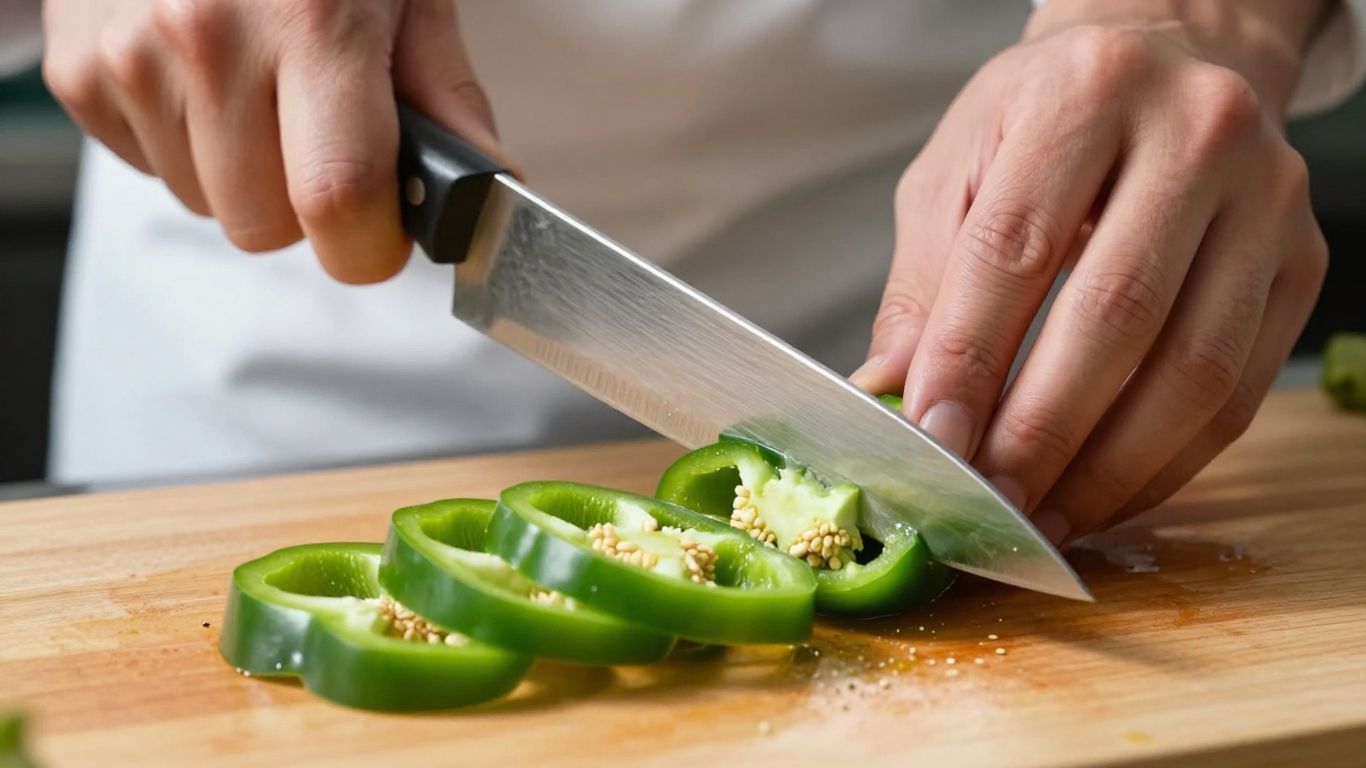
There are a few ways to hold a knife, and what works best can depend on the knife itself and what you’re cutting. The most common ones are the pinch grip and the handle grip.
- Pinch Grip: This is where you grip the blade itself, right where it meets the handle, with your thumb and index finger. Your other fingers wrap around the handle. This grip gives you a lot of control and is great for most chef’s knives and tasks that need precision.
- Handle Grip: Here, you just wrap all your fingers around the handle. It’s a simpler grip, often used for heavier blades or when you need a bit more power, like with a cleaver.
It’s worth trying out different grips to see what feels most comfortable and secure for you. The goal is to have a grip that feels natural and allows for good control without causing strain.
Optimizing Guide Hand Positioning For Safety
Your guide hand is your best friend when it comes to safety. It’s the hand that holds the food you’re cutting. The classic ‘claw’ grip is the standard for a reason.
- Curl your fingertips inward, tucking them under your knuckles. This creates a protective barrier.
- Use your knuckles as a guide for the side of the knife blade. This keeps the blade from sliding down onto your fingers.
- Keep your thumb tucked in behind your fingers. It shouldn’t be sticking out where it could get in the way.
This setup protects your fingers and also helps you move the food consistently as you cut.
Adapting Grips To Different Cutting Tasks
What works for slicing an onion might not be ideal for dicing a carrot. You’ll find yourself naturally adjusting your grip and guide hand position based on the job.
| Knife Type | Common Grip | Guide Hand Position | Primary Use Case |
|---|---|---|---|
| Chef’s Knife | Pinch Grip | Claw Grip | General chopping, dicing, mincing |
| Paring Knife | Pinch or Handle Grip | Claw or Modified | Peeling, trimming, small intricate cuts |
| Slicing Knife | Pinch Grip | Claw Grip | Slicing meats, fish, large vegetables |
| Cleaver | Handle Grip | Modified Claw | Heavy chopping, bone cutting (use with caution) |
Don’t be afraid to experiment. Sometimes a slight shift in how you hold the knife or position your guide hand can make a big difference in how smoothly and safely you can perform a cut. It’s all about finding what works for you and the specific task at hand.
Finding the right grip and guide hand technique is a bit like finding the right tool for the job. It takes a little practice, but once you get it, everything feels more stable and controlled. It’s about building that connection between your hands, the knife, and the food so you can move with confidence.
Prioritizing Safety In Every Cut
Implementing Five Essential Safety Rules
When you’re working with knives, especially when you’re trying to get faster, safety has to be the absolute top priority. It’s not just about avoiding a nick; it’s about building good habits that protect you and others. Think of these rules as the bedrock of your practice. Without them, speed becomes reckless.
Here are five rules to keep front of mind:
- Control Your Cuts: Always make sure your cutting path is clear and that you’re in a stable position. Avoid cutting towards yourself or anyone else. Keep your fingers tucked away, and don’t let your attention wander. A steady stance and controlled movements are key here.
- Stay Focused: This might sound obvious, but it’s easy to get distracted, especially when you’re in the zone or feeling rushed. Put away your phone, clear your mind of other tasks, and concentrate solely on what your hands and the knife are doing. If you need to talk to someone or answer a question, stop cutting first.
- Pass Knives Safely: Never hand a knife directly blade-first to someone. The safest way is to lay the knife down on a clean surface and let the other person pick it up, or to hand it over by the handle with the blade pointing away from both of you.
- Clean Up Smart: Always clean knives carefully. Hold the handle and wipe away from the blade edge. Don’t leave knives soaking in a sink where they can’t be seen, and always dry them thoroughly before storing.
- Know Your Limits: Understand the tools you’re using and the environment you’re in. If you’re using a new knife or a different cutting surface, take a moment to get a feel for it. Don’t push yourself beyond your current skill level, especially when fatigue sets in.
Maintaining Focused Attention During Cutting
Focus isn’t just about looking at the knife; it’s a mental state. When you’re cutting, your entire awareness should be on the task. This means being present in the moment, aware of the blade’s path, the resistance of the material, and the position of your guide hand. Distractions are the enemy of safe cutting. Even a momentary lapse in concentration can lead to an accident. Think about it like driving – you wouldn’t text and drive, right? Cutting requires a similar level of undivided attention. If you find your mind drifting, it’s a sign you need to take a short break and reset. This mental discipline is as important as any physical technique you’re learning.
Safe Practices For Passing And Cleaning Knives
Passing a knife needs a system. The best method is to place the knife on a stable surface, like the cutting board or a counter, and let the recipient pick it up by the handle. If you absolutely must hand it directly, hold the knife firmly by the handle, blade pointing down and away from both individuals, and let the other person grasp the handle. Never toss a knife, even a training one. Cleaning is also a critical step. Always wipe the blade away from your body and fingers, holding the handle securely. A damp cloth is usually sufficient. After cleaning, dry the blade completely to prevent rust and ensure a good grip. Store knives properly, either in a block, on a magnetic strip, or in a sheath, so the edge is protected and accidental contact is avoided.
Refining Your Cutting Board Setup
Alright, let’s talk about your cutting board. It might seem like just a surface, but how you set it up makes a big difference in how fast and safe you can work. Think of it as your personal command center for all things chopping.
Strategic Placement Of Tools And Ingredients
First off, where do things go? You want your most-used items within easy reach. Your chef’s knife, your main cutting board, and maybe a small bowl for scraps should be close. Ingredients you’re actively working with should be to one side, and prepped items to the other. This creates a natural flow, so you’re not constantly reaching over things or shuffling stuff around.
Designing An Efficient One-Way Product Flow
This is where things get really slick. Imagine a conveyor belt for your food. You start with your raw ingredients on one side, move them across the board for cutting, and then place the finished product on the other side. Waste goes into a bin that’s also positioned logically in this flow. This minimizes unnecessary movement and keeps your workspace clean and organized. It’s all about setting up a system so your hands and eyes know exactly where to go next, without thinking too hard about it.
Minimizing Movement And Maximizing Workspace
Every extra step, every awkward reach, costs you time and can lead to mistakes. So, arrange your station to reduce that. Keep your cutting board stable – maybe use a damp towel underneath if it tends to slide. Your knife should be easy to grab. If you’re prepping a lot of something, keep a larger quantity of it nearby, but not so close that it gets in the way. It’s a balance, really. You want everything you need, but nothing you don’t, right where you need it.
Here’s a quick rundown of how to think about your setup:
- Board Stability: A wobbly board is a hazard. Use a damp cloth or a non-slip mat underneath.
- Tool Proximity: Knives, bowls, and frequently used utensils should be within arm’s reach.
- Ingredient Staging: Raw ingredients on one side, prepped items on the other.
- Waste Management: A dedicated bin for scraps, placed logically in your workflow.
A well-organized cutting board setup isn’t just about looking neat; it’s about creating an environment where speed and safety can coexist naturally. It’s the foundation for efficient work.
Reducing Strain For Sustained Performance
Working with knives for extended periods can really take a toll. You might start feeling it in your hands, wrists, or even your shoulders. It’s not just about being tough; it’s about working smart so you can keep going without getting worn out or risking an injury. Think of it like any physical activity – proper form and pacing make a huge difference.
Optimizing Posture And Stance
Your body position is the foundation for everything you do. A good stance means you’re balanced and can move freely without putting extra stress on your joints. When you’re chopping or slicing, try to stand with your feet about shoulder-width apart. One foot can be slightly ahead of the other, giving you a stable base. Keep your knees a little bent – this absorbs shock and lets you shift your weight easily. Avoid locking your knees or hunching your shoulders. A relaxed, upright posture allows for better control and reduces fatigue.
Varying Knife Motions To Prevent Fatigue
Doing the same motion over and over can lead to repetitive strain. Mix things up! If you’re doing a lot of dicing, try switching to a different cut for a bit, like julienning or even just some rough chopping. This uses different muscles and gives others a break. Even small changes in how you hold the knife or the angle of your cut can help distribute the workload. It’s about keeping your body guessing and preventing any one area from getting overloaded.
Incorporating Microbreaks And Stretching Routines
Don’t wait until you’re aching to take a break. Short, frequent pauses are way more effective. Every 15-20 minutes, take 30 seconds to just shake out your hands, roll your wrists, and shrug your shoulders. These microbreaks reset your muscles and clear your head. If you have a bit more time, a quick stretch for your forearms and shoulders can do wonders. It’s a small investment that pays off in comfort and endurance throughout your work.
Here’s a quick routine you can do between tasks:
- Wrist Rolls: Gently rotate your wrists in circles, 5 times in each direction.
- Forearm Stretch: Extend one arm, palm up. Gently pull your fingers down towards your body with your other hand. Hold for 15 seconds, then switch arms.
- Shoulder Shrugs: Lift your shoulders up towards your ears, hold for a second, and then let them drop. Repeat 5-10 times.
Taking care of your body isn’t a sign of weakness; it’s a sign of intelligence. When you’re comfortable and pain-free, your focus sharpens, your movements become more precise, and your overall performance improves. Think of it as essential maintenance for your most important tool: yourself.
Progressive Training With A Cut Pit
Alright, so you’ve gotten pretty comfortable with your cut board. You’re making clean slices, your grip feels solid, and you’re not accidentally lopping off your own fingers. That’s awesome. But to really step things up, especially if you’re thinking about more dynamic situations, you need to introduce some movement and complexity. That’s where the ‘cut pit’ comes in.
Setting Up A Dynamic Cut Pit Environment
Think of a cut pit as a step up from the cut board. Instead of just standing still, you’re going to be moving. You’ll need a space, maybe about six to eight feet across. The core of it involves a few sturdy posts – three is a good number – set up around the perimeter. You then attach your cut boards, made from that layered cardboard we talked about, to these posts. Nylon cord works well for this. The idea is to have targets all around you, forcing you to adjust your position and angle.
- Space: A clear area of about 6-8 feet in diameter.
- Posts: Three heavy, sturdy posts set around the perimeter.
- Targets: Cut boards (layered cardboard) secured to the posts, facing inward.
- Movement: Designed to encourage pivoting, shuffling, and distance adjustment.
This setup simulates being attacked from multiple directions, not just straight on. It’s a great way to build proficiency in dealing with flank angles.
Practicing Flank Angles And Multi-Directional Attacks
With targets on multiple posts, you’re naturally going to be cutting at different angles. You’ll need to shuffle your feet, pivot your body, and adjust your distance to get the best line of attack on each board. This isn’t just about making a cut; it’s about moving efficiently to make the cut. A partner can even call out targets randomly – "Target right, head!" or "Target left, body!" – to add a layer of stress and reaction time training. This forces you to quickly assess the situation and move to the correct target.
The cut pit is where you start to integrate your cutting skills with your footwork and spatial awareness. It’s about reacting to the environment and the implied threats around you, not just a single, static target.
Building Confidence With Live Blade Manipulation
Working in a cut pit, especially with a training blade that has some weight and feel, builds a different kind of confidence. You’re not just practicing isolated movements; you’re practicing them under conditions that demand more. You’ll get tired faster, and that’s where you’ll see your technique start to break down if it’s not solid. This is exactly why this kind of training is so effective for developing resilience and adaptability. It helps you get comfortable manipulating the blade while moving, turning, and adjusting, which is a big step up from just standing at your cutting board. It’s about building that muscle memory for dynamic situations.
Leveraging Rubber Training Blades For Reflexes
The Role Of Rubber Trainers In Force-On-Force
When you’re ready to take your knife skills to the next level, especially in scenarios that mimic real-world encounters, rubber training blades become an invaluable tool. These aren’t just toys; they’re designed to let you practice full-speed techniques safely. Think of them as the sparring gear for knife work. They allow you to test your reactions and movements against a partner without the severe risk associated with live blades. This is where you build the muscle memory for rapid responses.
Honing Reflexive Skills At Full Speed
Practicing with rubber trainers lets you go all out. You can work on parries, blocks, and evasive maneuvers as if the threat were real. It’s about developing that instinctive reaction. When someone comes at you, you don’t want to be thinking; you want to be doing. Rubber blades help bridge that gap between knowing a technique and performing it under pressure. It’s about making those defensive actions automatic.
Here’s a quick look at how you might structure a session:
- Attacker: Wears protective gear, can use full force (strikes, kicks, etc.).
- Defender (Blademan): Uses only the rubber training blade. No striking or kicking allowed.
This setup highlights the defender’s reliance on blade work and reflexes. It quickly shows how even a skilled martial artist can be vulnerable to a determined attacker with a training blade.
Understanding The Realism Of Training Scenarios
While rubber blades offer safety, they also bring a level of realism. You can practice different grips, angles of attack, and defensive responses. It’s not about winning a knife duel; it’s about refining your ability to defend yourself effectively. These drills help you understand the speed and danger involved, preparing you mentally and physically for what might happen. It’s a controlled way to experience the intensity of a close-quarters encounter.
Targeting Weaknesses For Faster Improvement
We all have those cuts that just feel… off. Maybe it’s a julienne that’s never quite uniform, or a dice that takes way too long. Instead of just practicing everything equally, let’s get smart about it. Focusing on what slows you down or feels unsafe is the quickest way to get better. It’s about being honest with yourself and then building specific practice to fix those problem areas.
Identifying Your Slowest Or Sloppiest Cuts
Take a moment to really think about your cutting. Which tasks make you hesitate? Which ones consistently look messy or take longer than they should? It might be a specific vegetable, a particular cut size, or even a certain knife. Don’t shy away from these. These are your biggest opportunities for improvement.
- Julienne: Are your sticks uneven in thickness or length?
- Dice: Do your brunoise pieces vary wildly in size?
- Mince: Is your garlic paste taking forever to achieve?
- Specific Vegetables: Does working with something like a slippery tomato or a tough squash always trip you up?
Breaking Down Complex Motions Into Micro-Steps
Once you’ve pinpointed a tricky cut, don’t try to fix the whole thing at once. Break it down. For example, if your dice are uneven, is it the initial slicing? The subsequent batons? Or the final cross-cut? Isolate the part that’s causing the most trouble.
Let’s say your julienne is inconsistent. The problem might not be the knife itself, but how you’re holding the vegetable or how you’re moving your guiding hand. Focus only on getting those initial, uniform slices before you even think about the final julienne shape. Practice just that one small movement until it feels right.
Designing Focused Drills For Specific Skill Gaps
Now, turn those micro-steps into short, repeatable drills. You don’t need hours for this. A few minutes of focused practice can make a big difference. Use a timer if it helps, but the goal isn’t just speed yet; it’s correctness at a controlled pace.
Here’s a simple drill structure:
- Isolate the Motion: Practice just the one small movement you identified as weak (e.g., making uniform batons from a potato).
- Controlled Repetition: Perform the motion 10-15 times, focusing on form and consistency. Don’t rush.
- Quick Check: Briefly examine the results. Are they better? What needs adjustment?
- Repeat or Refine: Either repeat the drill if you’re seeing improvement, or make a tiny adjustment to your grip, stance, or motion and try again.
The key here is deliberate practice. It’s not about mindlessly chopping; it’s about paying close attention to what you’re doing and making small, informed adjustments. This targeted approach is far more effective than just going through the motions on a large batch of ingredients.
Integrating Practice Into A Busy Schedule
Short, Frequent Training Sessions
Life gets hectic, right? It’s easy to think you need hours to make real progress with knife skills. But that’s not always the case. Short, focused practice sessions can be incredibly effective, especially when you’re short on time. Think about it: even 10-15 minutes here and there can add up. You can squeeze in a quick drill while waiting for water to boil, or during a commercial break. The key is consistency. Doing a little bit often is far better than trying to cram everything into one long session that never happens.
Utilizing Downtime For Skill Refinement
Look for those little pockets of time in your day. Waiting for a download? Practice your grip. Got a few minutes before a meeting? Run through some basic cuts on a practice board. These aren’t long, involved sessions, but they keep your hands moving and your mind engaged with the task. It’s about making the most of what you have. Even just thinking about the next cut or visualizing a technique can be a form of practice.
Balancing Volume, Time, And Safety Goals
When you’re fitting practice into a packed schedule, you have to be smart about it. You can’t just hack away wildly. It’s a balancing act. You want to get enough repetitions in to build muscle memory, but not so many that you get tired and start making mistakes. Safety always comes first, no matter how little time you have. So, set realistic goals for each short session. Maybe today is about perfecting the grip on your guide hand for 10 minutes. Tomorrow, it might be about making 50 consistent julienne cuts, focusing on form over speed. It’s about making steady, safe progress, not about rushing.
Here’s a simple way to think about planning those short sessions:
- Warm-up (2-3 minutes): Simple, familiar cuts to get your hands moving and mind focused. Think basic slices or dicing.
- Focused Drill (5-10 minutes): Pick one specific skill or cut you want to work on. Maybe it’s consistent dice size, or a specific grip.
- Cool-down/Review (1-2 minutes): A few easy cuts, or just a moment to think about what felt good and what needs more attention.
The goal isn’t to replicate a full hour of training in 15 minutes. It’s about making consistent, small gains that build over time. Think of it like building a wall, brick by brick. Each short session is another brick laid, strengthening your overall skill set without demanding a huge chunk of your day.
Mental Preparation For High-Stress Situations
Visualizing ‘What If’ Scenarios
Think about it: training your body is one thing, but what about your mind? When things get hairy, your brain needs to be ready. Spending time just thinking through different attack scenarios can make a huge difference. Imagine someone coming at you with a knife. What’s your first move? What if they’re faster than you expected? What if there are other people around? Running these "what if" plays in your head, especially while you’re doing your drills, helps your mind get used to the idea of a real confrontation. It’s like a mental rehearsal, and it can stop you from freezing up when it actually happens.
Cultivating Ferocity And Controlled Aggression
Sometimes, defending yourself means being willing to do things that feel unnatural. It’s not about being angry; it’s about having the ability to switch on a level of intensity when your safety is on the line. This isn’t something most people are born with. It’s a skill you build. Practicing with purpose, and really committing to the defensive actions during your drills, helps you develop this controlled aggression. It’s about knowing you can act decisively, even when things are chaotic.
Overcoming Fear And Panic Through Practice
Fear is a natural reaction, but panic can be dangerous. The more you train, the more familiar you become with the physical and mental responses to a threat. This familiarity is what helps you manage fear. When you’ve practiced specific movements and responses repeatedly, they become more automatic. This reduces the mental load during a stressful event, allowing you to react rather than freeze. It’s the repetition, done with focus, that builds the confidence to act when it matters most. Consistent, mindful practice is the bridge between fear and action.
Here’s a quick look at how different scenarios can be mentally processed:
| Scenario Type | Mental Focus |
|---|---|
| Single Attacker | Reaction time, escape routes, disengagement |
| Multiple Attackers | Awareness of surroundings, target prioritization |
| Disadvantageous Position | Maintaining composure, finding openings, adapting |
| Unexpected Variables | Improvisation, problem-solving under pressure |
Feeling the pressure? When things get tough, staying calm is key. Learning how to manage your mind in stressful moments can make a huge difference. It’s like having a superpower for tough times! Want to learn simple tricks to keep your cool when the heat is on? Visit our website for tips and guidance.
Keep Practicing, Stay Sharp
So, we’ve gone over how to build up your knife skills, starting with the basics and moving towards more complex stuff. Remember, the key is consistent practice. It’s not about doing a marathon training session once in a while, but rather fitting in short, focused sessions whenever you can. Whether it’s a few minutes with a cardboard cut board in the garage or some drills with a training knife, every bit counts. Building these skills takes time, and the goal is to make them second nature. Keep at it, stay safe, and you’ll see the improvements. Your confidence and ability will grow with each repetition. Happy cutting!
Frequently Asked Questions
What’s the best way to start practicing knife skills quickly?
Begin with the basics! Just like learning anything new, start with simple movements and gradually work your way up to more complicated ones. Focus on doing things right, not just fast. Quality practice beats doing a lot of sloppy work any day. Think about making smooth, controlled movements – speed will come naturally as you get better.
How can I practice cutting without using real food?
You can make your own practice board using cardboard! Cut pieces of sturdy cardboard, stack them up about 2.5 inches thick, and glue them together. This gives you something to cut against that offers resistance, similar to real meat. It’s a great way to get used to the feel of cutting and build a strong grip.
Why is the way I hold the knife and use my other hand so important?
How you grip the knife and position your non-cutting hand (the guide hand) is crucial for both safety and making clean cuts. There are different ways to hold a knife, and finding the right grip for each task helps protect your fingers and gives you better control. Your guide hand should be positioned to keep your fingers out of the way of the blade.
What are the most important safety rules when practicing knife skills?
Always follow five key rules: make sure your cutting technique is stable, stay focused on what you’re doing, pass knives safely to others, clean them carefully, and use protective gear if needed. Being aware and careful prevents accidents. Don’t let yourself get distracted while you’re cutting.
How can I set up my cutting area to be more efficient?
Arrange your workspace so everything flows smoothly. Place your tools, ingredients, and trash bins in a way that you move in one direction. This cuts down on wasted steps, keeps your area clean, and helps prevent mixing things up. Think about having a clear path for your ingredients and waste.
What can I do to avoid getting tired or hurting myself during long practice sessions?
Pay attention to your body! Stand with good posture and keep your feet steady. Try changing up how you move the knife and your body to avoid doing the same motion over and over. Taking short breaks and doing simple stretches can make a big difference in preventing strain.
How can I improve my skills if I’m struggling with certain cuts?
Figure out which cuts are the slowest or messiest for you. Then, break down those difficult movements into smaller steps. Create specific practice drills just for those weak spots. By focusing on what’s hard, you can get better much faster than just practicing everything the same way.
Is it really possible to practice knife skills even if I have a busy schedule?
Absolutely! Short, frequent practice sessions are more effective than long, rare ones. Even 10-15 minutes regularly can build your skills over time. Use any small pockets of free time you have to practice. The key is consistency, not necessarily long hours all at once.