

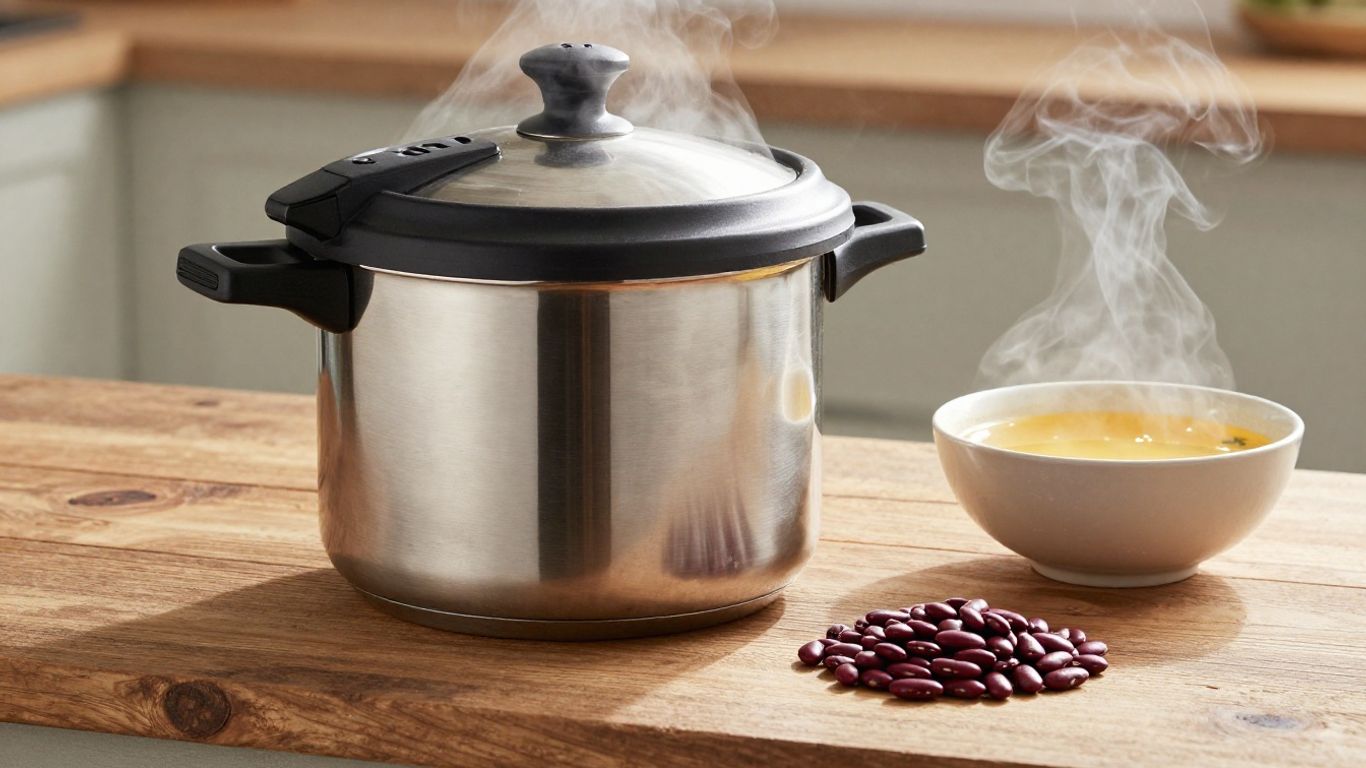
If you’ve ever wondered how to get more out of your pressure cooker, you’re not alone. I used to think it was just for soups or maybe the occasional pot roast, but turns out, there’s a lot more you can do with beans, grains, and homemade broths. Cooking these foods with a pressure cooker can save time, boost nutrition, and make your meals taste better. In this article, I’ll walk through the basics of pressure cooker mastery, covering everything from safety tips to creative meal ideas. Whether you’re new to pressure cooking or just want to up your game, you’ll find practical info you can use right away.
Key Takeaways
- Pressure cookers can make beans, grains, and broths quickly while keeping their nutrients and flavors strong.
- Always check the lid, seals, and vent before cooking to avoid kitchen mishaps.
- Pressure cookers and pressure canners are not the same—use the right tool for the job.
- Soaking beans is optional, but it changes cooking time and texture; add salt after cooking for best results.
- Batch cooking and proper storage help you save time and keep meals fresh all week.
Unlocking Pressure Cooker Mastery for Nutrient-Rich Cooking
Understanding the Science of Pressure Cooking
Pressure cookers have come a long way in both design and popularity, quietly moving from old-fashioned stovetop models to smart, multi-function electric versions. At their most basic, these appliances use steam and pressure to cook food quickly—raising the boiling point of water above 212°F, sometimes up to 250°F. This means foods like dried beans or grains, which normally take ages to get tender, are done in a fraction of the time. Because pressure cooking happens in a sealed environment, flavors mingle and intensify, and moisture loss is kept to a minimum.
- Sealed energy keeps nutrients and flavors locked in
- High pressure speeds up cooking for tough ingredients
- Less water means fewer vitamins and minerals lost to evaporation
Many cooks are surprised at just how much more flavor and nutrition can be coaxed out of everyday ingredients with a decent pressure cooker.
Maximizing Nutrition Retention with Quick Steam
Cooking at high temperatures usually sounds like bad news for nutrients. But pressure cookers turn that idea upside-down. Since food cooks faster, there’s actually less time for heat-sensitive vitamins (like C and B-group) to break down or wash out. The tight seal traps steam and prevents leaks, so minerals stay put.
Try these tips to get the most nutrition:
- Use minimal water—just enough to pressurize.
- Cut veggies into larger chunks to avoid them turning mushy.
- Release pressure as soon as cooking finishes for green vegetables—this avoids heat exposure and faded color.
| Cooking Method | Avg. Nutrient Loss (%) |
|---|---|
| Boiling | 40–60 |
| Conventional Steaming | 20–30 |
| Pressure Cooking | 5–20 |
Creating Deep Flavors in Minutes
The magic of a pressure cooker isn’t just in how fast it works but in the quality of the food. By locking in pressure and heat, meats and beans break down their tough fibers while starches in grains reach silky textures. More importantly, Maillard reactions (that browning you crave) are possible if you use the sauté setting before building pressure. Then, when you activate the pressure function, all those browned bits dissolve into savory broth, giving a satisfying, slow-cooked taste—without having to plan half a day ahead.
- Start with sautéing onions, garlic, or spices to build a flavor base
- Layer hearty ingredients at the bottom, tender ones on top
- Finish some dishes with a quick simmer (lid off) to adjust consistency
Pressure cooking isn’t just about saving time—it’s about squeezing every ounce of goodness and taste from your ingredients, turning even a bag of humble beans into something you’ll actually look forward to eating.
Essential Pressure Cooker Safety and Preparation
Pressure cooking can save you loads of time in the kitchen, but there’s a little learning curve if you haven’t used one before. Getting good, safe results with your pressure cooker starts before you even turn it on.
Kitchen Safety Principles for Pressure Cooking
Always treat your pressure cooker with care and respect – it’s a powerful tool. Here’s how to keep your kitchen accident-free:
- Never open the lid while your cooker is under pressure. Always wait until all steam has vented.
- Use at least 1 cup of liquid for steam to build properly.
- Don’t fill the pot more than 2/3 full; beans and grains can foam up, so stick to half-full in those cases.
- Double-check that the lid is locked and the sealing ring is fitted before cooking.
- Watch where the steam valve releases – keep hands and faces clear. Quick releases send hot steam straight up.
- Clean as you go to keep food residue from blocking vents.
If you’re ever in doubt, slow down and check your user manual. Rushing leads to mistakes—steam burns are no joke.
Best Practices for Cleaning and Maintenance
Keeping your pressure cooker clean not only helps it last longer, but also makes every meal taste better. Here’s what to focus on weekly:
- Wash the lid, seal, and pot with hot soapy water after each use.
- Thoroughly dry all parts before putting them back together, especially the rubber seal.
- Remove and clean the pressure release valve regularly – small grains and bean skins can gunk it up.
- Occasionally check for food odors in the sealing ring. If needed, soak it in a mix of water and baking soda overnight.
- Never put electrical bases in water.
Simple Cleaning Table
| Part | After Each Use | Weekly Cleaning | Deep Clean (Monthly) |
|---|---|---|---|
| Pot Insert | ✔️ | ||
| Lid | ✔️ | ||
| Sealing Ring | ✔️ | ✔️ | ✔️ (baking soda) |
| Steam Vent/Valve | ✔️ | ||
| Exterior | ✔️ |
Inspection Tips for Seals and Vents
Taking a minute to check your seals and vents before each pot of beans or rice can prevent bigger problems later. Here’s a speedy routine:
- Remove the sealing ring and flex it—look for cracks, warping, or stiffness.
- Inspect the vent for leftover debris. A toothpick (or brush) can clear tiny blockages.
- Make sure the float valve moves up and down smoothly. Sticking here means it’s time to clean or lightly lubricate with a dab of neutral oil.
- Replace the sealing ring at the first sign of wear or every 12–18 months, whichever comes first.
- Most pressure cooker brands sell replacement parts—don’t risk an imperfect seal.
By building these habits, you make your pressure cooker safer and more reliable every time you use it.
Choosing Between Pressure Cooker and Pressure Canner
When it comes to home cooking and food storage, deciding between a pressure cooker and a pressure canner can make a huge difference. Each one plays a unique role in the kitchen. Understanding what sets them apart will help you stay safe and make the most out of your cooking experiences.
When to Use a Pressure Cooker vs. a Canner
If you’re wondering which tool belongs in your kitchen, start by deciding your main goal:
- Use a pressure cooker for quick meals like soups, beans, rice, and tender meats when speed is the priority.
- Choose a pressure canner if you want to preserve food, especially when canning low-acid foods like meats, vegetables, or complete meals in jars for long-term storage.
- Avoid using a regular pressure cooker for canning—proper temperature control is critical for food safety and only a true canner can handle that reliably.
Key Differences in Design and Function
Here’s a quick comparison to make things clearer:
| Pressure Cooker | Pressure Canner | |
|---|---|---|
| Purpose | Fast cooking of meals | Safe preservation of low-acid foods |
| Capacity | Usually 4-8 quarts | Larger: often 16 quarts or more |
| Jar Fit | Often too small for standard jars | Built specifically to hold jars upright |
| Pressure Control | Simpler settings, lower pressure | Precise pressure gauge, can reach 15 PSI+ |
| Usage Time | Short cooking cycles | Holds pressure for extended periods |
Home canning needs steady temps and pressure for safety. Even if a small cooker says it can "can," it usually doesn’t meet the standards your pantry—and your health—demand.
Safety Considerations for Home Use
Staying safe is always the most important part.
- Always follow manufacturer instructions for pressure levels and venting.
- Don’t overfill a cooker or canner—leave room for steam and bubbling.
- Double-check the seals, valves, and pressure gauge every time you use your appliance.
- Never substitute a pressure cooker for a canner when preserving food. The risks (food spoilage, botulism) aren’t worth it.
Deciding between these two appliances comes down to what you’re cooking and how you want to use your time. Pressure cookers shine for quick weekday meals, while pressure canners are the top choice for anyone hoping to keep a garden harvest or batch-cooked beans ready all winter.
Pressure Cooker Mastery for Cooking Beans
Soaking versus No-Soak Methods
Pressure cooking beans is quick and predictable, whether you soak them first or start with them dry. Soaking cuts down on cook time and may make the beans a bit easier to digest—some folks swear by it, others skip it and save time. Here’s what to keep in mind:
- Soaking beans overnight reduces cooking time by about half.
- No-soak beans go straight into the pressure cooker with slightly more water and a longer cook time.
- Soaking can help with texture and may reduce some of the bloating people experience with beans, but it’s not necessary for safety or taste.
| Bean | Soaked: Pressure Cook Time | No-Soak: Pressure Cook Time |
|---|---|---|
| Black Beans | 8-10 min | 22-25 min |
| Pinto Beans | 12-15 min | 28-30 min |
| Chickpeas | 14-16 min | 35-40 min |
Don’t stress about picking the “right way”—either method gets you tender, homemade beans without hours at the stove.
Timing and Water Ratios for Different Beans
Getting the right result with beans is really about finding the sweet spot for time and liquid in your pressure cooker. Every variety soaks up water differently, but here are some basic guidelines:
- Use about 3-4 cups of water for every cup of dried beans.
- Too little water can cause burn warnings and tough beans; too much water washes out flavor.
- Letting the pressure come down naturally (about 10-15 minutes after the timer) helps keep the beans from splitting and creates a creamier texture.
| Bean Type | Dried (1 cup) | Water (cups) | Cook Time (soaked) | Cook Time (no soak) |
|---|---|---|---|---|
| Pinto | 1 | 4 | 12-15 min | 28-30 min |
| Navy | 1 | 3.5 | 9-11 min | 22-25 min |
| Kidney | 1 | 4 | 14-16 min | 30-35 min |
| Lima (large) | 1 | 4 | 6-8 min | 18-22 min |
Salt and Flavoring Strategies for Tenderness
There’s plenty of debate about when to add salt to beans. Some say it makes the skins tough; others say it doesn’t matter. After plenty of batches, here’s a clear approach:
- For best tenderness, add salt after the beans are fully cooked but while they’re still hot.
- Brining beans overnight (soaking in a salted solution) doesn’t noticeably change flavor much, but you can experiment.
- Add aromatics (onion, garlic, bay leaf, herbs, or dried chiles) before cooking. They infuse deeply under pressure.
- Avoid acidic ingredients (tomatoes, vinegar) until the beans have softened. Acids can slow or even stop softening.
Pro Tip: A tablespoon of oil or fat in the pot helps reduce foaming and makes the broth silkier.
Cooked beans from the pressure cooker are not just fast—they’ll be creamier and soak up more flavor than any canned variety at the store.
Beans are regular weeknight food in my kitchen now. With the pressure cooker, it’s no longer a guessing game, and the possibilities for flavor are endless.
Transforming Grains Through Pressure Cooking
Best Grains Suited for Pressure Cookers
Pressure cookers are fantastic for grains. They cook them way faster than on the stovetop, and you get this really nice, tender texture. Most grains work well, but some are just naturals. Think about things like brown rice, quinoa, barley, farro, and even oats. These grains, especially the whole ones, can take a while to cook normally, but under pressure, they soften up beautifully. Even tougher grains like kamut or spelt become manageable.
Optimizing Texture with Timing and Liquid
Getting grains just right in a pressure cooker is all about the liquid and the time. Too much liquid or too much time, and you end up with mush. Not enough, and they’re still hard. It’s a bit of a balancing act, but once you get it, it’s easy.
Here’s a general idea for some common grains:
| Grain | Liquid Ratio (Water:Grain) | Cook Time (Minutes) | Natural Release (Minutes) |
|---|---|---|---|
| Brown Rice | 1.25:1 | 20-25 | 10 |
| Quinoa | 1.5:1 | 1 | 10 |
| Steel-Cut Oats | 2:1 | 5-10 | 5 |
| Barley | 2.5:1 | 25-30 | 10 |
| Farro | 2:1 | 20-25 | 10 |
Remember, these are starting points. Your specific cooker and the age of your grains can make a difference. Always check your cooker’s manual for guidance.
Combining Whole Grains for Balanced Meals
Why stick to just one grain when you can mix them? Combining different grains in your pressure cooker can create really interesting textures and flavors, plus you get a wider range of nutrients. Think about a mix of brown rice and quinoa for a hearty side dish, or barley and farro for a chewy, satisfying base for a salad. You can even add lentils or beans to the mix for a complete protein source. Just make sure the grains you combine have similar cooking times, or add the quicker-cooking ones later in the process if you’re feeling adventurous. It’s a great way to use up small amounts of different grains you have in the pantry and create something new and delicious.
Building Broths and Mineral-Rich Stocks in the Pressure Cooker
Making broth in a pressure cooker is a gamechanger—suddenly, that long, stovetop simmer turns into something you can pull off on a weeknight. Done right, you get rich, nourishing results in much less time.
Selecting Bones, Vegetables, and Seasonings
The backbone of any good broth is what you put in the pot. Here’s what matters:
- Bones: Chicken backs, wings, or beef knuckles give the best results. You can even mix types for a more layered flavor.
- Vegetables: Carrots, onions, celery, parsnips, and leeks are all classics. Don’t overthink it—leftover veggie bits work well, too.
- Seasonings: A bit of black pepper, a bay leaf, a piece of ginger, or a bundle of parsley stems boosts the taste without overpowering it.
For a cleaner, clearer broth, consider blanching bones briefly before cooking. This step removes excess blood or grit and keeps your broth from going cloudy.
Achieving Gelatinous, Nutrient-Dense Broth
What sets great broth apart is that lovely, jiggly texture when chilled. That’s collagen turning into gelatin—a good sign you’ve pulled minerals and nutrients from the bones.
- Use joint-rich bones, like chicken feet or beef knuckles, for maximum gelatin.
- Low-pressure settings can help prevent cloudiness and keep broths clear while still drawing out nutrients.
- Add a splash of vinegar at the start. This helps pull minerals (like calcium) from the bones into your broth.
Here’s a quick breakdown for common broth types:
| Broth Type | Key Bones | Pressure Time | Liquid per Pound |
|---|---|---|---|
| Chicken | Backs, wings, feet | 60–90 min | 4–5 cups |
| Beef | Shanks, knuckles | 90–120 min | 5–6 cups |
| Vegetable | None | 15–20 min | 3–4 cups |
Flavorful Variations: Beef, Chicken, and Vegetable
You can make any broth your own with just a few tweaks:
- For a richer beef broth, try roasting the bones and veggies first.
- Use fresh herbs—think thyme, dill, or cilantro—during the last 10 minutes, not before, for a brighter flavor.
- For an umami boost, toss in a dried mushroom or a bit of kombu (seaweed) if you have it.
- Vegetable broths become more savory with a tomato or potato thrown in.
Experimenting with different bones, scraps, and herbs brings new flavors every time—you never get the same pot twice.
Building broths in a pressure cooker lets you create nutritious, satisfying bases for soups and stews with just a few scraps and a bit of time. It’s honestly one of the most practical home cooking tricks I know.
Mastering Recipe Conversion for Pressure Cooking
So, you’ve got a favorite recipe that usually takes ages on the stovetop or in the oven. The good news is, you can likely adapt it for your pressure cooker. It’s not always a direct swap, but with a few adjustments, you can speed things up considerably.
Adapting Stovetop and Oven Recipes
When you’re looking at a recipe that calls for a long simmer or bake, a good rule of thumb is to cut the original cooking time by about two-thirds. For example, if a stew normally simmers for 2 hours, you might only need 40 minutes under pressure. This is a starting point, of course, and you might need to tweak it based on the ingredients. Always check for doneness after the reduced time.
Managing Liquid and Fill Levels
Pressure cookers need liquid to build steam, but you don’t need as much as you might think. Generally, reduce the liquid called for in your original recipe by about half. However, make sure you always have at least 1 cup of liquid in the pot to get it up to pressure. Also, be mindful of how full you pack the cooker. For most recipes, you shouldn’t fill it more than two-thirds full. This leaves room for steam to circulate and prevents the vent from getting clogged.
Here’s a quick guide:
- Liquid: Reduce by 50%, but maintain at least 1 cup.
- Fill Level: Do not exceed 2/3 full.
- Venting: Ensure the steam release valve is clear.
Remember that recipes found online, especially on social media, might not always follow safe cooking practices. It’s best to stick with recipes from trusted sources or adapt them carefully.
Pairing Foods with Similar Cook Times
One of the beauties of pressure cooking is its ability to cook different components of a meal together. When converting recipes, try to group ingredients that have similar cooking needs. For instance, tougher cuts of meat, root vegetables like carrots and potatoes, and dried beans often benefit from the same pressure cooking time. This makes one-pot meals a breeze. If you have ingredients that cook much faster, like delicate vegetables or pre-cooked items, you can often add them towards the end of the cooking cycle or steam them separately.
Consider these pairings:
- Hearty Base: Tough meats, whole grains, dried beans.
- Mid-Cook Additions: Root vegetables (carrots, potatoes, parsnips).
- Late Additions: Softer vegetables (broccoli, peas), leafy greens (spinach, kale).
By understanding these basic conversion principles, you can confidently transform many of your favorite dishes into quick, delicious pressure cooker meals.
Creative Meal Ideas for Pressure Cooker Enthusiasts
Hearty Soups and Stews
Pressure cookers are fantastic for turning humble ingredients into rich, satisfying soups and stews. Think about a classic beef stew where tough cuts of meat become incredibly tender in a fraction of the time. You can toss in root vegetables like carrots, potatoes, and parsnips along with your aromatics – onions, garlic, and celery – and let the pressure cooker do the heavy lifting. The sealed environment locks in moisture and flavor, creating a depth that usually takes hours on the stovetop. Even simple lentil soups or hearty chili become more robust and quicker to prepare. The key is layering flavors, starting with a good sauté of your base vegetables and perhaps browning your meat before adding liquids and other ingredients.
Protein-Rich Bean Dishes
Forget soaking beans overnight! Pressure cookers make cooking dried beans a breeze. Black beans for tacos, chickpeas for hummus, or pinto beans for a side dish are all achievable with minimal planning. You can cook a whole pound of dried beans in under an hour, often without any pre-soaking. This opens up a world of possibilities for quick weeknight meals. Imagine making a flavorful black bean soup or a hearty three-bean salad with beans cooked fresh. Remember to adjust your liquid ratios based on the type of bean, and don’t be afraid to add aromatics like bay leaves, garlic, or a piece of kombu for extra umami.
One-Pot Grains and Vegetables
Pressure cookers excel at cooking grains perfectly, and combining them with vegetables in a single pot makes for incredibly easy and healthy meals. Quinoa, farro, barley, or even brown rice can be cooked to fluffy perfection. You can add chopped vegetables like broccoli, bell peppers, or spinach towards the end of the cooking cycle, or cook them alongside the grains for a complete meal. This method is ideal for busy evenings when you want a nutritious meal on the table fast. Consider a Mediterranean-inspired dish with quinoa, diced tomatoes, olives, and herbs, or a simple side of barley with roasted root vegetables.
Innovative Functions Beyond Pressure Cooking
Most people know their pressure cooker for making soups or speeding up a pot of beans, but these appliances offer more than just pressure. Today’s electric pressure cookers combine a collection of useful functions into one kitchen tool, making them a go-to choice for those short on time and space.
Using the Sauté and Browning Features
Before you seal the lid, most electric models let you sauté onions, brown meat, or toast spices right in the pot. This means:
- Fewer pans to clean because you’re not transferring between stove and cooker.
- Better flavor, since browning adds depth to meats, mushrooms, and vegetables.
- Complete meals made all in one place, minimizing mess.
It’s smart to deglaze after browning by adding a splash of liquid, scraping up the stuck bits—this helps avoid the “burn” warning and brings richer flavor to broths or stews.
Making Yogurt and Fermented Foods
Many electric pressure cookers include a yogurt setting. The process is surprisingly easy and hands-off:
- Heat milk using the preset to reach the right temperature.
- Cool a bit, add your starter (like plain yogurt), and mix well.
- Set the yogurt function and let the mixture incubate for several hours.
Some models go further and let you control temperature for fermenting foods like kimchi or kefir, expanding your homemade pantry options.
Exploring Steaming and Warming Capabilities
Pressure cookers double as reliable steamers—just add water and a steaming rack or basket:
- Steamed vegetables stay vibrant and tender, not mushy.
- Seafood, dumplings, and even hard eggs can be cooked gently.
- The warming feature keeps dishes ready-to-serve without burning or drying them out.
| Function | Use Case Example | Benefit |
|---|---|---|
| Sauté/Brown | Browning beef for stew | Builds flavor, one-pot meal |
| Yogurt | Making homemade yogurt | Cost-effective, easy |
| Steaming | Broccoli or dumplings | Quick, nutrient friendly |
| Keep Warm | Batch-cooked grains | Saves time, easy service |
Opening up to the full range of your cooker’s functions can change how you plan meals and free up both your evening and your countertop. There’s hardly a meal that can’t start or finish in your trusty pressure cooker if you experiment a little.
Smart Storage and Freshness for Cooked Beans and Grains
So you’ve made a big batch of perfectly cooked beans or grains in your pressure cooker. That’s awesome! Now, how do you keep them tasting great and safe to eat? It’s not too complicated, really. The key is to cool them down quickly and store them properly.
Refrigeration and Freezing Guidelines
Once your beans or grains have cooled down a bit, get them into the fridge. Don’t leave them sitting out at room temperature for too long – that’s when bacteria can start to grow. An airtight container is your best friend here. They should be good in the refrigerator for about 3 to 4 days. If you’ve made a huge batch and know you won’t get through them that fast, freezing is a great option.
When freezing, make sure to use containers or bags that are meant for the freezer. You can freeze them in portion sizes, which makes reheating a breeze later on. Properly frozen, cooked beans and grains can last for a good few months, usually around 5 months, without losing too much quality.
Batch Cooking for Busy Weeks
This is where the pressure cooker really shines. Cooking a big batch of beans or grains at the start of the week means you’ve got a healthy base ready for quick meals. Think about it: you can have a pot of rice or a batch of black beans ready to go for tacos, salads, or as a side dish. It saves so much time during those hectic weeknights when you’d rather not start from scratch.
- Cook a large batch of your favorite grain (like quinoa or brown rice).
- Prepare a big pot of beans (kidney, black, or chickpeas work well).
- Portion them into containers for easy grab-and-go meals.
Serving and Reheating Suggestions
Reheating is pretty straightforward. For grains, a little splash of water or broth before microwaving or heating on the stovetop can help revive their texture. Beans can often be reheated just as they are, or you can add a bit more liquid if they seem dry. If you froze them, let them thaw in the refrigerator overnight before reheating.
Remember that the texture of cooked beans and grains can change slightly after refrigeration or freezing. While they’ll still be perfectly edible and nutritious, they might not have that just-cooked tenderness. Don’t be afraid to add a little extra liquid or seasoning when reheating to bring them back to life.
Here’s a quick look at storage times:
| Food Type | Refrigerated (Approx.) | Frozen (Approx.) |
|---|---|---|
| Cooked Grains | 3-4 days | 4-6 months |
| Cooked Beans | 3-4 days | 5-6 months |
| Bean/Grain Salads | 2-3 days | N/A |
Selecting Equipment and Accessories for Pressure Cooker Success
Choosing the right pressure cooker and a few handy accessories can really make a difference in your cooking. It’s not just about picking any pot; it’s about finding a tool that fits your kitchen and how you like to cook. Think about what you’ll be making most often. Are you planning on cooking big batches of beans for the week, or are you more interested in quick weeknight soups? This will help you decide on the size.
Size and Brand Recommendations
Pressure cookers come in a range of sizes, usually measured in quarts. For a single person or a couple, a 3-quart or 4-quart model might be plenty. If you have a family or like to meal prep, an 6-quart or even an 8-quart cooker is probably a better bet. It’s always better to have a little extra space than to be constantly struggling to fit everything in.
When it comes to brands, there are a lot of options out there. Electric pressure cookers, like the popular Instant Pot, have become a kitchen staple for good reason. They often come with multiple functions built-in, like sautéing, slow cooking, and even making yogurt, which can save you counter space. Stovetop models are also great; they tend to be a bit simpler and can be more budget-friendly. They also offer a lot of control over the heat.
Must-Have Accessories for Versatility
Once you have your pressure cooker, a few accessories can really expand what you can do with it. A steamer basket is almost a must-have. It lets you easily steam vegetables, fish, or dumplings, keeping them separate from the liquid below. This is great for preserving nutrients and getting perfectly cooked, tender-crisp veggies.
Another useful item is a silicone sealing ring. Pressure cookers often come with one, but having a spare is a good idea, especially if you cook both savory and sweet dishes. You can dedicate one ring to savory foods and another to desserts to avoid any flavor transfer. Some people also like to get a glass lid for their electric pressure cooker. This allows you to use the cooker as a regular pot for simmering or serving after the pressure cooking is done, without having to transfer food to another dish.
Here are a few other handy accessories:
- Springform pan: Perfect for making cheesecakes or other desserts that need to be easily removed from the pan.
- Silicone egg bites molds: Great for making individual portions of egg bites or mini muffins.
- Extra sealing rings: As mentioned, having spares is always a good idea.
Reliable Resources for Equipment Shopping
Finding the right equipment doesn’t have to be complicated. Start by checking out the manufacturer’s website for the brand you’re interested in. They’ll often have detailed specs and comparisons. Online retailers are also a good place to look, as they usually have a wide selection and customer reviews that can offer real-world insights. Don’t forget to read the user manuals that come with your appliances; they are packed with helpful information specific to your model.
When you’re shopping, pay attention to the materials used in the construction of the pressure cooker. Stainless steel is a popular choice because it’s durable, non-reactive, and easy to clean. Some models have non-stick interiors, which can be convenient for certain foods, but they might require a bit more care to avoid scratching.
If you’re unsure about a specific model or accessory, looking for reviews on cooking blogs or forums dedicated to pressure cooking can be really helpful. You can often find people sharing their experiences, tips, and even troubleshooting advice. Sometimes, just seeing what other home cooks are using and recommending can point you in the right direction.
Picking the right gear and extras is key to making your pressure cooker work wonders. Don’t let confusing choices slow you down! For a complete guide on what you need, check out our website.
Conclusion
Pressure cookers really do make life in the kitchen easier, especially when you’re working with beans, grains, and broths. They cut down on cooking time, keep flavors strong, and help you get dinner on the table fast—even if you forgot to soak your beans. Whether you’re making a big pot of pinto beans, a hearty grain bowl, or a rich bone broth, the pressure cooker handles it all with less fuss. Just remember to follow basic safety tips, check your seals, and don’t overfill. It’s a tool that’s as handy for busy weeknights as it is for meal prepping on the weekend. If you haven’t tried making broths or grains in yours yet, give it a go. You might be surprised at how much you use it once you get the hang of it. Happy cooking!
Frequently Asked Questions
What is the difference between a pressure cooker and a pressure canner?
A pressure cooker cooks food quickly using steam and pressure. It’s great for making meals like beans, grains, and soups. A pressure canner is larger and made for safely preserving foods in jars, like meats and vegetables. It holds higher pressure for longer to kill germs needed for canning.
Do I need to soak beans before pressure cooking them?
You don’t have to soak beans before cooking them in a pressure cooker. Soaking can make them cook faster and may help with digestion, but you can skip it if you’re short on time. Just remember, soaked beans need less cooking time than dry ones.
How do I know how much water to use when cooking beans or grains?
A good rule is to use about 4 cups of water for every cup of dry beans or grains. Some grains need less water, so check your cooker’s manual or a trusted recipe. Don’t fill your pressure cooker more than halfway with beans or grains, since they expand while cooking.
Can I add salt to beans while cooking in a pressure cooker?
It’s best to add salt after the beans are cooked. Salt can make beans tough if added at the start. Once the beans are soft, season them to taste.
What foods should I not cook in a pressure cooker?
You shouldn’t use a pressure cooker for canning, frying in oil, or cooking foods that foam a lot, like pasta or oatmeal. These can block the vent and cause problems.
How do I clean my pressure cooker safely?
Always unplug and let your pressure cooker cool before cleaning. Wash the lid, pot, and sealing ring with warm soapy water. Check the vent and ring for food bits, and let the ring air dry before putting it back. Don’t store the cooker with the lid sealed tight.
How do I store cooked beans and grains for later?
Let them cool, then put them in airtight containers. Store in the fridge for up to 4 days or freeze for up to 5 months. Make sure to label them with the date.
Can I use my pressure cooker for things other than pressure cooking?
Yes! Many electric pressure cookers have settings for sautéing, slow cooking, steaming, making yogurt, and keeping food warm. Check your model’s manual to see all the features you can use.