
So, you’ve heard about sprouting lentils and are maybe wondering what all the fuss is about? It’s not as complicated as it sounds, honestly. Basically, you’re just giving dried lentils a drink and a little time to wake up. This whole process, which we’re calling lentil mastery, can actually make them easier to digest and taste a bit different – sometimes even better. We’re going to break down how to do it, why you might want to, and what to do with them once they’re all sprouted and ready to go.
Key Takeaways
- Sprouting lentils is a simple kitchen practice that can improve their taste and make them easier for your body to handle.
- The sprouting process increases nutrient availability and reduces compounds that can cause gas and bloating.
- Brown lentils are the most reliable choice for sprouting at home; red or split lentils often don’t work well.
- Consistent rinsing every 8 hours is vital for preventing spoilage and ensuring safe sprouts.
- Sprouted lentils can be used raw in salads or cooked in soups and stews, offering a versatile addition to meals.
Unlocking Lentil Mastery Through Sprouting
The Growing Appeal of Sprouted Legumes
Lentils are already a kitchen favorite for many, and for good reason. They’re affordable, packed with nutrients, and incredibly versatile. But have you considered taking them a step further? Sprouting lentils is gaining traction, and it’s not just a passing trend. People are increasingly interested in how they prepare their food, looking for ways to get more goodness out of everyday ingredients. This shift towards more active food preparation, like soaking, fermenting, and sprouting, is all about making our meals work harder for our health. It’s about transforming a simple pantry staple into something that feels more alive and beneficial.
Motivations for Embracing Sprouting
Why go through the extra step of sprouting? For starters, many find that sprouted lentils are much easier on the digestive system. The sprouting process helps break down certain compounds in lentils that can cause gas and bloating. Plus, sprouting can actually increase the levels of certain vitamins and antioxidants, making them even more nutritious. As more people are choosing plant-based meals, sprouted lentils offer a satisfying, protein-rich option that’s also kind to the planet. It’s a way to eat well while feeling good about your food choices.
Sprouting as a Functional Food Practice
Think of sprouting as a way to activate the lentil’s natural potential. It’s a practice that turns a regular ingredient into what some call a "functional food" – something that offers health benefits beyond basic nutrition. The process is surprisingly simple, requiring little more than lentils, water, and a bit of patience. It’s a bit like a science experiment you can eat, showing how a tiny seed can transform into a vibrant sprout. This simple act of germination makes nutrients more available and can lead to a more comfortable eating experience.
The effort involved in sprouting lentils is quite low, especially when you consider the payoff. It’s a process that doesn’t demand fancy equipment or a lot of your time. Mostly, it’s about waiting and performing a quick rinse a couple of times a day. Once you get the hang of it, it becomes a natural part of your kitchen routine, much like making coffee in the morning.
The Simple Science of Sprouting Lentils
Sprouting lentils at home is both practical and a little bit magical. Let’s break down how just a few days can completely change a bag of dried lentils, shedding light on nature’s own transformation in your kitchen.
Effort-to-Reward Ratio of Germination
It’s hard to beat the return you get from a few days of patience and two basic kitchen items—a jar and some water. You start with dry lentils and, after soaking and rinsing over a short period, end up with a crunchy, nutritious ingredient perfect for all kinds of dishes. Even folks who shy away from cooking are surprised by how easy the process is. Here’s how the time and effort stack up:
| Task | Active Effort | Waiting Time | Result |
|---|---|---|---|
| Soak lentils | 2 minutes | 8 hours | Plump lentils |
| Rinse & drain (3x/day) | 1 minute each | 2–3 days | Fresh sprouts |
| Harvest & store | 2 minutes | – | Ready to eat |
Most days, you’ll spend less time caring for your sprouting jar than making coffee.
Witnessing Nature’s Potential
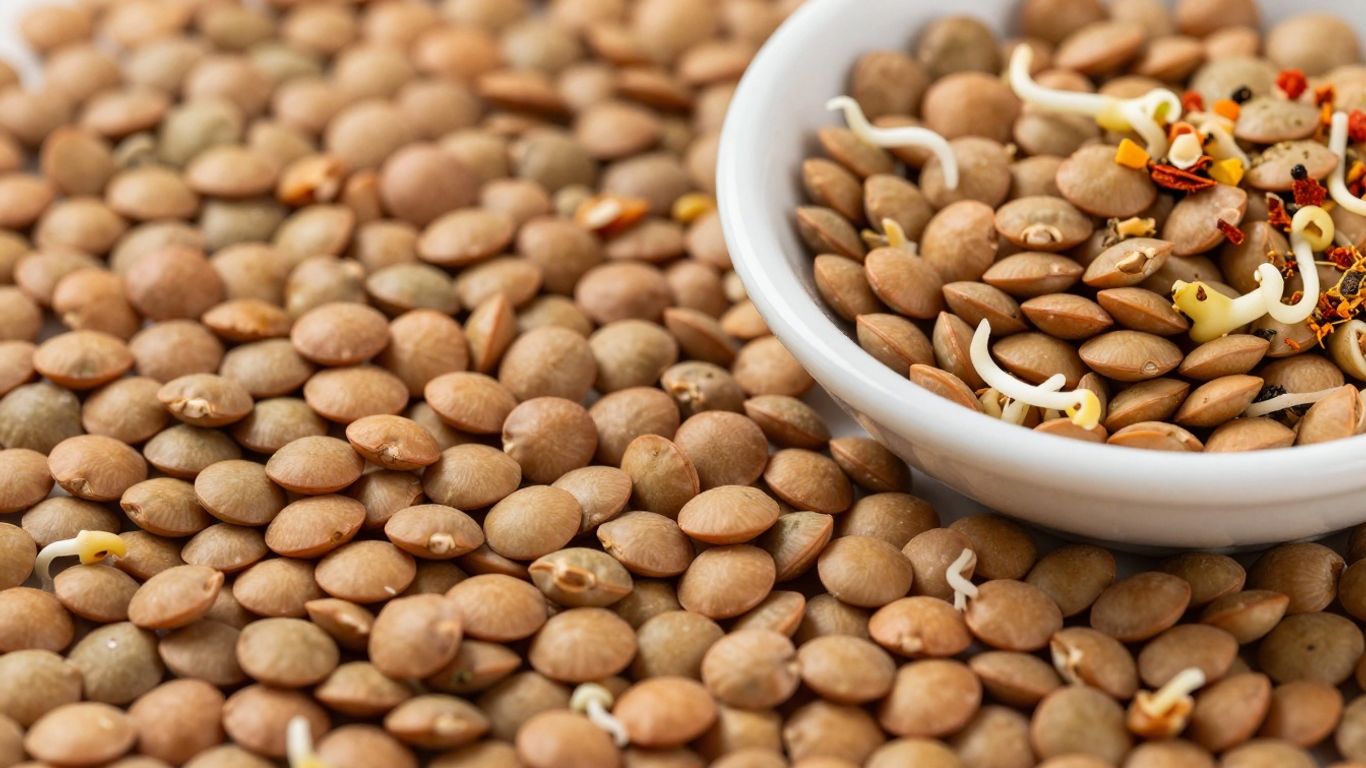
Sprouting isn’t just about nutrition—it’s a small window into the lifecycle of a plant. When you wake up and see little white tails poking out of your lentils, it’s hard not to feel a sense of accomplishment. Germination turns what was once a hard, dry seed into something alive and ready to eat. The process is hands-off, but watching the change happen on your countertop feels a bit like a science experiment every time.
Transforming a Kitchen Staple
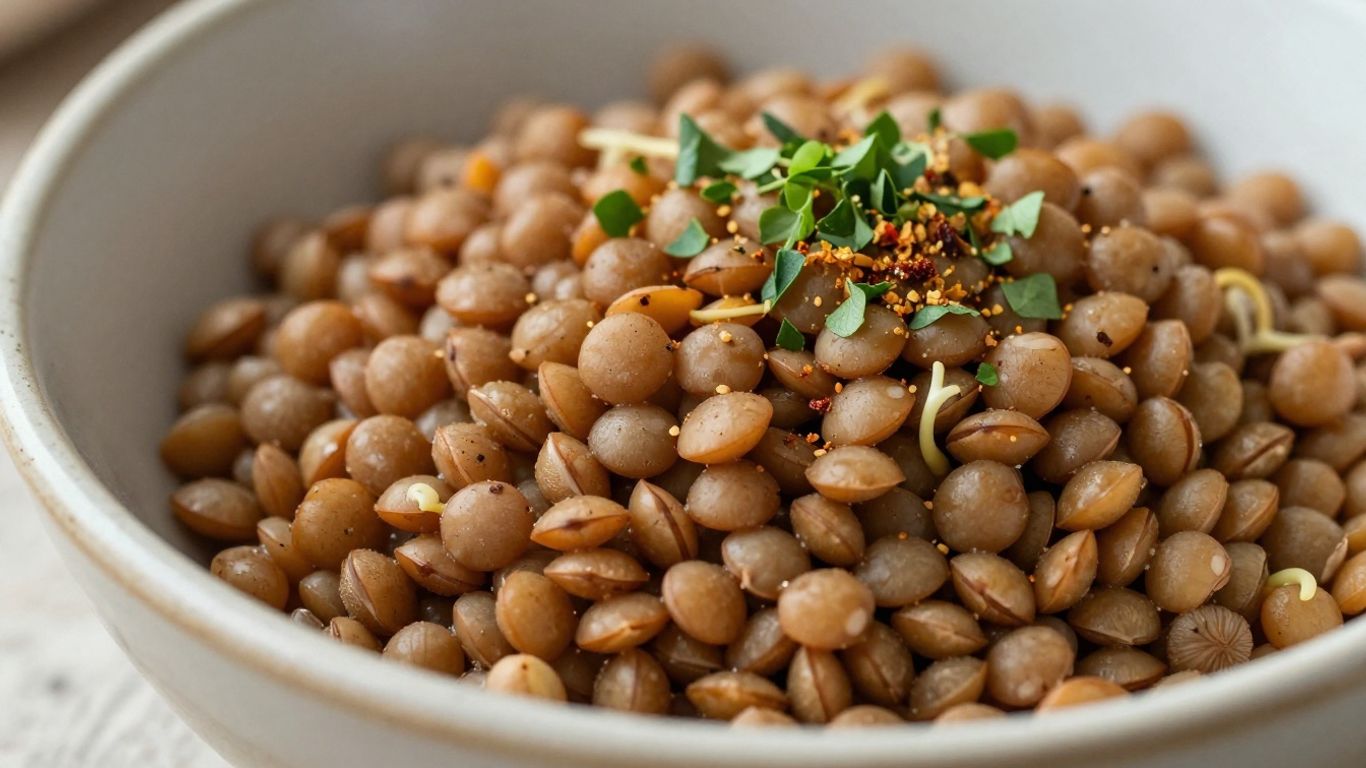
Sprouting isn’t only for the ultra-health-conscious. It gives those bland old lentils a makeover—suddenly, they’re brighter in color, slightly sweet, and a little bit nutty in flavor. Sprouted lentils bring crunch and freshness to salads, wraps, grain bowls, and more. You can even toss them into hot dishes or blend them for spreads.
- Sprouting changes the texture from tough to tender-crisp.
- Nutritional content rises as enzymes wake up dormant nutrients.
- Old recipes get new life just by swapping in sprouted instead of cooked lentils.
A few days of soaking and rinsing can make a world of difference in taste and nutrition, all with almost no fuss. If you’ve never watched a handful of dry lentils spring to life, you’re missing out on one of the simplest (and cheapest) kitchen upgrades.
Nutritional Enhancements During Germination
Sprouting lentils isn’t just about growing little roots—it changes the way our bodies interact with this everyday ingredient. The transformation is more than visible; it’s metabolic. Lentils, after a period of soaking and sprouting, upgrade their nutritional makeup in concrete ways.
Increased Nutrient Availability
Germination jumpstarts key enzymes in each lentil, making vitamins and minerals more accessible to us. As the seed wakes up, nutrients like iron, magnesium, and B vitamins become easier for our bodies to use compared to their dormant, unsprouted state. Instead of having to work harder to break down food, we take in more of what the lentil contains. For a clearer look at some of these differences:
| Nutrient | Unsprouted Lentils (per 100g) | Sprouted Lentils (per 100g) |
|---|---|---|
| Iron | 3.3 mg | 3.8 mg |
| Vitamin C | <0.5 mg | 5.0 mg |
| Folate | 181 mcg | 210 mcg |
| Magnesium | 36 mg | 43 mg |
Sprouting has a real, measurable impact on nutritional content—especially when it comes to vitamins that help energy production and immunity.
Reduced Antinutrients for Better Absorption
Lentils, like many legumes, naturally contain anti-nutrients like phytic acid and enzyme blockers. These compounds make it tough for us to absorb the minerals and protein found in the seeds. Luckily, during sprouting, these blockers break down fast.
- Up to 90% reduction in phytic acid after two days
- Greater iron and zinc absorption
- Proteins become easier to digest
What’s left is a softer, more bioavailable food that supports absorption, not hinders it.
Enhanced Protein and Fiber Content
The lentil’s structure changes as it grows. Protein composition shifts, making some amino acids more prominent. With fiber, a similar thing happens: as the sprout forms, the plant produces slightly more dietary fiber and begins to break down complex starches. The digestibility improves, sometimes dramatically, for those who find legumes hard on their stomachs.
Key Improvements After Sprouting:
- Increase in certain essential amino acids
- Slight rise in total protein
- More soluble fiber, supporting bowel regularity
Sprouting might look simple, but it transforms a pantry staple into a more digestible and nutrient-packed food. If you’ve ever felt weighed down by beans or lentils before, sprouting may be the solution you didn’t know you needed.
Sprouted lentils don’t just offer a small upgrade—they give our diet a better shot at tapping into everything lentils can provide.
Health Benefits of Sprouted Lentils
Support for Digestive Comfort
Sprouting lentils can make them easier on your stomach. During the sprouting process, certain compounds that can cause gas and bloating, like oligosaccharides, are reduced. This means you might find that sprouted lentils lead to less discomfort after eating compared to their unsprouted counterparts. It’s a gentle way to enjoy the goodness of legumes.
Contribution to Heart Health
These little sprouts pack a punch when it comes to supporting your ticker. They contain folate, a B vitamin that plays a role in preventing damage to arteries. By helping to keep your cardiovascular system in good shape, sprouted lentils can be a helpful addition to a heart-conscious diet.
Anti-inflammatory Properties
Sprouted lentils contain beneficial plant compounds, including polyphenols. These compounds act as antioxidants, helping to protect your body from damage. They also have properties that can help calm inflammation, which is linked to many long-term health concerns. Think of them as tiny helpers working to keep your body balanced.
Culinary Transformations: Flavor and Texture
A Distinctive Taste Profile
When lentils sprout, their flavor changes. They move away from the earthy, sometimes slightly bitter taste of dried lentils and develop a milder, nuttier profile. It’s a subtle shift, but noticeable. This makes them a bit more versatile, I think. They don’t overpower other ingredients as much. This transformation makes them a great addition to dishes where you want a gentle, wholesome flavor. Think of it as taking a familiar ingredient and giving it a gentle nudge towards something new and interesting.
The Joy of Varied Textures
One of the most exciting things about sprouted lentils is the texture. Raw, they offer a pleasant, subtle crunch. It’s not hard or tough, but a gentle bite that adds a nice contrast, especially in salads or wraps. But here’s the cool part: they soften up really quickly when cooked. Just a few minutes on the stove can turn them into something tender and soft, perfect for soups, stews, or even blending into dips. This ability to be both crisp and tender depending on how you prepare them is a real game-changer for adding variety to your meals.
Here’s a quick look at how texture changes:
- Raw Sprouts: Offer a mild, satisfying crunch.
- Lightly Cooked (5-10 mins): Become tender but still hold their shape.
- Fully Cooked (longer): Soften considerably, suitable for pureeing.
Elevating Dishes with Novelty
Using sprouted lentils can really make a dish feel special. It’s like adding a secret ingredient that brings a little something extra. Whether you’re tossing raw sprouts into a fresh salad for that unexpected crispness or simmering them into a hearty soup for a smoother texture, they bring a new dimension. They can be used in so many ways – think lentil sprout wraps, mixed into grain bowls, or even as a base for veggie burgers. It’s a simple way to get creative in the kitchen and impress yourself (and anyone you’re cooking for!) with a familiar ingredient made new.
Sprouting lentils turns a pantry staple into a dynamic ingredient, offering a spectrum of textures from crisp to tender and a flavor that’s both mild and nutty. This adaptability means they can fit into a wide range of dishes, from fresh salads to comforting soups, adding a unique touch without demanding center stage.
Choosing the Right Lentil for Sprouting
When you decide to sprout lentils, picking the right kind makes a difference. It’s not super complicated, but a little knowledge goes a long way. Most lentils can be sprouted, but some are definitely easier and more reliable than others for home sprouting.
Reliability of Brown Lentils
Brown lentils are often the go-to for sprouting, and for good reason. They’re widely available, relatively inexpensive, and tend to sprout with good consistency. Their sturdy nature means they can handle the soaking and rinsing cycles without falling apart too easily. They offer a good balance of effort and reward, making them a solid choice for beginners. When you sprout brown lentils, you can expect a decent yield and a reliable germination rate, which is key when you’re just getting started.
Challenges with Red and Split Varieties
Red lentils and split lentils can be a bit trickier. Because they’ve already been split or have had their outer hull removed, they tend to break down more quickly during the soaking and sprouting process. This can lead to a mushier end product and a higher chance of spoilage if not managed perfectly. While you can sprout them, you might find yourself dealing with more slime or a less appealing texture. If you’re aiming for a firm sprout, especially for salads, these might not be your first pick.
Best Lentil Types for Sprouting Success
Beyond the common brown lentil, green lentils (like Puy or French green lentils) are also excellent candidates. They hold their shape well and sprout reliably, offering a similar experience to brown lentils. For a slightly different texture and flavor, you might explore smaller varieties. The main thing to remember is to look for whole, unbroken lentils. Cracked or damaged lentils are more prone to contamination and less likely to sprout successfully. Always opt for lentils that look fresh and are free from dust or debris.
Here’s a quick rundown:
- Best Bets: Brown Lentils, Green Lentils (whole)
- Use with Caution: Red Lentils, Yellow Lentils (can get mushy)
- Avoid: Split Lentils (break down too easily)
When selecting lentils for sprouting, always prioritize whole, intact seeds. This not only improves your chances of successful germination but also minimizes the risk of bacterial growth during the process. Look for lentils that are plump and free from cracks or damage.
Mastering the Sprouting Process: A Step-by-Step Guide

Getting sprouts from dry lentils to your plate is surprisingly straightforward. It really just takes a bit of patience and a consistent routine. Think of it as a small, rewarding project you can do right on your kitchen counter. The whole process, from start to finish, usually takes just a few days.
The Crucial Soaking Phase
This first step is where it all begins. You’ll take your dried lentils and give them a good soak in cool water. This rehydrates them and signals that it’s time to wake up and start growing. It’s not complicated at all – just make sure you use enough water, about two to three times the volume of the lentils, and let them sit for a good chunk of time, usually around 8 hours or overnight. This is also a good time to skim off any seeds that float to the top, as they’re probably not going to sprout anyway.
Consistent Rinsing and Draining
After the initial soak, the real magic happens with regular rinsing and draining. You’ll want to rinse your lentils several times a day, typically every 8 hours. Use cool, clean water and make sure to drain them thoroughly each time. Tilting the jar or container is key to letting all the excess water escape. This step is super important because it keeps the lentils moist but not waterlogged, which is exactly what they need to sprout and, importantly, to prevent any funky smells or sliminess from developing. Consistency here is your best friend for healthy sprouts.
Knowing When to Harvest Your Sprouts
You’ll know your lentils are ready when you start seeing little tails emerge from the seeds. These tails should be about as long as the lentil itself. This usually happens within 2 to 4 days, depending on the type of lentil and your kitchen’s temperature. Once they reach this stage, give them one last rinse. You can then store them in a clean, airtight container in the refrigerator. They’re best used within about 5 days for peak freshness and flavor. Don’t wait too long, though; they can get a bit mushy if left too long after they’re ready.
Here’s a quick look at typical sprouting times:
| Lentil Type | Sprout Time (approx.) | Notes |
|---|---|---|
| Brown Lentils | 2-3 days | Reliable, good for most uses |
| Green Lentils | 3+ days | Can take longer, texture may vary |
| Red/Split | Rarely sprouts | Best avoided for sprouting |
Remember, the goal is to mimic natural germination conditions. This means providing moisture, air circulation, and a suitable temperature. Avoid direct sunlight, as it’s not necessary for sprouting and can sometimes overheat the seeds.
Safety First: Essential Hygiene Practices
When you’re sprouting lentils at home, keeping things clean is super important. It’s not complicated, but you do need to pay attention. Think of it like any other food prep – a little care goes a long way to keep you healthy.
Minimizing Microbial Risks
Lentils, like any raw food, can potentially carry bacteria. The sprouting process, with its warm, moist environment, can actually encourage these microbes to multiply if you’re not careful. The good news is that simple, consistent practices can keep these risks very low. Regular rinsing and proper draining are your best defense. It’s about creating an environment where bacteria can’t thrive, rather than one where they might.
The Importance of Potable Water
What you rinse your lentils with matters. You want to use water that’s safe to drink. If your tap water has a strong smell or taste, or if you know it’s not the best quality, it’s a good idea to use filtered water for rinsing. This step is often overlooked, but it’s a key part of keeping your sprouts clean and safe.
Recognizing Signs of Spoilage
Your senses are your best tools here. If your sprouts look off, smell bad, or feel slimy, it’s time to toss them. Trust your gut. Here’s what to watch out for:
- Sliminess: Healthy sprouts should feel crisp, not slick or gooey.
- Off-odors: A sour or musty smell is a clear sign something’s wrong. Fresh sprouts should smell earthy or neutral.
- Discoloration: Any yellowing or browning on the sprouts themselves, beyond the natural hull, can indicate spoilage.
If you notice any of these signs, don’t risk it. Discard the entire batch immediately. It’s better to be safe than sorry when it comes to food safety.
Integrating Sprouted Lentils into Your Diet
So, you’ve successfully sprouted some lentils. Now what? The good news is, they’re incredibly adaptable. You can use them raw or cooked, and they fit into a surprising number of meals. It’s really about what you’re aiming for with your dish and your own comfort level.
Raw vs. Cooked: Making the Choice
Deciding whether to eat your sprouted lentils raw or cooked often comes down to personal preference and digestive sensitivity. Raw sprouts offer a pleasant crunch and retain the most enzymes, making them great for salads, wraps, or as a topping. Think of adding a handful to your sandwich for an extra bit of texture and nutrition. However, if you have a sensitive stomach, or are preparing food for young children, the elderly, or anyone with a compromised immune system, cooking them is the safer bet. Cooking also softens them up, making them blend more easily into soups and stews.
For most healthy adults, either approach is fine, but always prioritize cleanliness and freshness. If they look or smell off, don’t risk it.
Here’s a quick look at the differences:
- Raw: Best for salads, wraps, sandwiches. Offers a crunchy texture. Maximum enzyme retention. Potential for digestive upset for some. Requires strict hygiene.
- Cooked: Best for soups, stews, curries, fritters. Softer texture. Easier digestion. Slight loss of heat-sensitive nutrients. Requires cooking time.
Culinary Applications and Pairings
Sprouted lentils are surprisingly versatile. Their mild, slightly nutty flavor is a great base for all sorts of seasonings. They pair wonderfully with bold spices like cumin, turmeric, and coriander. A squeeze of lemon or lime juice can brighten them up, and fresh herbs like cilantro or parsley add a nice touch. Garlic and onions are always good companions, too.
Think about adding them to:
- Soups and Stews: Toss them in during the last 10-15 minutes of cooking for a tender addition.
- Salads: Mix raw sprouts into green salads or grain-based salads for added texture and protein.
- Stir-fries: Add them near the end to keep them from getting too mushy.
- Wraps and Sandwiches: Use raw sprouts as a fresh, crunchy filling.
- Fritters or Patties: Blend them into mixtures for a protein boost.
Tips for Beginners
If you’re just starting out, keep it simple. Don’t try to get too fancy right away. Start with a basic recipe, like adding cooked sprouted lentils to a familiar soup or tossing raw sprouts into a salad you already make. Pay close attention to the rinsing process during sprouting – that’s really the most important part for good results and safety. And remember, sprouting takes a couple of days, so plan ahead a little. You’ll get the hang of it quickly, and soon it’ll feel like second nature.
Troubleshooting Common Sprouting Challenges
Even with the best intentions, sometimes your lentil sprouts don’t turn out quite right. It happens to everyone, and usually, it’s something simple to fix. Don’t get discouraged if your first few batches aren’t perfect; a little practice goes a long way.
Addressing Sliminess and Odors
Sliminess or a sour smell are the most common complaints, and they almost always point to the same issue: not enough rinsing. When sprouts sit in stagnant water, bacteria can multiply quickly. This creates that unpleasant slick texture and off-putting odor. Consistent, thorough rinsing is your best defense.
- Rinse Frequency: Aim to rinse your lentils every 6 to 8 hours. If you’re in a warm environment, you might even need to do it every 4-6 hours. Don’t just give them a quick swish; really agitate the water.
- Drainage: Make sure the sprouts drain completely after each rinse. Waterlogged sprouts are a breeding ground for unwanted microbes.
- Water Quality: Always use clean, potable water. If your tap water has a strong smell or taste, consider using filtered water.
If your sprouts are already slimy or smell bad, it’s best to discard them. It’s not worth the risk of getting sick. Starting over with a clean jar and a renewed commitment to rinsing is the safest bet.
Ensuring Successful Germination
Sometimes, you might find that your lentils just aren’t sprouting, or only a few are showing signs of life. This can be frustrating, especially after you’ve put in the effort. Here are a few reasons why this might happen:
- Lentil Quality: Older lentils or those that have been heavily processed (like split red lentils) may not have a viable seed coat needed for germination. Always opt for fresh, whole brown or green lentils specifically sold for sprouting if possible.
- Soaking Time: Did you soak them long enough? The initial soak is critical for waking up the seed. If they were under-soaked, they might not have the moisture needed to start growing.
- Temperature: Lentils sprout best in a moderate temperature range, typically between 65-75°F (18-24°C). If your kitchen is too cold, germination will be slow or might not happen at all. Conversely, extreme heat can also be detrimental.
If you’re consistently having trouble getting your lentils to sprout, try a different brand or type of lentil. Sometimes, a simple change in your starting material can make all the difference.
Preventing Mold Growth
Seeing fuzzy white strands on your sprouts can be alarming, and it’s important to distinguish between healthy root hairs and problematic mold. Healthy root hairs are typically fine and wispy, while mold often looks more like cobwebs or has a distinct musty smell.
- Air Circulation: Sprouts need air to thrive. Ensure your sprouting container allows for good airflow. Don’t pack them too tightly.
- Hygiene: A clean sprouting environment is key. Sterilize your jar or container between batches. Wash your hands thoroughly before handling the sprouts.
- Discard Suspect Batches: If you’re unsure whether it’s mold or root hairs, or if the sprouts have an off smell, it’s always better to err on the side of caution and discard the batch. Mold can be harmful, and it’s not worth the risk.
Remember, sprouting is a natural process, and like any living thing, sprouts can be sensitive. By paying attention to these common issues and adjusting your technique, you’ll be enjoying delicious, healthy sprouts in no time.
Having trouble with your sprouts? Don’t let common issues like mold or slow growth get you down. These little challenges are usually easy to fix. For more tips and tricks to ensure your sprouts thrive, visit our website today!
Mastering Lentil Sprouts: A Simple Upgrade
So, we’ve talked about how soaking and sprouting lentils can really change things up in the kitchen. It’s not some complicated process; honestly, it’s pretty straightforward once you get the hang of the rinsing routine. You get tastier lentils that are easier on your stomach, which is a win-win. Whether you toss them raw into a salad for a bit of crunch or cook them down into a soup for a softer texture, they add something special. Don’t feel like you have to do this every meal, but if you’re looking for a simple way to make your plant-based dishes a little better, giving lentil sprouts a try is definitely worth it. It’s a small step that can make a noticeable difference.
Frequently Asked Questions
Can I eat sprouted lentils raw?
You can eat sprouted lentils raw if they are super fresh, have been rinsed really well, and you eat them right away. But, raw sprouts can sometimes have tiny germs on them that could make you sick. For most people, cooking them just a little bit is safer and still keeps most of the good stuff. It also makes them easier to digest.
How long should I cook sprouted lentils?
Sprouted lentils cook much faster than the dry kind. Usually, they only need about 10 to 15 minutes in boiling water. If you use a pressure cooker, they can be ready in as little as 5 to 7 minutes. Be careful not to overcook them, or they’ll get mushy. Check them early to see if they’re done.
Are sprouted lentils healthier than regular lentils?
Sprouted lentils are easier for your body to handle, meaning they’re more digestible. They also have a bit more vitamins, like vitamin C and some B vitamins. Both regular and sprouted lentils are healthy choices, though. For many people, the biggest win is that sprouted lentils cause less gas and bloating.
How do I store sprouted lentils?
Keep your sprouted lentils in a container with a lid in the fridge. They should last for up to 5 days. Make sure to rinse them one last time and drain them really well before putting them away. If they start to smell funny or feel slimy, it’s time to toss them.
What’s the easiest way to start sprouting lentils?
Start simple! Get some brown lentils, soak them overnight, then rinse them every 8 hours for about 2 days. Use a clean jar with a mesh lid. The key is to rinse and drain them well each time. Once you get the hang of it, you can try them in salads or simple stir-fries.
Why do my sprouts get slimy or smelly?
Sliminess and bad smells usually happen when sprouts aren’t rinsed often enough or aren’t drained properly. This lets tiny germs grow. Make sure you’re rinsing them at least every 8 hours and draining all the water out each time. Using clean water is important too.
Can I sprout any kind of lentil?
It’s best to stick with brown or green lentils for sprouting. They tend to sprout reliably. Red lentils and split lentils often don’t sprout well because their skins are thinner or they’ve been processed, which can make them rot before they sprout.
What’s the main benefit of sprouting lentils?
The main benefits are making them easier to digest and improving their taste. Sprouting breaks down some of the things in lentils that can cause gas, making them gentler on your stomach. They also get a slightly fresher, nuttier flavor that can make your meals more interesting.