
So, you want to cook dried beans? It’s not as hard as it might seem, but there are a few tricks to get them just right. You’ve probably heard about soaking them, but what’s the deal? Is it really necessary? And if it is, how long? This article is all about bean soaking charts. We’ll break down the different ways to soak beans, how long each takes, and why it even matters. Plus, we’ll touch on how soaking affects cooking time and what to do if you’re short on time. Let’s get those beans ready!
Key Takeaways
- Soaking beans, whether overnight or using a quick soak method, helps them cook more evenly and reduces cooking time significantly. This is especially helpful if you’re in a hurry.
- The overnight soak method involves leaving beans in water for 8-12 hours, providing consistent results for texture and digestibility. Just make sure to drain and rinse them well afterward.
- Quick soaking is a good alternative when time is limited. It usually involves boiling beans briefly, letting them sit, and then draining and rinsing.
- Adding salt to your soaking water, especially kosher salt, can help prevent skins from toughening and can even improve bean flavor. Just be mindful of the amount to avoid overly salty beans.
- Bean soaking charts are super useful for knowing the right soaking and cooking times for different types of beans, helping you achieve perfectly cooked beans every time.
Understanding Bean Soaking Charts
The Importance of Bean Soaking Charts
So, you’ve got a bag of dried beans and a craving for something hearty. Before you just toss them in a pot, let’s talk about soaking. It might seem like an extra step, but it really makes a difference in how your beans turn out. Think of a bean soaking chart as your friendly guide, helping you get the best texture and flavor without all the guesswork. It takes the mystery out of bean prep, which is pretty great when you’re just trying to get dinner on the table.
Navigating Different Soaking Methods
There are a couple of main ways to get your beans ready: the overnight soak and the quick soak. The overnight method is pretty straightforward – you just let the beans sit in water for a good chunk of time. The quick soak is for when you’re short on time and need a faster way to rehydrate them. Both have their place, and knowing when to use which can save you a lot of hassle. It’s all about matching the method to your schedule and what you’re cooking.
Key Information Found in Bean Soaking Charts
What exactly will you find on these charts? Usually, they’ll tell you how long to soak different types of beans, whether you’re going the overnight or quick soak route. You’ll also often see recommendations for the amount of water and salt to use. Some charts even give you a heads-up on how soaking might affect the final cooking time. It’s like a cheat sheet for bean success.
Here’s a general idea of what to expect:
- Soaking Time: How long to leave beans in water.
- Water Ratio: How much water to use per cup of beans.
- Salt Recommendation: If and how much salt to add to the soaking water.
- Bean Type: Specific notes for different kinds of beans.
Charts are there to simplify things. They take common knowledge and put it into an easy-to-read format, so you don’t have to remember every single detail for every single bean.
The Overnight Soak Method
When you’ve got the time, the overnight soak is a classic for a reason. It’s a simple, hands-off approach that really lets the beans do their thing. You just cover them with water and let them sit. This method is great because it’s pretty forgiving and usually leads to a really nice, even texture when they’re cooked. Plus, it’s a good way to start the bean-cooking process without much fuss.
Achieving Optimal Texture with Overnight Soaking
The overnight soak is your best bet for achieving that perfectly tender, creamy texture in your beans. It allows the beans to fully rehydrate, which means they cook more evenly. Think of it like giving them a long, slow drink of water. This thorough hydration helps break down some of the compounds that can make beans tough or gassy. It’s a patient method, but the results are usually worth the wait, giving you beans that are soft all the way through without being mushy on the outside.
Recommended Soaking Times for Overnight
For most dried beans, an overnight soak means letting them sit in water for about 8 hours. Some smaller beans, like lentils or split peas, might not need quite that long, maybe 4-6 hours is enough. Larger beans, like chickpeas or kidney beans, can sometimes benefit from a little extra time, perhaps up to 12 hours. The key is that they should roughly double in size and feel plump. If your kitchen is warm, it’s a good idea to soak them in the refrigerator to prevent any unwanted fermentation.
Here’s a general guide:
- Small Beans (e.g., lentils, split peas): 4-6 hours
- Medium Beans (e.g., black beans, pinto beans): 8 hours
- Large Beans (e.g., chickpeas, kidney beans): 8-12 hours
Preparing Beans for Overnight Soaking
Getting started is pretty straightforward. First, give your dried beans a good rinse under cool water. While you’re rinsing, pick out any little stones or debris you might find – it’s rare, but it happens! Then, place the beans in a large bowl or pot. You’ll want to cover them with plenty of fresh, cool water. A good rule of thumb is to use about three times as much water as beans, as they’ll swell up quite a bit. If you’re using tap water, especially if it’s on the hard side, consider adding about 1 tablespoon of salt per quart of water. This can help prevent the skins from getting tough. Just let them soak on the counter, or in the fridge if it’s warm, until morning.
Exploring the Quick Soak Method
Sometimes, you just can’t wait for beans to soak overnight. Maybe you’re planning a last-minute meal, or you simply forgot to get them started. That’s where the quick soak method comes in handy. It’s a way to get your beans ready for cooking in a fraction of the time.
When Time is of the Essence: The Quick Soak
The quick soak method is designed for those moments when you need beans fast. It involves using hot water to speed up the hydration process. While it might not be the traditional route, it’s a perfectly valid technique that can save you a lot of time.
Steps for a Successful Quick Soak
Getting started with the quick soak is pretty straightforward. Here’s how you do it:
- Rinse and Sort: First, give your dried beans a good rinse under cool water. While you’re at it, pick out any small stones or debris. It’s a good habit to get into, no matter the soaking method.
- Boil and Soak: Place the rinsed beans in a pot and cover them with water. Bring the water to a rolling boil for about 1 to 3 minutes. Then, remove the pot from the heat, cover it, and let the beans sit in the hot water for about 1 hour. They should plump up nicely.
- Drain and Rinse: After an hour, drain the beans and give them another good rinse. They are now ready to be cooked.
Benefits and Drawbacks of Quick Soaking
Like any cooking method, the quick soak has its pros and cons.
- Benefits: The most obvious benefit is speed. You can go from dried beans to cooked beans in a few hours, rather than having to plan the night before. Some studies suggest that the hot water used in quick soaking can actually help break down certain compounds that cause gas, potentially making the beans easier to digest for some people.
- Drawbacks: On the flip side, the hot water can leach out a bit more of the water-soluble nutrients compared to an overnight soak. Also, some cooks find that beans soaked this way might not achieve the absolute perfect texture that an overnight soak can provide, especially for certain varieties like kidney beans. However, for most everyday uses, the difference is often negligible.
While the quick soak method is efficient, it’s worth noting that it might not be the absolute best for preserving every single nutrient. However, the convenience it offers is undeniable, and the impact on overall nutrition is usually minor for most home cooks.
Here’s a quick look at the timing:
| Step | Duration |
|---|---|
| Rinsing | 1-2 minutes |
| Boiling | 1-3 minutes |
| Soaking (hot) | Approximately 1 hour |
| Draining/Rinsing | 1-2 minutes |
Comparing Soaking Techniques
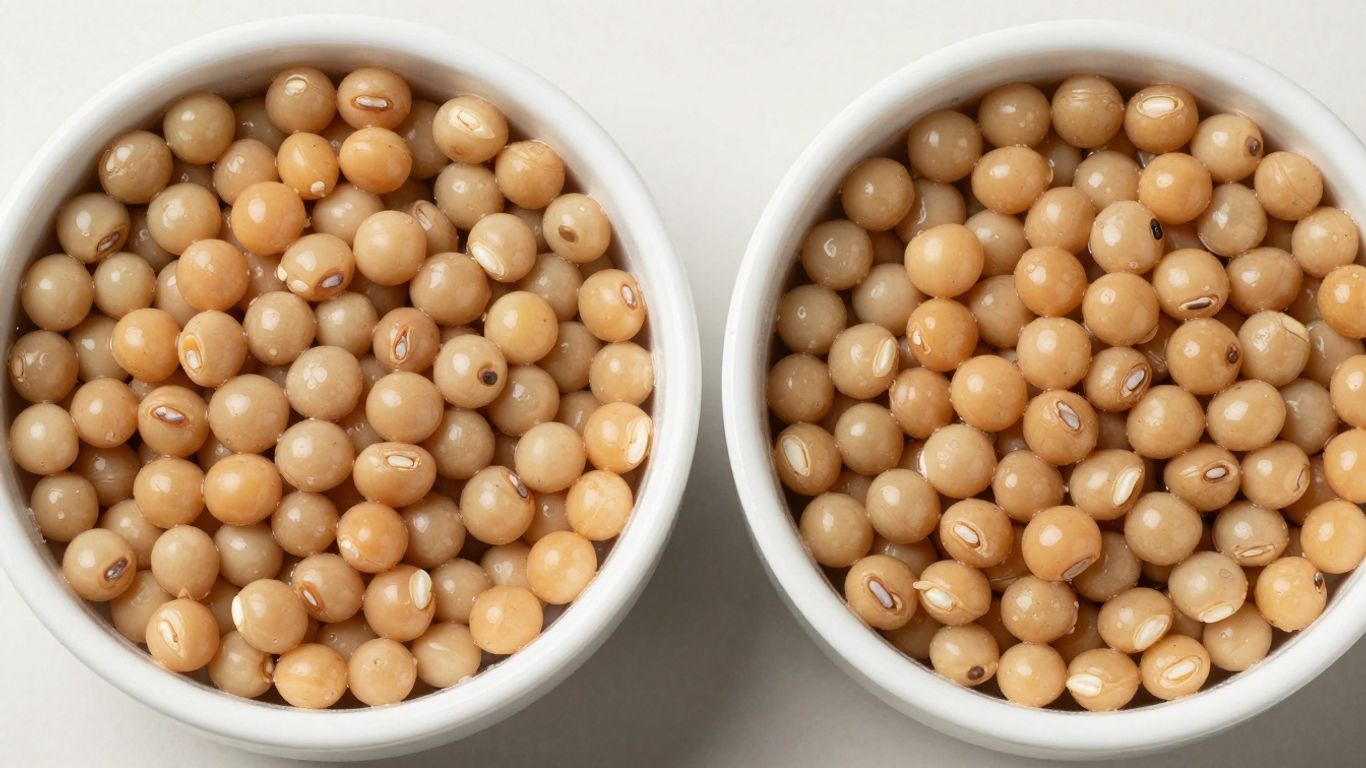
Overnight vs. Quick Soak: A Direct Comparison
When you’re planning a meal around beans, you’ve got a couple of main paths to get them ready: the long, slow overnight soak or the speedy quick soak. Both methods aim to rehydrate dried beans, making them cook more evenly and reducing cooking time. But they aren’t quite the same, and understanding the differences can help you pick the best one for your situation.
The overnight soak is the classic approach, letting beans sit in water for at least 8 hours, or usually, the whole night. This gentle, prolonged hydration is great for achieving a really consistent texture. It’s simple: just cover your beans with plenty of water and let them do their thing. It requires planning ahead, though. You can’t just decide you want soaked beans an hour before dinner.
On the other hand, the quick soak method is for when you’re short on time. It usually involves bringing beans to a boil for a few minutes, then letting them sit in the hot water for about an hour. This gets them rehydrated much faster. It’s a lifesaver if you forgot to soak them the night before.
Impact on Digestion and Texture
Soaking beans can make them easier to digest for some people. Beans contain certain sugars, called oligosaccharides, that our bodies don’t break down well. Bacteria in our gut do, and this can lead to gas. Both soaking methods can help reduce these sugars. Interestingly, the quick soak method, which uses hot water, has shown to be more effective at removing these gas-producing compounds compared to the overnight soak. Some studies suggest it can remove over 40% of these sugars, while the overnight soak might remove around 28%.
When it comes to texture, the overnight soak generally leads to a more even, tender result. The slow hydration allows water to penetrate the beans gradually, softening them uniformly. The quick soak, while effective at rehydrating, can sometimes lead to a slightly less consistent texture. The rapid heating and soaking might not penetrate the bean as deeply or evenly as the overnight method.
Choosing the Right Method for Your Needs
So, which method should you go with? It really depends on your schedule and what you’re looking for.
- For the best texture and ease of digestion: If you have the time and can plan ahead, the overnight soak is often the preferred method. It’s reliable and yields great results.
- When time is tight: The quick soak is your best friend. It’s perfect for last-minute meals or when you simply forget to soak beans the night before.
- If digestive comfort is a priority: The quick soak method might offer a slight edge in reducing gas-producing compounds, making it a good choice if beans tend to cause you discomfort.
Ultimately, both methods work. The key is to find the one that fits best into your cooking routine and delivers the results you want for your delicious bean dishes.
Essential Elements of Bean Preparation
The Role of Salt in Soaking Water
Adding salt to your soaking water is a topic that gets debated, but here’s the general idea: it’s usually best to hold off on salting the soaking water itself. While some folks swear by it, many cooks find that salting too early can actually toughen the bean skins, making them take longer to cook. The real magic happens when you add salt during the cooking process. Salting the beans while they cook infuses each bean with flavor from the inside out. Waiting until the very end often results in beans that are either bland or have an uneven, overly salty taste. Think of it like seasoning any other ingredient – you want that flavor to penetrate.
Rinsing and Draining Beans Correctly
After your beans have soaked, whether overnight or through a quick soak, a thorough rinse and drain is a non-negotiable step. This isn’t just about getting rid of any stray dirt or debris. It’s also about washing away some of those oligosaccharides – the complex sugars that can be tough for some people to digest and lead to gas. So, don’t skimp on this part! Give them a good swirl in fresh water, drain them well, and then they’re ready for the pot.
Here’s a simple process:
- Pour the soaked beans into a colander.
- Rinse them under cool, running water, gently tossing them to ensure all surfaces are cleaned.
- Drain them thoroughly, letting excess water drip away.
Water Quality Considerations for Soaking
The water you use for soaking and cooking your beans can actually make a difference. If you have particularly hard water in your area, it can sometimes make beans take longer to soften. Conversely, very soft water might lead to beans that break down too quickly. Most tap water is perfectly fine, but if you notice consistently odd results, consider using filtered water. It’s a small detail, but sometimes it’s the little things that lead to perfectly cooked beans every time.
Cooking Time Variations
So, you’ve soaked your beans, and now you’re wondering how long this whole cooking business is going to take. It’s a fair question, and the answer is: it depends! The type of bean you’re using plays a big role, and whether or not you soaked them beforehand makes a significant difference. Think of it like this: unsoaked beans are like a tough, dense log that needs a long time to burn, while soaked beans are more like seasoned firewood, ready to go much faster.
How Soaking Affects Cooking Duration
Soaking beans is like giving them a head start. It rehydrates them, softening them up considerably. This means they absorb heat more efficiently and cook through much quicker. For some beans, like chickpeas, the difference can be dramatic – going from nearly an hour of cooking time when dry to just about 10-15 minutes after a good soak. It’s a real time-saver, especially if you’re not using a pressure cooker.
Bean Type and Cooking Time Differences
Not all beans are created equal when it comes to cooking. Smaller beans, like lentils (which often don’t even need soaking!), cook up in a flash, sometimes under 15 minutes. Larger, denser beans, such as kidney beans or chickpeas, naturally take longer. Even within the same category, there can be variations. For example, pinto beans might cook a bit faster than cannellini beans, even after soaking.
Here’s a general idea of how soaking impacts cooking times:
| Bean Type | Unsoaked Cook Time (approx.) | Soaked Cook Time (approx.) |
|---|---|---|
| Black Beans | 25-30 minutes | 5-7 minutes |
| Chickpeas | 40-45 minutes | 10-15 minutes |
| Kidney Beans | 20-25 minutes | 5-7 minutes |
| Pinto Beans | 30-35 minutes | 6-9 minutes |
| Cannellini Beans | 30-35 minutes | 6-8 minutes |
Note: These times are estimates and can vary based on bean freshness and cooking method.
Utilizing Charts for Accurate Cooking Times
To really get a handle on cooking times, bean soaking charts are your best friend. They take the guesswork out of the equation. You can find charts that list specific bean varieties and provide recommended soaking durations alongside their corresponding cooking times, whether you’re using a stovetop, slow cooker, or pressure cooker. Having a reliable chart handy means you can plan your meals with confidence, knowing exactly when those delicious beans will be ready to eat. It’s about making bean cooking less of a mystery and more of a predictable, enjoyable process.
Relying on a good chart helps you avoid the common pitfalls of undercooked or overcooked beans. It’s the difference between a meal that’s just okay and one that’s truly satisfying, with perfectly tender beans every single time.
Maximizing Flavor and Digestibility
Beans are fantastic, but sometimes they can be a bit… challenging. Let’s talk about how to make them taste amazing and be easier on your stomach.
Reducing Digestive Discomfort Through Soaking
Ever feel a bit bloated after a hearty bean meal? That’s often due to certain sugars called oligosaccharides that our bodies don’t break down easily. Bacteria in our gut have a field day with them, producing gas. While soaking alone doesn’t magically remove all of these, it’s a good first step. Some folks find that rinsing thoroughly after soaking helps, and cooking beans until they are very tender also makes them easier to digest. It’s a bit of trial and error to see what works best for you.
Some people find that adding a tiny pinch of baking soda to the soaking water can help soften beans and make them more digestible. However, be aware that this might also reduce some of the water-soluble nutrients. It’s a trade-off to consider.
Enhancing Bean Flavor Profiles
Plain beans are fine, but why stop there? You can really transform them with a few simple additions. Think of the soaking and cooking water as a flavor bath for your beans.
Here are some ideas to get you started:
- Broth Boost: Cook your beans in vegetable or chicken broth instead of plain water. You can use half broth, half water if you like.
- Aromatic Additions: Toss in some smashed garlic cloves, a few slices of ginger, or whole herb sprigs like thyme or rosemary into the cooking water.
- Spice It Up: Add whole spices like cumin or coriander seeds (tied in a cheesecloth sachet so they’re easy to remove) or a dried chili for a little kick.
- Vegetable Base: Sautéing onions, carrots, or celery in a bit of oil before adding your beans and liquid can build a wonderful flavor foundation.
Don’t forget salt! Adding salt during the cooking process, rather than just at the end, helps season the beans from the inside out. It makes a huge difference.
The Science Behind Bean Digestion
It’s interesting to think about why beans affect us differently. Those oligosaccharides we mentioned are complex sugars. Our digestive system lacks the specific enzymes to break them down completely. When they reach the large intestine, the gut bacteria get to work, and gas is a byproduct of their fermentation process. While soaking and cooking can help break down some of these compounds and make the beans more palatable, individual digestive systems vary greatly. What works for one person might not work for another. It’s all about finding your personal bean sweet spot.
Advanced Soaking and Cooking Techniques
Sometimes, you just need to get those beans cooked faster, or maybe you’re looking to tackle some of the digestive challenges that can come with them. That’s where a few advanced tricks come in handy. We’re not just talking about soaking and boiling anymore; we’re looking at ways to optimize the whole process.
Leveraging the Instant Pot for Soaking
Instant Pots and other pressure cookers aren’t just for cooking; they can actually speed up the soaking process too. It’s a neat trick when you’ve forgotten to soak your beans overnight. You can do a "quick soak" right in the pot. Just cover your beans with water, seal the lid, and set it to high pressure for about 1 minute. Then, let the pressure release naturally for about 10-15 minutes. After that, drain and rinse the beans as usual. It’s a good way to get them rehydrated quickly, though some folks say it might leach a bit more of the good stuff out compared to a long soak.
Storing Soaked Beans for Future Use
Life gets busy, and sometimes you soak beans only to realize you don’t have time to cook them right away. No worries! Once your beans are soaked and drained, you can pop them into an airtight container or a zip-top bag and keep them in the fridge. They’ll be perfectly fine for about 3 to 4 days. This is super handy for meal prepping. Just remember not to soak them for much longer than that, as they can start to lose their flavor and get a bit mushy or tough.
Troubleshooting Common Bean Cooking Issues
Ever cooked beans for hours only to find they’re still hard as rocks? It’s frustrating, I know. There are a few reasons this might happen. Old beans can be stubborn and might never fully soften. Also, the water you’re using can play a role. Really hard tap water, with its mineral content, can sometimes make bean skins tough. Adding a bit of salt to your soaking water (about 3 tablespoons per gallon) can help counteract this by preventing minerals from binding to the bean skins. On the flip side, adding acidic ingredients like tomatoes or vinegar too early in the cooking process can also prevent beans from softening properly. It’s best to add those towards the end of cooking.
Some people find that beans cause digestive upset. While soaking helps, a quick-soak method, which involves boiling the beans for a minute and then letting them sit for an hour, has been shown to reduce certain carbohydrates that can cause gas more effectively than a long soak. If this is a concern for you, it might be worth trying this method.
Beyond the Basics: Bean Varieties and Soaking
So, we’ve talked a lot about soaking beans in general, but what happens when you get into the nitty-gritty of different types of beans? It turns out, not all beans are created equal when it comes to soaking and cooking. Some are pretty straightforward, while others have their own little quirks.
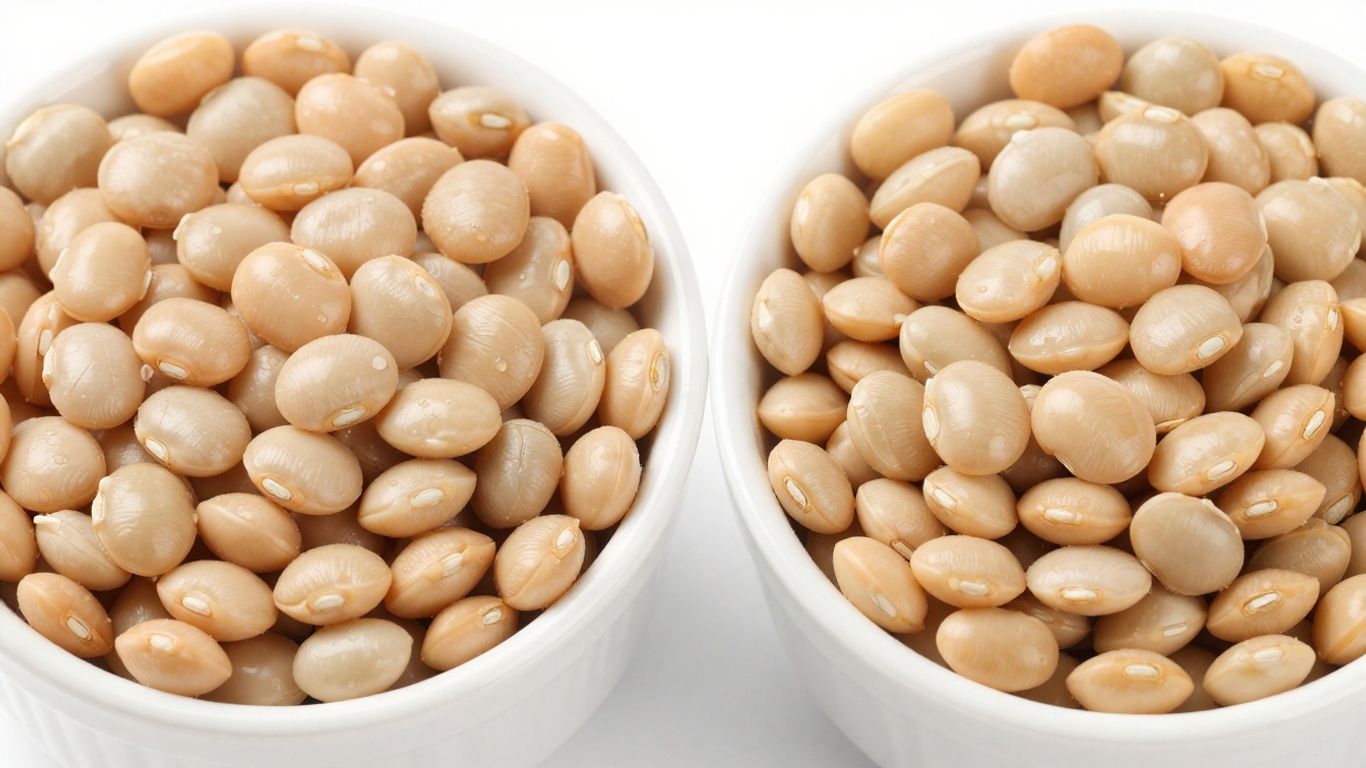
Specific Soaking Needs for Different Beans
Most common dried beans, like kidney, black, or pinto beans, do well with the standard overnight or quick soak methods we’ve discussed. They rehydrate nicely and cook up tender. However, smaller beans, like lentils or split peas, often don’t need soaking at all. They’re usually tender enough to cook right out of the bag, which is a nice time-saver!
Then you have the larger, tougher beans. Think chickpeas or cannellini beans. These guys can benefit from a longer soak, sometimes even up to 24 hours, especially if they’re a bit older. This extra time helps them soften up properly, leading to a much better texture when cooked.
Freshness and Its Impact on Soaking Times
Did you know that how old your dried beans are can actually change how long you need to soak them? It’s true. Beans that are super fresh, maybe from last year’s harvest, will rehydrate much faster. They’re more pliable and ready to go. On the other hand, beans that have been sitting in your pantry for a few years might be a bit more stubborn. They can take longer to soften, and sometimes, even with soaking, they might not get as tender as you’d like. If your beans are several years old, you might need to extend your soaking time or even consider a longer cooking period.
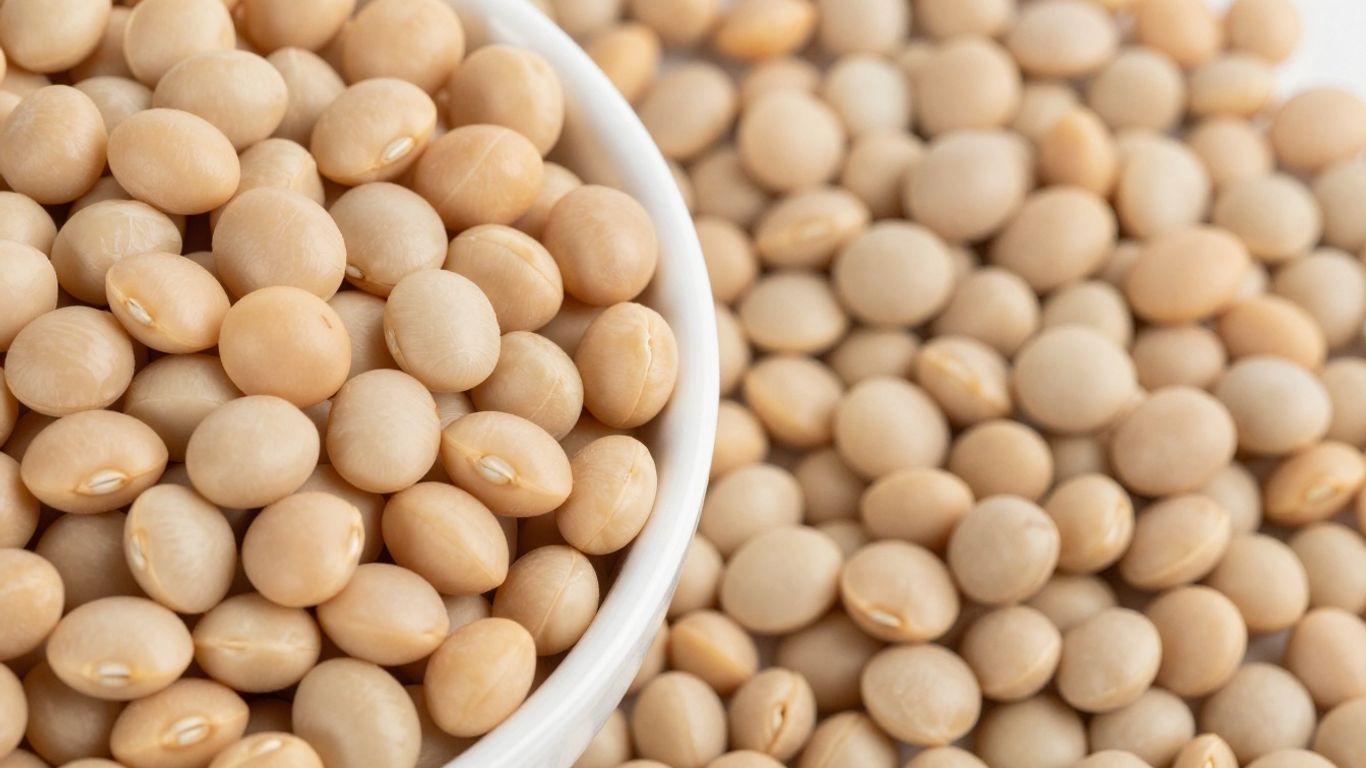
Specialty Beans and Their Unique Requirements
Some beans are just a bit fancy, and they come with their own set of rules. For instance, soybeans are a whole different ballgame. They often require a longer soaking period, and some recipes even call for blanching them after soaking to help with digestibility. Then there are heirloom varieties or beans from different regions that might have slightly different textures or cooking behaviors. It’s always a good idea to check the packaging or do a quick search for specific instructions if you’re trying something new.
- Lentils & Split Peas: Generally, no soaking required.
- Small Beans (e.g., black, pinto): Standard overnight or quick soak.
- Large Beans (e.g., chickpeas, cannellini): May benefit from longer soaking (up to 24 hours).
- Older Beans: Extend soaking time and cooking time.
- Soybeans: Often require longer soaking and blanching.
When you’re working with different types of beans, remember that these are just guidelines. Your pantry conditions, the specific batch of beans, and even your altitude can play a role. Don’t be afraid to adjust your soaking and cooking times based on how the beans look and feel.
Integrating Bean Soaking Charts into Your Kitchen
Creating Your Personal Bean Soaking Reference
So, you’ve got your bean soaking charts down, you understand the difference between a quick soak and an overnight soak, and you’re ready to make beans a regular part of your cooking. That’s awesome! But how do you keep all this info handy? It’s easy to forget the exact soaking time for black beans versus lentils, or how much salt to add. The best way to keep things smooth is to create your own personal reference guide. Think of it like a cheat sheet for perfect beans, every time.
Here’s a simple way to do it:
- Notebook Method: Grab a small notebook or even just a few pages stapled together. Dedicate a page or two to each type of bean you use often. Jot down the bean name, the recommended soaking method (overnight or quick), the soaking time, and any specific notes, like "rinses best" or "gets mushy if soaked too long."
- Digital Notes: If you’re more of a digital person, create a document or a note in your favorite app. You can even use a spreadsheet if you want to get fancy with columns for different bean types and soaking methods.
- Printable Charts: You can also print out a basic chart and fill it in by hand. Keep it stuck to the inside of a cabinet door or on your fridge.
The goal is to have the information you need right at your fingertips when you’re planning your meals.
Tips for Consistent Bean Preparation
Consistency is key when it comes to cooking dried beans. Once you have your personal reference chart, stick to it! Here are a few more tips to make sure your beans turn out great every time:
- Measure Accurately: Use the recommended water-to-bean ratio. Too little water and they might not hydrate properly; too much and they can become waterlogged.
- Salt Smartly: Remember that adding salt to the soaking water can help beans cook more evenly and become tender. The amount can vary, but a good starting point is about 1 to 2 teaspoons of kosher salt per quart of water. Don’t be afraid to experiment a little to find what works best for your taste.
- Rinse Thoroughly: Always rinse your beans after soaking, and definitely before cooking. This gets rid of any lingering dirt or debris.
- Check for Rocks: It sounds silly, but it happens! Before you even start soaking, spread your dried beans out on a light-colored surface and pick through them. You’d be surprised what you might find.
The Joy of Perfectly Cooked Beans
There’s a real satisfaction that comes from cooking dried beans from scratch. They taste so much better than canned, and you have so much more control over the flavor and texture. When you nail the soaking and cooking process, you get beans that are tender, creamy, and full of flavor. They can be the star of a hearty chili, a creamy hummus, or a simple side dish. Making bean soaking charts and following consistent preparation steps isn’t just about following rules; it’s about building confidence in the kitchen and enjoying delicious, wholesome food. So, get that notebook ready, pick your favorite beans, and start cooking! You’ll be amazed at the difference it makes.
Want to make cooking with beans easier? Our guide on "Integrating Bean Soaking Charts into Your Kitchen" shows you how. Learn simple tricks to get your beans ready without the fuss. Ready to simplify your meal prep? Visit our website for more tips and tricks!
Wrapping Up Your Bean Journey
So, whether you’re a seasoned cook or just starting out, understanding the difference between quick-soaking and overnight soaking for your beans can really make a difference. It’s not just about saving time, though that’s a big plus with the quick soak. Overnight soaking, while it takes longer, often leads to a more even texture and can be easier on the digestion for some people. Neither method is necessarily ‘better’ than the other; it really comes down to what works best for your schedule and your body. Don’t be afraid to experiment a little. Try both methods with your favorite beans and see which one you prefer. Happy cooking, and enjoy those delicious, perfectly cooked beans!
Frequently Asked Questions
Do I really need to soak beans?
It’s not always a must, but it can be super helpful! Soaking beans can make them easier to digest, meaning less gas and bloating for some people. Plus, it cuts down on cooking time significantly, which is great if you’re in a hurry.
What’s the difference between soaking overnight and quick soaking?
Soaking overnight means leaving your beans in water for about 8 hours or until the next morning. Quick soaking is a faster method where you boil the beans for a minute, then let them sit in hot water for about an hour. Both work, but overnight soaking is often preferred for the best texture.
How much water and salt should I use for soaking?
A good rule of thumb is about 5 to 6 cups of water for every pound of beans. For salt, it depends on the type you use. For Diamond Crystal kosher salt, try 2 to 2.5 teaspoons per pound of beans. If you use table salt or Morton’s kosher salt, you’ll need a bit less to avoid making the beans too salty.
Can I soak beans in broth instead of water?
Yes, you can! If you decide to soak your beans in broth, you’ll want to reduce the amount of salt you add, as the broth already has some saltiness to it. This helps keep your beans from becoming too salty.
How long does it take to cook soaked beans?
Cooking times vary a lot depending on the type of bean. Soaked beans cook much faster than unsoaked ones. For example, soaked chickpeas might take around 10 minutes in an Instant Pot, while unsoaked ones could take 40 minutes or more. Always check a cooking chart for specific bean types!
What if my beans are still hard after cooking?
If your beans didn’t soften up, they might be old or stale. Sometimes, very hard tap water can also make them tough. Another reason could be acidity in your cooking liquid, which can prevent beans from softening. Make sure you’re using enough water and not adding acidic ingredients too early.
Can I soak beans for too long?
It’s best not to soak beans for much longer than 24 hours. If they soak for too long, they might start to lose their flavor, their skins could get tough, and their texture might become mushy.
What’s the deal with salt in the soaking water?
Adding salt to your soaking water is actually a good idea! It helps prevent minerals in your tap water from making the bean skins tough. It also helps the beans soften more evenly during cooking.