

Cast iron cookware, it’s kind of a big deal in kitchens everywhere. It’s tough, it cooks food really well, and honestly, it can last forever if you treat it right. But for some folks, figuring out how to actually take care of it can feel a little confusing. There’s a lot of old advice out there, and not all of it is still relevant. This guide is here to clear things up and give you the lowdown on making your cast iron a kitchen staple for years to come. We’ll cover everything from that first seasoning to keeping it looking great, so you can cook with confidence.
Key Takeaways
- Seasoning cast iron means creating a non-stick surface by baking thin layers of oil onto the metal. The more you use it, the better it gets.
- For daily cleaning, hot water and a gentle scrub are usually enough. A plastic scraper or even kosher salt can help with stuck-on bits. You can use mild soap if needed, but avoid harsh cleaners or abrasive pads.
- Rust or damage can often be fixed with a good scrub and re-seasoning. For really bad cases, a self-cleaning oven cycle can strip it down to bare metal for a fresh start.
- Preheat your cast iron before cooking for a good sear. Be mindful of cooking very acidic foods for long periods, as it can break down the seasoning.
- Store your cast iron dry, ideally without a lid, to prevent rust. Placing cloths between stacked pans can protect the surface.
The Fundamentals of Cast Iron Care
Understanding the Value of Cast Iron
Cast iron cookware is more than just pots and pans; it’s a piece of history that can last for generations. Think of it as a culinary heirloom. A well-maintained cast iron skillet can easily outlive its owner, becoming a silent witness to countless family meals and traditions. It’s a workhorse in the kitchen, capable of handling everything from a quick weeknight stir-fry to a slow-cooked Sunday roast. Beyond its durability, cooking with cast iron can even add a small amount of iron to your diet, a nutrient that’s pretty important for your health.
Why Proper Care Matters
Taking good care of your cast iron isn’t about being fussy; it’s about making sure your cookware performs at its best and lasts as long as it’s designed to. Proper care builds up a natural nonstick surface, called seasoning, which gets better with every use. This means less sticking, easier cooking, and a more enjoyable experience overall. Neglecting your cast iron, on the other hand, can lead to rust, a sticky surface, and food that clings stubbornly to the pan. It’s the difference between a reliable kitchen tool and a frustrating chore.
Common Myths About Cast Iron Maintenance
There’s a lot of confusing advice out there about cast iron. Let’s clear a few things up:
- Myth: You can never use soap on cast iron.
- Reality: A little mild soap is generally fine for cleaning, especially if you’ve cooked something particularly greasy. The key is to use it sparingly and always dry and lightly oil the pan afterward.
- Myth: You have to completely strip and re-season your pan for every little issue.
- Reality: Most minor problems, like a bit of rust or a slightly damaged surface, can be fixed with a good scrub and a touch-up seasoning. You rarely need to start from scratch.
- Myth: Bacon grease is the best for seasoning.
- Reality: While bacon grease can work, the sugars in it can sometimes burn and create a sticky residue. Neutral cooking oils are often a better choice for building a smooth, even seasoning layer.
The most important thing to remember is that cast iron is tough. It’s designed to be used and to last. Don’t be afraid of it; embrace its resilience and learn its simple needs. With a little attention, your cast iron will reward you for years to come.
Seasoning Cast Iron: The Key to Longevity
What Seasoning Really Means
Seasoning cast iron isn’t about adding flavor, like you might think. It’s actually a process that creates a natural, nonstick surface. When you heat oil on the cast iron, it undergoes a chemical change called polymerization. This turns the oil into a hard, plastic-like coating that bonds to the metal. This polymerized layer is what makes your cast iron nonstick and protects it from rust. Think of it as building up a protective shield, layer by layer, with every use.
Choosing the Right Oil for Seasoning
When it comes to seasoning, you have a few good options. Many people find success with common cooking oils like vegetable oil, canola oil, or even shortening. These are readily available and work well. Some prefer flaxseed oil for its ability to create a very hard finish, though it can be a bit more expensive and sometimes prone to flaking if not applied perfectly. The key is to use an oil with a relatively high smoke point.
Here are some common choices:
- Vegetable Oil/Canola Oil: Affordable, easy to find, and effective.
- Vegetable Shortening: Similar benefits to vegetable oil.
- Flaxseed Oil: Can create a very durable finish, but requires careful application.
- Grapeseed Oil: Another good option with a high smoke point.
Polymerization and the Nonstick Surface
Polymerization is the magic behind cast iron’s nonstick properties. It’s the process where fats or oils, when heated to their smoke point, break down and rearrange their molecules. These molecules then bond to the iron surface, creating a smooth, hard layer. This isn’t just a greasy film; it’s a chemical transformation. The more you cook with your cast iron, especially with oils and fats, the more this layer builds up and improves, making your pan even more nonstick over time. It’s a living surface that gets better with age and use.
Step-by-Step Guide to Seasoning Your Skillet
Preparing New or Bare Cast Iron
So, you’ve got a new cast iron skillet, or maybe an old one you’re looking to bring back to life. If it’s new, it might already have a factory "seasoning," but honestly, it’s usually worth doing it yourself to get a really solid base. For any skillet, whether new or old, the first step is a good wash. Don’t be shy about using soap and hot water here – yes, soap! We’ll get into why later, but for now, just scrub it clean. After washing, it’s super important to dry it thoroughly. You can use a towel, but to make sure every last bit of moisture is gone, pop it in a warm oven (around 200°F or 93°C) for a few minutes. This gets rid of any hidden water that could lead to rust later.
Applying Thin Layers of Oil
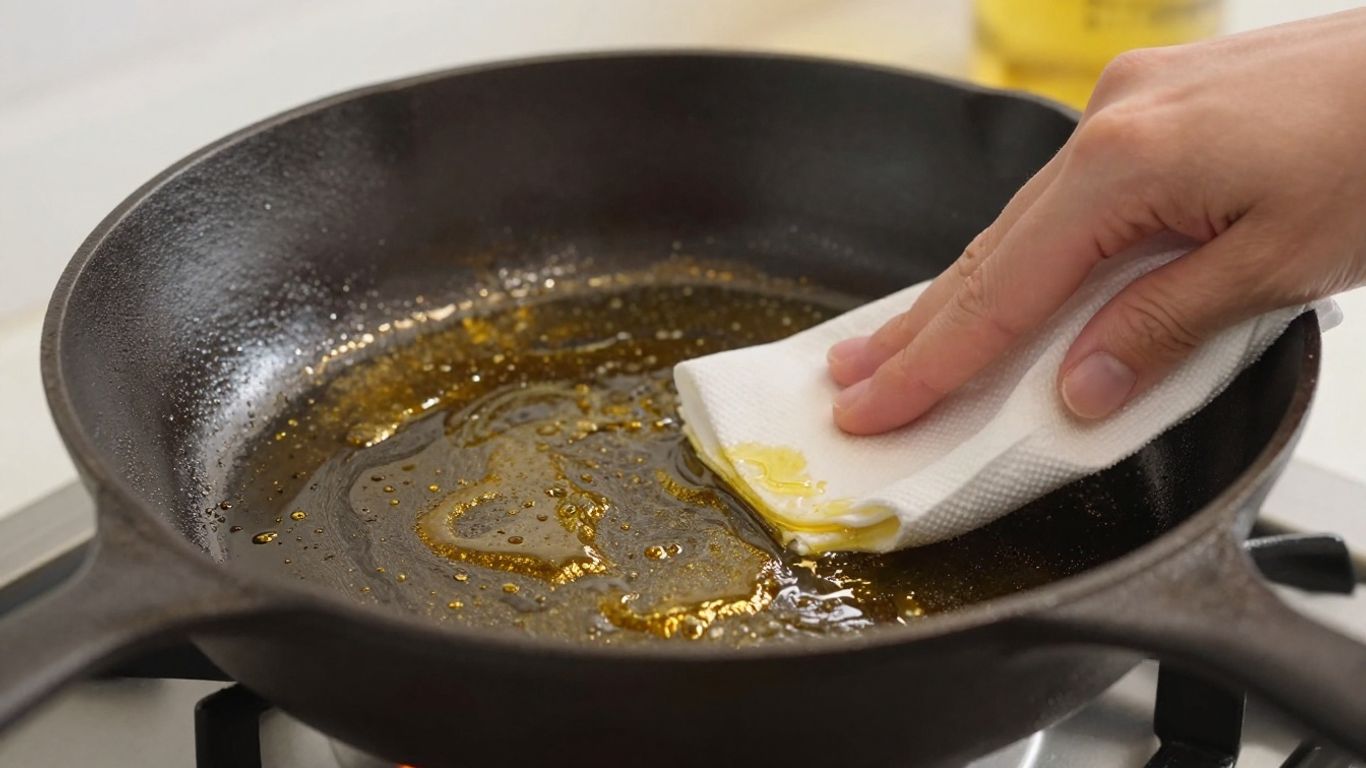
Now for the magic part: the oil. You want to use a cooking oil with a high smoke point. Common choices include vegetable oil, canola oil, grapeseed oil, or even vegetable shortening. Avoid oils that go rancid quickly. The key here is thin. Grab a lint-free cloth or paper towel and apply a very, very thin layer of your chosen oil all over the skillet – inside, outside, the handle, everywhere. Then, take a clean cloth and wipe off as much of that oil as you possibly can. Seriously, you want it to look like there’s almost no oil left. This might seem counterintuitive, but too much oil will result in a sticky, uneven surface instead of a smooth, non-stick finish. We’re aiming for a microscopic layer that will polymerize.
Achieving the Classic Patina
With your skillet thinly oiled, it’s time for the oven. Preheat your oven to a high temperature, usually around 450-500°F (232-260°C). Place the oiled skillet upside down on the center rack. Putting it upside down helps prevent any excess oil from pooling and creating sticky spots. You can place a baking sheet or aluminum foil on the rack below to catch any potential drips. Let it bake for at least one hour. After an hour, turn off the oven and let the skillet cool down completely inside the oven. This process might create some smoke and a bit of an odor, so good ventilation is a good idea. You’ll likely see a change in color, a darkening of the metal. This is the oil polymerizing, bonding to the iron. Repeat this oiling and baking process at least 3-4 times. Each layer builds upon the last, creating that durable, non-stick surface and the beautiful, deep black patina that cast iron is known for. The more you cook with it and maintain it, the better that patina will become.
| Step | Action |
|---|---|
| 1 | Wash and thoroughly dry the skillet. |
| 2 | Apply a very thin layer of high-smoke-point oil. |
| 3 | Wipe off almost all the oil. |
| 4 | Bake upside down at high heat for 1 hour. |
| 5 | Cool completely and repeat 3-4 times. |
Routine Cleaning Techniques for Cast Iron
Cleaning your cast iron doesn’t have to be a chore. In fact, with the right approach, it’s quite simple and helps maintain that beautiful nonstick surface you’ve worked hard to build. The goal is to remove food bits without stripping away the seasoning.
Daily Cleaning Without Damaging Seasoning
After cooking, let your skillet cool down a bit, but it’s often easiest to clean while it’s still warm. For most everyday messes, a simple wipe-down is all you need. Use a paper towel or a soft cloth to remove any food particles. If there’s a bit of residue, hot water is your best friend. Avoid letting your cast iron soak in water, as this can lead to rust.
Effective Use of Hot Water and Scrapers
When food seems a little stuck, reach for hot water and a non-metal scraper. A stiff nylon brush or a dedicated cast iron scraper works wonders. Gently scrub away any stuck-on bits. For tougher spots, you can add a little hot water to the pan and bring it to a simmer on the stovetop for a minute or two. This helps loosen food particles, making them easier to scrape away. Think of it like a mini-deglaze.
When and How to Use Soap Safely
There’s a long-held belief that soap is the enemy of cast iron, and for good reason. Older soaps contained lye, which would indeed strip the seasoning. However, modern dish soaps are much milder. If you’ve cooked something particularly sticky or smelly (like fish), a small amount of mild dish soap used with a soft sponge or brush is perfectly fine. The key is to use it sparingly and rinse thoroughly. Always dry your cast iron completely immediately after washing, even if you used soap. A quick wipe with a towel followed by a minute or two on low heat on the stovetop will ensure it’s bone dry and ready for its next use or a light coat of oil.
Here’s a quick rundown of what to do:
- After Cooking: Let the pan cool slightly.
- For Light Messes: Wipe clean with a paper towel or cloth.
- For Stuck-On Food: Use hot water and a non-metal scraper or brush.
- For Stubborn Residue: Simmer a little hot water in the pan, then scrape.
- If Soap is Needed: Use a tiny amount of mild dish soap, rinse well.
- Always: Dry thoroughly immediately after cleaning.
Remember, the polymerized layer of seasoning is quite durable. While it’s best to avoid harsh scrubbing or prolonged soap use, occasional, gentle cleaning with soap won’t ruin your pan. The most important steps are thorough drying and a light re-oiling if needed.
Dealing With Stubborn Food Residue
Sometimes, no matter how careful you are, bits of food decide to stage a protest and stick to your cast iron pan like they own the place. Don’t panic! Most of the time, these stubborn bits can be coaxed off without damaging your hard-earned seasoning. The key is to be patient and use the right techniques.
Using Kosher Salt as a Gentle Abrasive
For those moments when a simple wipe-down just won’t cut it, kosher salt is your best friend. Its coarse crystals act as a gentle abrasive, lifting stuck-on food without scratching the pan’s surface. It’s a natural and effective way to scrub away residue.
Here’s how to do it:
- While the pan is still warm (but not scorching hot), sprinkle a generous amount of kosher salt into it. About 2-3 tablespoons should do for a standard skillet.
- Use a soft cloth or a sponge (the non-abrasive side!) to scrub the salt around the pan. You’ll feel it grab onto the stuck bits.
- For really tough spots, you can add a tiny bit of water to create a paste, which helps loosen things up even more.
- Once the residue is gone, rinse the pan thoroughly with hot water and dry it immediately.
Deglazing With Water
This technique is fantastic for loosening up browned bits and burnt-on food. It’s essentially using the power of steam and liquid to lift the residue.
- Pour about a quarter-inch of water into the pan.
- Place the skillet on the stovetop over medium heat and bring the water to a simmer or a gentle boil.
- As the water heats up, use a wooden spoon or a spatula to gently scrape the bottom of the pan. The softened food bits should start to lift away.
- Once the residue is loosened, carefully pour out the hot water and proceed with drying and a light re-oiling of the pan.
Avoiding Abrasive Pads and Harsh Chemicals
It’s tempting to grab steel wool or a harsh scouring pad when faced with a really tough mess, but resist the urge! These can strip away the seasoning you’ve worked so hard to build. Similarly, strong chemical cleaners are a no-go. They can damage the protective layer and even leave behind residues that aren’t good for cooking.
Remember, cast iron is resilient, but its seasoning is delicate. Think of it like a well-worn wooden cutting board – you wouldn’t use bleach on that, right? Gentle methods preserve the pan’s nonstick properties and longevity.
After dealing with stubborn residue, always remember to dry your pan thoroughly and apply a very thin layer of oil to maintain the seasoning. This simple step helps prevent rust and keeps your cast iron ready for its next culinary adventure.
Restoring Cast Iron From Rust and Wear
No need to panic if your trusty cast iron starts rusting or the finish looks worn out. With careful steps, you can bring even the saddest-looking skillet back to life. Cast iron is nearly indestructible, so it’s often just a matter of working through the right process based on what you’re facing.
Simple Re-Seasoning for Minor Issues
Sometimes all you’ll notice is a few dry spots, light rust, or flaking seasoning. Minor problems like these can usually be fixed pretty quickly:
- Scrub the cookware with hot, soapy water using a stiff brush (don’t worry—soap won’t hurt seasoned iron these days).
- Rinse and dry thoroughly, making sure no moisture remains.
- Rub a super-thin layer of neutral oil (like canola or grapeseed) all over, inside and out.
- Bake the pan upside-down in a 450°F oven for one hour, with a sheet of foil beneath to catch any drips. Cool fully before the next use.
Regular touch-up seasoning is the easiest way to keep rust at bay and your skillet looking sharp.
Stripping and Rebuilding Severe Damage
If your pan is covered in rust or has sticky, uneven buildup, it’ll need a bit more work. Here’s how you rebuild from scratch:
Steps to Strip Severely Rusted Cast Iron:
- Scour all rust and buildup with steel wool or a chainmail scrubber until you reach bare iron.
- Rinse and dry well (set it in a warm oven to drive out hidden moisture).
- Oil and bake as described in the re-seasoning process, repeating two or three times to build a proper protective coating.
Depending on the severity, you might need to repeat the oiling and baking steps more than once—patience wins here.
When to Use Self-Cleaning Oven Cycles
For pans in truly rough shape, self-cleaning oven cycles can help burn away all the old seasoning and rust. Not everyone likes this option, but it’s available if nothing else works.
| Option | When to Use | Precautions |
|---|---|---|
| Simple Re-Seasoning | Minor rust, dull patches | Avoid excess oil, always dry fully |
| Abrasive Scrubbing | Heavy rust or stuck-on gunk | Use gloves, ensure ventilation |
| Self-Cleaning Oven | Severe, widespread damage | Remove oven racks first, ventilate well |
If you choose the oven’s self-clean feature:
- Set the pan (without any racks, unless your manual says otherwise) in the oven.
- Run the cleaning cycle, then allow the cast iron to cool completely before handling.
- Wash, dry, and re-season as with a bare pan.
Restoring neglected cast iron might take some effort, but in most cases, it’s well worth the time. Once you bring that old pan back, it can cook beautifully for years to come—and maybe even get handed down to the next generation.
Cooking Confidently With Cast Iron
Cooking with cast iron really opens up a world of options in the kitchen. These pans can go from stovetop to oven, brown a steak just right, and even bake desserts. But using cast iron isn’t quite like other cookware. When you understand how to work with it, you can confidently tackle anything from weeknight dinners to savory brunches. The more you use your skillet, the better it will perform—so don’t be afraid to put it to work.
Preheating for a Flawless Sear
Preheating is key with cast iron. Unlike nonstick pans, cast iron heats slowly but holds onto heat very well. Here’s how to get the most out of it:
- Set your skillet on the burner and turn the heat to medium or medium-high.
- Let it heat for several minutes before adding any oil. Hold your hand a couple inches above the surface—if you feel steady heat, it’s ready.
- Add a thin layer of oil, swirl to coat, and let it shimmer before putting in food.
Preheating the pan helps avoid sticking and builds the foundation for a beautiful golden crust on meats or vegetables.
Cooking Acidic Foods: Dos and Don’ts
Cast iron’s seasoning can break down if you cook acidic foods too long. Tomato sauce, vinegar-based dishes, or anything lemony can wear away your hard-earned patina. Here’s what works and what to rethink:
- Do: Add acidic ingredients late in cooking, just to finish or glaze.
- Don’t: Simmer tomato sauce or citrus-heavy stews for hours—use enameled cast iron or stainless for long simmering.
- Do: Deglaze with a splash of wine or lemon juice briefly; quick contact won’t harm the seasoning.
This makes cast iron great for quick sauces, but not for slow, tangy braises. Over time, frequent cooking of acidic foods can leave dull spots on your pan and require touch-up seasoning.
Selecting the Right Utensils
You can use almost any utensil with well-seasoned cast iron, but here’s a breakdown:
| Utensil Type | Recommendation | Why |
|---|---|---|
| Metal spatulas | Use gently | Won’t harm seasoning, but can scratch if used forcefully |
| Wood or bamboo | Safest choice | Gentle on surface |
| Silicone | Good for nonstick tasks | Flexible, easy to clean |
| Plastic | Acceptable, but can melt | Only use at low/medium temps |
Bulky metal tools may scrape at the seasoning if you’re rough, but for most cooks, regular use of a metal spatula isn’t an issue. Just avoid sharp metal edges and stick with wood or silicone for the best results.
Keep your utensils simple. If you’re flipping eggs or burgers, a thin metal spatula works beautifully, and for stirring or scraping, a sturdy wooden spoon gets the job done without worry.
Cooking with cast iron isn’t about fussy rules—it’s about building trust with your pan. Use it often, clean it simply, and your food will reward you with great flavor and a little touch of tradition every time.
Proper Storage Techniques for Cast Iron
Storing your cast iron cookware correctly is pretty simple, but it makes a big difference in keeping it in good shape. The main thing to watch out for is moisture, because that’s what leads to rust. If you’re not keeping your skillet on the stovetop, a good spot is inside your oven. Just make sure it’s cool before you put food in it, obviously.
When you stack pans, it’s a good idea to put something between them. A paper towel or a thin cloth works well. This stops the seasoning from getting scratched or damaged. You can even buy special pan protectors if you want to be extra careful.
- Preventing Moisture and Rust: Always make sure your cast iron is completely dry before storing it. Even a little bit of dampness can start the rust process.
- Stacking Pans Safely: Use a soft barrier like a paper towel or a cloth between stacked pans to protect the seasoned surface.
- Open Storage Versus Enclosed Spaces: Storing pans in an open, dry area is generally better than in a damp cabinet. If you must store them in a cabinet, ensure good air circulation.
The goal is to keep the air moving around the pan and prevent any moisture from getting trapped. This simple step helps maintain that hard-earned seasoning.
If you find yourself needing to store pans for a longer period, giving them a quick wipe with a very thin layer of oil before storing can add an extra layer of protection against rust.
Keeping Your Seasoned Finish Looking Its Best
So, you’ve put in the work to get that beautiful, dark patina on your cast iron. That’s awesome! Now, how do you keep it looking that way, day after day? It’s not as complicated as some folks make it out to be. Think of it like maintaining a good relationship – a little consistent effort goes a long way.
Touch-Up Seasoning After Each Use
After you’ve finished cooking and cleaned your cast iron, it’s a good habit to give it a quick touch-up. Once it’s clean and dry, apply a very thin layer of cooking oil – like vegetable or canola oil – all over the surface, inside and out. Then, take a clean cloth or paper towel and wipe off as much of that oil as you possibly can. Seriously, wipe it until it looks like there’s no oil left. This tiny bit of oil, when heated gently, helps reinforce that nonstick layer. It’s like giving your pan a little moisturizer after a good scrub.
Correcting Glossy or Tacky Surfaces
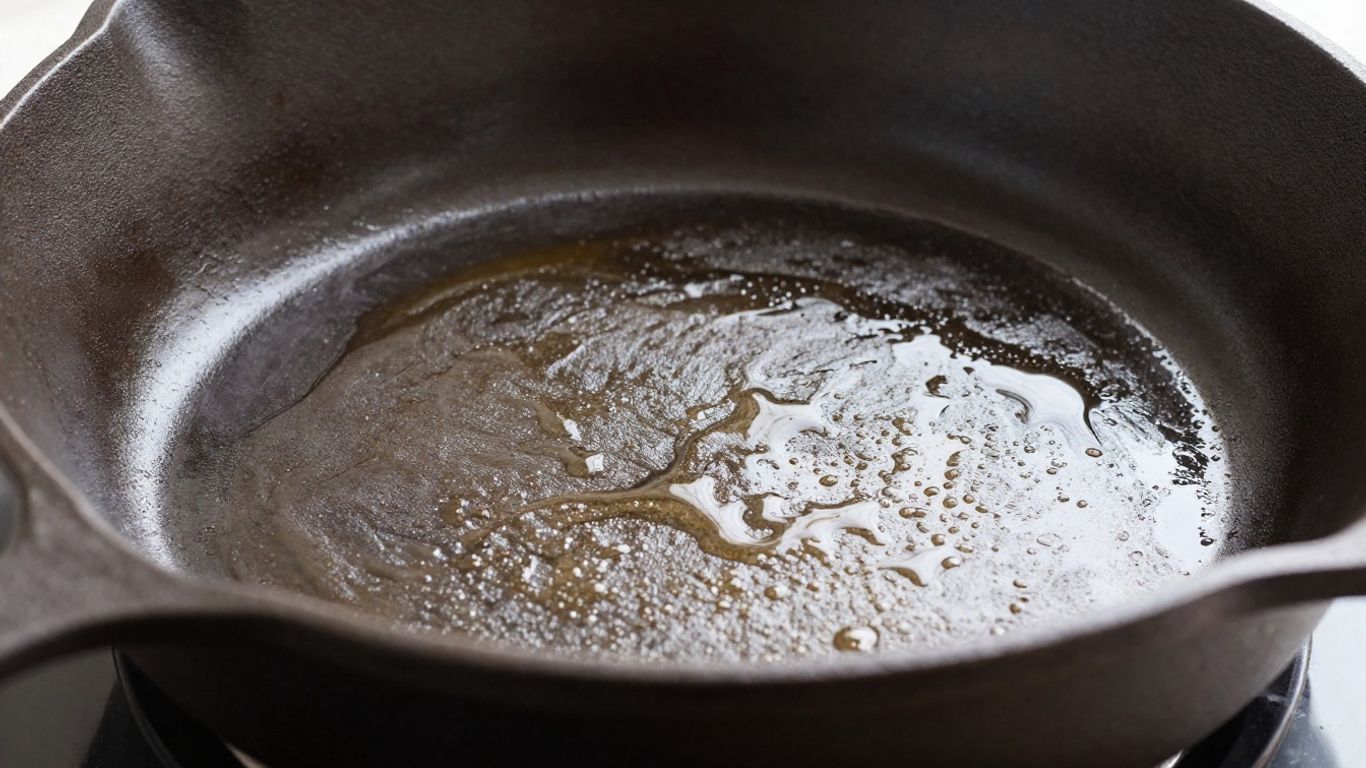
Sometimes, you might notice your pan looks a bit too shiny or feels slightly sticky after a touch-up. This usually means you’ve left a bit too much oil on the surface. Don’t panic! The fix is simple. Just place the pan back on a low heat on the stovetop or in a warm oven (around 200°F or 93°C) for about 10-15 minutes. This gentle heat helps to further polymerize that excess oil, turning it from sticky to smooth. Keep an eye on it, and once it cools, it should feel much better. If it’s still a bit tacky, repeat the gentle heating process.
Maintaining a Matte, Deep Black Patina
The goal for most cast iron enthusiasts is that deep, matte black finish. This isn’t just about looks; it’s a sign of a well-established, durable seasoning. To achieve and maintain this, focus on using your pan regularly. Each time you cook, especially with fats or oils, you’re adding another microscopic layer to the seasoning. Avoid harsh scrubbing or prolonged soaking, as these can strip away the patina you’ve worked so hard to build. If you do need to scrub a bit harder, remember to follow up with that light oil touch-up and gentle heating. Over time, with consistent use and proper care, your cast iron will develop that coveted, rich, matte black appearance that tells a story of countless delicious meals.
Choosing the Best Tools for Cast Iron Care
Having the right gear makes all the difference when it comes to keeping your cast iron in top shape. It’s not about having a million fancy gadgets, but rather a few key items that help with cleaning, seasoning, and general upkeep. Think of these as your trusty sidekicks in the kitchen.
Recommended Cleaning Brushes and Scrapers
When it comes to scrubbing, you want tools that are tough on stuck-on food but gentle on your pan’s seasoning. A stiff-bristled nylon brush is a workhorse for everyday cleaning. It can get into the nooks and crannies without scratching the surface. For those really stubborn bits, a dedicated cast iron scraper is your best friend. These are usually made of hard plastic and are shaped to fit the curves of your skillet, letting you dislodge burnt-on food without damaging that hard-earned nonstick layer. Avoid metal scouring pads or steel wool, as they can strip away the seasoning you’ve worked so hard to build.
Here’s a quick look at what to keep handy:
- Nylon Scrub Brush: Great for general cleaning and removing loose food particles.
- Plastic Pan Scrapers: Perfect for tackling burnt-on messes without scratching.
- Chainmail Scrubber: An option for tougher jobs, offering more abrasion than a brush but less risk than steel wool.
Protective Liners and Pan Separators
If you stack your cast iron cookware, you know the potential for scratches. To prevent this, pan separators or liners are a lifesaver. These are typically made of felt or soft cloth and are placed between pans when they’re stored. They create a buffer, protecting the seasoned surface from getting gouged or scraped. Some people even use folded paper towels or thin kitchen towels. It’s a simple step that helps maintain the integrity of your cookware over time.
Oils and Cloths for Seasoning
When it’s time to season, the right oil and application method are key. You don’t need anything fancy. Common cooking oils like vegetable oil, canola oil, or flaxseed oil work well. The trick is to apply it in extremely thin layers. For application and removal, lint-free cloths or paper towels are ideal. You want to wipe on a thin coat of oil, then use a clean cloth or paper towel to wipe off as much excess as possible. This ensures an even, non-tacky finish after polymerization. Too much oil will result in a sticky surface, which is the opposite of what you want.
The goal with seasoning is to build up a hard, plastic-like layer through polymerization. This happens when oil is heated past its smoke point and transforms into a protective coating. Applying oil too thickly can prevent this process from happening evenly, leading to a weak or sticky finish. It’s all about thin, even layers and thorough wiping.
Having these basic tools readily available will make the process of caring for your cast iron much more straightforward and enjoyable. It’s about working with your cookware, not against it.
Family Heirlooms and the Legacy of Cast Iron
Honoring Generational Cookware
Cast iron cookware is more than just pots and pans; it’s a tangible link to the past. Many skillets and Dutch ovens have been passed down through families for generations, carrying with them stories and memories of countless meals prepared. These pieces are not just tools, but treasures. Think about the hands that held your skillet before yours – perhaps your grandmother’s, or even further back. Each scratch and patina mark tells a story of family gatherings, holiday feasts, and everyday cooking. Embracing cast iron means becoming a steward of this culinary history, ensuring these beloved items continue to serve future generations.
Restoring Vintage Finds
Discovering an old, perhaps rusty, cast iron piece at a flea market or inheriting one can be incredibly exciting. Don’t be put off by its current condition. With a little effort, you can bring these vintage treasures back to life. The process often involves removing rust and then re-seasoning the pan from scratch. This restoration is a rewarding way to connect with the past and give a deserving piece of cookware a new purpose. It’s a chance to add another chapter to its long story.
Passing Down Care Tips and Recipes
When you pass down your cast iron cookware, don’t just hand over the pan itself. Share the knowledge that comes with it. This includes the best methods for cleaning, seasoning, and cooking. It’s also the perfect opportunity to share family recipes that are best made in cast iron.
- Cleaning: Remind them that hot water and a stiff brush are usually enough.
- Seasoning: Explain the importance of thin oil layers and proper heating.
- Cooking: Discuss how cast iron heats evenly and retains warmth.
- Storage: Advise on keeping it dry to prevent rust.
The true legacy of cast iron lies not just in its durability, but in the shared experiences and traditions it helps create and preserve across generations. It’s about the continuity of home cooking and family connection.
Cast iron cookware has a special place in many kitchens, often passed down through generations. These sturdy pans aren’t just for cooking; they’re a link to our past and a way to keep family traditions alive. Imagine the meals your grandmother made in that very same skillet! Ready to start your own cast iron story? Visit our website to find the perfect piece to begin your legacy.
Your Cast Iron Journey
So, there you have it. Cast iron might seem a little intimidating at first, but it’s really not that complicated. Think of it less like a delicate antique and more like a trusty tool that gets better with age and use. A little care goes a long way, and soon enough, you’ll be whipping up amazing meals in a pan that feels like an old friend. Don’t be afraid to experiment, learn as you go, and most importantly, enjoy the process. Your cast iron skillet is ready for a lifetime of delicious memories.
Frequently Asked Questions
What exactly is ‘seasoning’ cast iron?
Seasoning is like giving your cast iron a protective coating. It’s when you heat oil on the pan until it turns into a hard, plastic-like layer. This layer makes the pan non-stick and protects it from rust. The more you cook with your cast iron, the better this layer gets!
Can I really use soap to clean my cast iron skillet?
Yes, you can! Old advice said never to use soap because it used to have harsh chemicals that would strip the seasoning. But today’s mild dish soaps are fine. Still, many people prefer to just use hot water and a scrub brush because it’s usually enough and keeps the seasoning in top shape.
My cast iron has rust spots. What should I do?
Don’t worry, rust is usually fixable! You can scrub off the rust with steel wool or a stiff brush. After cleaning, make sure it’s completely dry, then apply a thin layer of oil and heat it up (re-season it). It’ll be good as new.
How often do I need to re-season my cast iron?
You usually don’t need to re-season it very often if you use it regularly. Just a quick touch-up with oil after cleaning and drying is often enough to keep it in good shape. You only need to do a full re-seasoning if it gets rusty or the surface looks damaged.
What kind of oil is best for seasoning?
You can use many types of cooking oils. Vegetable oil, canola oil, or even vegetable shortening work well. The key is to use a very thin layer and wipe off the excess so it doesn’t get sticky.
Is it okay to cook acidic foods like tomato sauce in cast iron?
It’s best to be careful with acidic foods. While a quick splash of lemon juice is usually fine, cooking things like tomato sauce for a long time can sometimes break down the seasoning. For long, slow-cooked acidic dishes, another type of pan might be better.
How should I store my cast iron pans?
Make sure your cast iron is completely dry before storing it to prevent rust. It’s a good idea to put a paper towel or a cloth between stacked pans to protect the seasoning from scratches. Storing them on the stovetop or in a dry cabinet works well.
Why is my cast iron pan sticky after seasoning or cooking?
A sticky surface usually means you used too much oil when seasoning or during a touch-up. When you season, you need to wipe off almost all the oil so only a super thin layer remains. If it’s sticky, you might need to scrub it gently and re-season with less oil.