
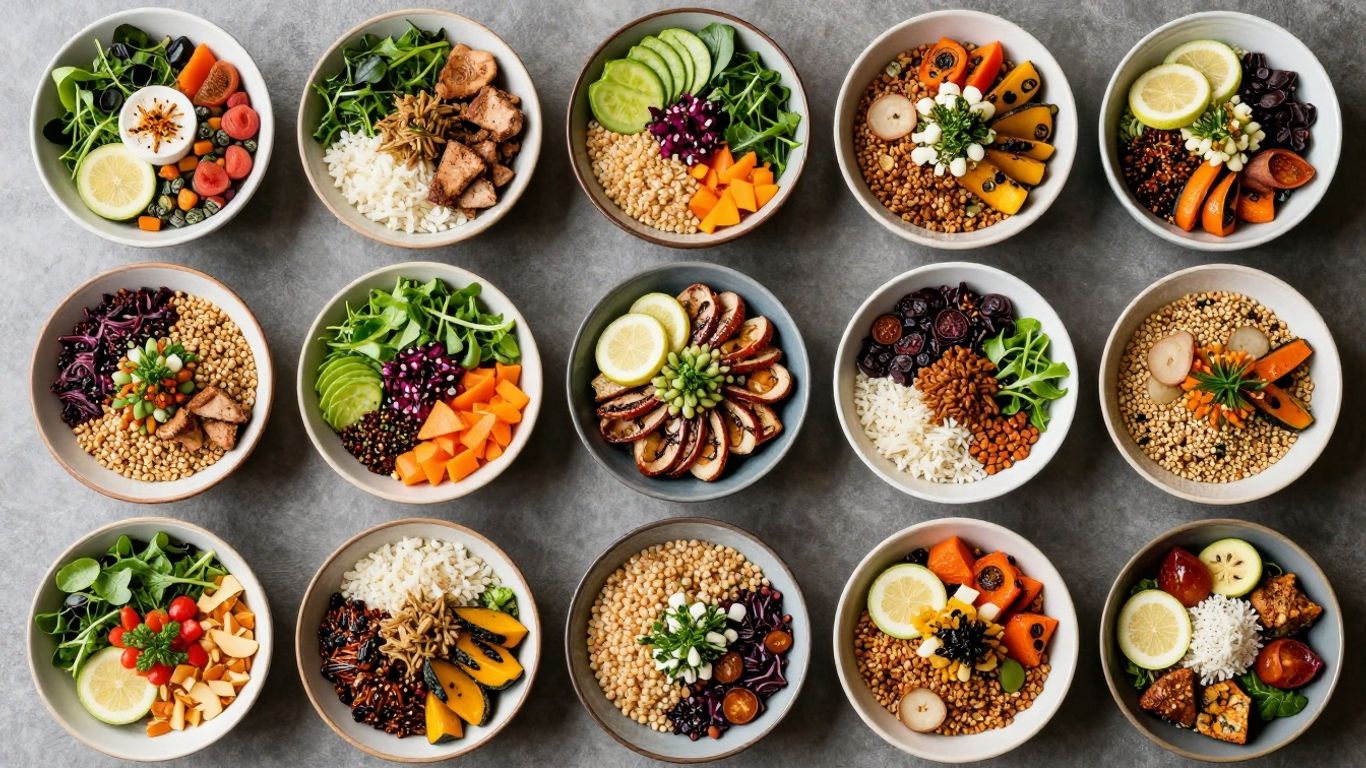
Thinking about expanding your grain bowl options? Sometimes, the most interesting projects come from unexpected places. We’re going to look at some different materials and ideas that can help you create unique grain bowl expansions, no matter the season. It’s all about finding what works and what looks good, even if it’s not the typical choice.
Key Takeaways
- White Oak, though tough, can be glued up from scraps to make decent bowls, especially when stained to show off the grain. It’s hard on tools, so carbide is often best.
- Ambroisa Maple was used for a cake plate, finished with shellac and carnauba wax for a food-safe surface. The camera didn’t quite capture the rich colors.
- Walnut offers a range of colors, from light brown to deep chocolate, and can be combined with other materials like Padauk and epoxy for interesting designs.
- Rosewood and Pear Wood are mentioned as woods to work with, alongside a note about dealing with dust and debris using a “Dust Deputy”.
- Tomatoes, cucumbers, and raspberries are all growing well with recent rain, showing how nature thrives. Bananas, surprisingly, can be engraved with a laser engraver.
1. White Oak
When you think about wood for turning bowls, white oak might not be the first thing that comes to mind. But sometimes, you just work with what you have. I had a bunch of white oak cutoffs from furniture projects – nice wood, too good to just toss or burn. The problem was, they were mostly 1-inch thick scraps in random lengths and widths. So, what do you do with them? Glue them up into bowl blanks, of course.
I took a few of these 1-inch boards, glued them together to make a 4-inch thick blank, and gave it a shot. Honestly, the results weren’t bad at all. I used a stain to really make the grain pop, then sealed it and finished with wax. It turned out to be a pretty decent little bowl. I even made a bigger one, about 11 inches across and 4 inches tall. It was a bit of a beast to handle on my midi lathe, but it came out as a nice fruit bowl with some really striking grain patterns, especially after staining.
White oak can be a bit challenging to work with, though. It’s a hard wood, so it tends to dull tools pretty quickly. If it’s really dry, it can also be prone to chipping. For this reason, I found myself using carbide tools almost exclusively. My steel gouges were getting dull in just a couple of minutes, and running back to the grinder constantly was getting old. Switching to carbide made the process smoother, but it was still a slow go. Sanding wasn’t exactly a picnic either.
It’s probably why you don’t see many commercial white oak bowl blanks around. I haven’t seen any myself.
Here’s a quick look at how it turned out:
- Material: White Oak scraps
- Process: Glued up 1" thick boards into a 4" thick blank
- Finishing: Stain, sealer, and wax top coat
- Result: Decent bowls with striking grain patterns, especially after staining.
Working with white oak might require a bit more patience and the right tools, but the unique grain and potential for striking finishes make it a worthwhile material for those willing to put in the effort.
2. Ambrosia Maple
Ambrosia maple is a bit of a unique case. It’s not a specific species of maple, but rather any maple that’s been visited by the ambrosia beetle. These little guys bore into the wood, and as they do, they bring a fungus along for the ride. This fungus creates these really cool, random streaks and splotches of discoloration, kind of like what you see in spalted wood. You’ll almost always find the tiny holes left by the beetles, too, which are part of its charm.
Working with ambrosia maple is generally pretty straightforward. It’s usually on the softer side, so it cuts easily on the lathe. The finished pieces can look pretty spectacular, with those natural markings adding a lot of character. However, because it’s softer, you do have to be a bit careful not to damage the surface. Sometimes, you might find softer, almost rotten spots within the wood, and since it’s a fungus we’re talking about, it’s always a good idea to wear a respirator and use dust collection when you’re working with it. Just a little precaution.
Here’s a quick look at what you might expect:
- Appearance: Distinctive dark streaks and splotches caused by fungal staining, often with visible beetle bore holes.
- Workability: Generally easy to cut and shape due to its softer nature.
- Cost: Prices can be a bit higher, often comparable to woods like Padauk. A typical 6" square by 3" thick blank might run around $20-$25 when green.
- Potential Issues: Susceptible to surface damage due to softness; occasional punky or rotten areas; requires dust protection due to fungal spores.
While the natural markings are a big draw, remember that the fungus responsible means you should always take precautions with dust. It’s a beautiful wood, but a little extra care goes a long way.
3. Walnut
Walnut is a wood that many woodworkers really like, and for good reason. It’s generally pretty easy to work with, whether you’re using traditional tools or the newer carbide ones. Shaping and sanding it are usually straightforward, which is a big plus.
What really stands out with walnut is its color and grain. You can get pieces that are a deep, rich brown, almost like dark chocolate. Other times, depending on how it’s cut, you might see beautiful, almost shimmery brownish-gold tones. It’s quite a range.
When it comes to finishes, walnut is pretty forgiving. You can go for a low-sheen satin look or a super high polish, and both work well. I’ve tried waxes, spray lacquers, and even just shellac, and they all turned out nicely. If the piece ever looks a bit dull, a quick buffing is usually all it takes to bring back its shine.
Walnut is a popular choice because it’s beautiful, works well, and is generally available at a reasonable price point for most projects.
It’s usually available either dried or green. For those just starting out, it’s probably best to stick with kiln-dried wood. Green wood can be trickier to handle, often requiring extra drying time and potentially leading to warping or cracking. It’s something to explore later once you’ve got the basics down.
Prices can change, of course, but a decent-sized bowl blank, maybe 6 inches square and 2 inches thick, might run you somewhere between $7 and $12 if you shop around. Thicker pieces will naturally cost more. Overall, walnut is a solid choice for many projects.
4. Cherry
Cherry wood is a pretty common sight in woodworking shops, and for good reason. It’s generally easy to find, and the price isn’t too steep, often sitting around the same cost as walnut. When you’re working with it on the lathe, it behaves well. It cuts cleanly, sands down smoothly, and you can shape it into just about anything you can imagine. It’s a reliable choice for many projects.
However, some woodturners find cherry a bit, well, plain. The color can be a bit muted, and the grain patterns aren’t always the most exciting. It’s not that there’s anything wrong with it; it’s just that it might not give you that ‘wow’ factor you’re looking for if you want something really eye-catching. It’s a bit like a comfortable old sweater – dependable, but not exactly a fashion statement.
Availability
- Widely available from commercial suppliers.
- Often sold as pre-cut bowl blanks.
- Price is comparable to walnut.
While cherry might not be the most visually dramatic wood out there, its ease of use and accessibility make it a solid option, especially for those who appreciate a more subtle aesthetic or are just starting out and want a forgiving material to practice on.
5. Pear Wood
Pear wood is one of those materials that you might not see for sale very often, but it’s definitely worth keeping an eye out for. If you happen to know someone who’s taking down a pear tree, see if you can get your hands on some of the wood. It’s known to be quite workable, cutting and sanding nicely, making the whole process pretty straightforward.
I’ve found that it finishes up well, taking on a smooth surface that’s pleasant to the touch. Some folks find the color a bit plain, and I can see that. It’s not the most striking wood out there, but its subtle tones can be appealing, especially if you’re going for a more understated look. My partner really likes it, so personal preference definitely plays a role here.
If you can get it for free, or at a low cost, it’s a great wood to experiment with. It’s a good option for smaller projects or when you want a wood that’s easy to handle without a lot of fuss.
Workability
- Cuts well
- Sands smoothly
- Easy to shape
While pear wood might not have the dramatic grain or vibrant colors of some other species, its ease of use and subtle beauty make it a rewarding material for those who can source it.
6. Rosewood
Rosewood. Just saying the name conjures up images of deep, rich colors and a luxurious feel. And honestly, it lives up to the hype. This wood is stunning, often showing off a beautiful chocolate brown base with lighter, reddish-brown streaks. Sometimes you even get wider bands of red mixed in, making each piece truly unique. It feels great to the touch, too, which is probably why woodturners, especially those making pens, really love working with it.
When you’re sanding and finishing rosewood, it really shines. It polishes up to a beautiful luster that just makes you want to run your fingers over it. Machining it is generally a smooth experience; I haven’t run into many issues with catches or tear-outs. It sands down beautifully, too.
However, it’s not all smooth sailing. Rosewood can be a bit messy to work with. The dust tends to cling to everything, including your tools and you, likely due to its oily nature. And then there’s the cost. Good quality imported rosewood isn’t cheap, often costing significantly more than common woods like walnut. Some sources mention that even kiln-dried pieces can develop hairline cracks after finishing, which is a real bummer, especially if you’re aiming for a commercial product.
While the aesthetic appeal and workability of rosewood are undeniable, potential issues like cracking and its higher price point are important considerations for any project.
Here’s a quick look at some characteristics:
- Color: Deep chocolate brown with reddish-brown streaks, sometimes with wider red bands.
- Feel: Smooth and luxurious to the touch.
- Workability: Generally machines and sands well.
- Challenges: Can be oily, dusty, expensive, and potentially prone to developing hairline cracks post-finishing.
7. Padauk
Padauk is a wood that really grabs your attention. It comes all the way from Africa, and when it’s freshly cut, it’s a sight to behold. You’ll see colors ranging from a bright red to a vibrant orange, with darker, almost black stripes running through the grain. It’s quite a dramatic look. Over time, though, these vivid colors do start to change. They gradually fade into a more muted reddish-brown, sometimes even a chocolatey hue, and can eventually turn gray. A good finish can help slow this fading process, but it’s pretty much inevitable.
Working with Padauk is generally a pleasant experience, similar to walnut. It cuts easily, though you might find yourself sharpening your tools a bit more often. Sanding is straightforward, but definitely use a dust collection system. The fine red dust gets everywhere if you’re not careful, leaving a reddish film on everything. For finishes, a simple shellac seal coat followed by buffing on carnauba wax has given me a nice high gloss.
Here’s a quick look at how Padauk compares in cost:
| Wood Type | Relative Cost (vs. Walnut) |
|---|---|
| Padauk | 2-3 times |
While Padauk is beautiful, be aware that its striking color is temporary and will change with age. This is a natural characteristic of the wood, and while finishes can help, they won’t stop the transformation entirely. It’s a trade-off for its initial visual impact.
It’s worth noting that Padauk is usually only available kiln-dried, which is standard for imported woods to prevent pests.
8. Raspberries
Raspberries are a delightful addition to any garden, offering a sweet reward for your efforts. These brambles, while sometimes a bit unruly, produce some of the most sought-after berries. The weight of a good harvest can even bend the canes, requiring support.
When the weather is just right, especially after a good rain, raspberries can really take off. You might find yourself with more berries than you know what to do with! It’s a common sight to see gardeners rigging up supports, like posts and strings, to help hold up the laden branches.
Here’s a quick look at what makes raspberry growing so rewarding:
- Flavor: Unbeatable fresh taste, perfect for snacking.
- Versatility: Great for jams, pies, or just eating straight off the bush.
- Growth: Can produce abundantly with proper care and the right conditions.
The transition from a dry spell to consistent rainfall can dramatically change a plant’s output. What was once struggling can quickly become a vibrant producer, showcasing nature’s ability to respond to its environment. This is especially true for fruiting plants like raspberries, which rely heavily on adequate moisture for fruit development.
While they can be a bit wild, the payoff is immense. Watching those little red jewels ripen is a special kind of garden magic. Just be prepared to give them a little help when they’re at their most fruitful!
9. Tomatoes
Tomatoes are a garden staple, and this year, they’re really showing off. After a good bit of rain, the plants have really taken off. You can see them tripling in size, and they’re already covered in blossoms. Some of those blossoms have even turned into tiny, developing tomatoes. It’s pretty amazing to watch them grow so quickly.
The warm, damp weather has really jump-started the tomatoes, making them look beautiful this year.
Here’s a quick look at what’s happening with the tomato plants:
- Growth Spurt: Plants have tripled in size.
- Flowering: Abundant blossoms are appearing.
- Fruit Development: Young tomatoes are already forming.
It’s a good reminder of how much plants can thrive with the right conditions. Seeing these tomatoes develop is always a rewarding part of gardening.
10. Cucumbers

Cucumbers are a garden staple, and for good reason. They grow pretty fast, especially when the weather is warm and damp. You can almost see the vines getting longer day by day, and soon enough, you’ll spot those little baby cucumbers starting to form. It’s pretty neat to watch.
Growing cucumbers is a rewarding experience for any gardener. They don’t ask for much, just a bit of sun and water, and they give back with fresh, crisp produce. Whether you’re planning to slice them into salads, pickle them, or just enjoy them straight from the vine, having a steady supply is fantastic.
Here are a few things to keep in mind when growing cucumbers:
- Variety Selection: There are many types of cucumbers, from slicing varieties to pickling ones. Choose what best fits your needs.
- Support: Most cucumber plants benefit from a trellis or support system. This keeps the fruit off the ground, reduces disease, and makes harvesting easier.
- Watering: Consistent watering is key. Cucumbers need about an inch of water per week, more during hot spells. Try to water the base of the plant to keep the leaves dry.
- Pest and Disease Management: Keep an eye out for common pests like cucumber beetles and squash bugs. Good air circulation and proper watering can help prevent diseases.
The rapid growth of cucumbers, especially after a good rain, is a vivid reminder of nature’s productivity. It’s a simple pleasure to witness these plants thrive and produce such a versatile vegetable.
11. Lilies
Lilies are such a sight to behold, aren’t they? This year, the colors have been absolutely breathtaking. It’s amazing how a bit of rain can really make things pop. We’ve had a good amount of rain lately, and it seems like everything in the garden is just thriving. The lilies, in particular, have really turned it around, looking so lush and vibrant.
It’s not just the visual appeal, though. There’s a certain elegance to lilies that just brightens up any space. They come in so many different varieties, each with its own unique charm and bloom time.
- Stargazer Lilies: Known for their vibrant pink and white petals and strong fragrance.
- Asiatic Lilies: Offer a wide range of colors and are generally unscented.
- Oriental Lilies: Famous for their large, showy flowers and sweet, potent scent.
- Calla Lilies: Though technically not true lilies, their elegant, trumpet-shaped blooms are iconic.
Working with natural elements like lilies in a design or even just appreciating them in a garden setting can be incredibly rewarding. They remind us of the simple beauty that surrounds us and the cycles of nature.
While they might not be a food item like some of the other things we’ve talked about, their presence adds a different kind of richness. They’re a reminder that expansion and variety aren’t just about what we consume, but also about what we experience and appreciate visually.
12. Violets
Violets, those small, often overlooked blooms, bring a surprising splash of color and a delicate charm to any setting. While not typically thought of as a "grain" in the same way as wood, their presence in a garden or as a decorative element can be just as impactful. They thrive in cooler weather, often appearing in early spring, and their vibrant hues can really brighten things up after a long winter.
Their subtle beauty adds a touch of natural elegance.
When considering violets, think about their variety. There are many types, each with its own shade and growth habit. Some are ground covers, spreading gently, while others stand a bit taller. They prefer shady spots and moist soil, making them a good choice for under trees or in areas that don’t get direct sun all day.
Care Tips for Violets:
- Plant in well-draining soil, preferably with some organic matter.
- Provide partial shade; they don’t like intense, direct sunlight.
- Keep the soil consistently moist, but not waterlogged.
- Deadhead spent blooms to encourage more flowering.
While they might not be the star of a grand floral display, violets offer a quiet beauty that complements other plants and adds depth to garden designs. Their resilience and ability to bloom in less-than-ideal conditions make them a rewarding choice for many gardeners.
13. Bananas
Bananas. You might not think of them when you think about wood or even some of the other items on this list, but they have a place. It turns out, you can actually engrave a banana. It sounds a bit wild, right? I saw this mentioned and had to look into it. Apparently, with the right tools, like a small laser engraver, you can etch designs onto the peel of a banana. It’s not something you’d do every day, but it’s a fun little trick if you’re experimenting with a laser engraver and want to try something different.
It’s a good reminder that sometimes the most unexpected materials can be used for creative projects. You just need the right approach. Think about it – you could personalize a banana for a party or just for a laugh. It’s a temporary kind of art, for sure, but that can be part of the charm.
While it might seem like a novelty, the ability to engrave something as delicate as a banana peel shows the precision and versatility that modern tools can offer. It’s a testament to how far technology has come, allowing for detailed work on surfaces we wouldn’t typically consider.
So, if you happen to have a laser engraver lying around and a bunch of bananas, why not give it a go? Just remember, these machines aren’t toys, so always follow safety guidelines. It’s a quirky application, but it definitely adds an interesting dimension to what you can do with a simple piece of fruit.
14. Squash
Squash, a versatile member of the gourd family, offers a bounty of options for year-round enjoyment. Whether you’re growing them in your garden or picking them up at the market, squash brings a unique texture and flavor to the table. From the smooth, tender flesh of summer varieties to the dense, sweet interior of winter squash, there’s a type for every culinary need.
The rapid growth of squash vines is truly a sight to behold, especially after a good rain. These plants can go from small seedlings to sprawling producers in a surprisingly short amount of time. Their leaves unfurl, and soon, small fruits begin to form, promising a harvest that can be both abundant and delicious.
Here are a few common types you might encounter:
- Summer Squash: Think zucchini, yellow squash, and pattypan. These have thin skins and are best enjoyed when cooked quickly.
- Winter Squash: Acorn, butternut, and pumpkin fall into this category. They boast thicker skins and store well, offering a sweet, hearty flavor perfect for roasting or soups.
- Gourds: While often ornamental, some gourds are edible and can be used in various dishes.
When preparing squash, remember that the seeds and flesh can vary greatly in texture and flavor. Don’t be afraid to experiment with different cooking methods to discover your favorite way to enjoy them. Roasting, steaming, and pureeing are just a few ways to bring out their natural sweetness.
15. Cake Plate
You know, sometimes the most unexpected items can inspire a whole project. That’s how I feel about this cake plate. It wasn’t a grand plan, just a piece that needed finishing. It’s made from ambrosia maple, which has this really nice, subtle figuring. I finished it with shellac and carnauba wax, making sure it’s safe for food. It stands about 5 inches tall and the top plate is roughly 11 inches across.
The real beauty of this piece is how it came together almost by accident. It’s a good reminder that creativity doesn’t always follow a straight line. Sometimes, you just have to work with what you have and see where it leads.
The colors in photos never quite capture the richness of the actual wood. It’s something you really have to see in person to appreciate the depth and character.
It’s funny how a simple object like a cake plate can become a focal point. It’s not about being fancy, but about the care put into its creation and the story it tells. This one definitely has a story, even if it’s a quiet one.
Thinking about a cake plate? It’s more than just a stand; it’s the centerpiece for your sweet creations! Imagine your favorite dessert, beautifully displayed. Ready to find the perfect one to make your treats shine? Visit our website today to explore our amazing collection and pick out the one that’s just right for you!
Wrapping Up Our Grain Bowl Journey
So, we’ve looked at a bunch of different ways to approach making grain bowls, from using up scrap wood to trying out new tools and techniques. It’s pretty clear there’s a whole lot of creativity out there, and it’s not just about the fancy stuff. Sometimes, the most interesting projects come from what you already have or from figuring out a problem in a new way. Whether you’re a seasoned woodworker or just curious, there’s always something new to learn and try. Don’t be afraid to experiment, use what you’ve got, and see where your own ideas take you. The world of wood turning is vast, and there’s plenty of room for everyone to make something beautiful.
Frequently Asked Questions
Can I use scrap wood for wood turning projects?
Absolutely! Even leftover pieces of wood from other projects, like white oak cutoffs, can be glued together to create bowl blanks. It might take a little extra work, but you can end up with unique and beautiful pieces, like a fruit bowl with striking grain patterns.
What’s the deal with Zinsser Shellac?
Zinsser Shellac sometimes has codes on the can that tell you when it was made. Some cans might be quite old, over 5 years! It’s actually pretty easy and not too expensive to make your own shellac, which is a good alternative.
How do I make a cake plate that’s safe for food?
To make a food-safe cake plate, you can use woods like ambrosia maple. Finishing it with shellac and carnauba wax creates a surface that’s safe for serving food. The colors of the wood might look richer in person than in photos.
What are some tips for working with different types of wood?
When you’re wood turning, you don’t always need super strong wood like you do for furniture. For decorative bowls, appearance is key. Woods that might have ‘flaws’ for furniture can actually look really cool and artistic in turned pieces. It’s all about the look you want!
Why is it hard to hollow out certain wood shapes?
Hollowing out shapes like ‘hollow form vessels’ can be tricky. Trying to reach inside without making the opening bigger or hurting yourself is tough, even with special tools. Some tools and methods you see online might look easy, but they can be difficult and even dangerous to use.
What’s the best way to finish wood for furniture?
For furniture, you want a finish that lets the natural beauty of the wood show through. Using cabinet scrapers instead of sandpaper can give a great look, and finishes that feel like wood, not plastic, are often preferred. Aim for ‘good enough’ rather than overdoing it.
Can I dry wood using a microwave?
Yes, you can dry wood using a microwave, but you need to be very careful. It can cause cracking, especially on the ends, and might discolor the wood. While it works, it’s not super fast and requires patience and careful monitoring to avoid problems.
What’s the difference between wood for furniture and wood for turning?
Furniture making needs wood that’s strong and won’t break under stress. For wood turning, especially decorative bowls, the main focus is on how the wood looks. You can use woods with interesting grain or color variations that might not be suitable for structural furniture pieces.